

A voucher that can be torn off cleanly seems higher quality to customers than one you have to yank on. For that to work, the perforation has to be right from the start. That is exactly what this tutorial is about. You will learn the layout requirements that apply to perforations, set up the perforation in Adobe InDesign using a spot color, and find out how you can manage entirely without a special color using the viaprinto perforation editor. The tutorial is based on a video training by graphic designer Stefan Riedel. The video is sponsored and refers to the print shop viaprinto.
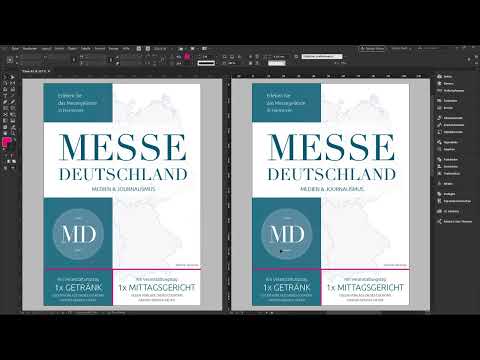
The video is only loaded from YouTube when you play it – data (including your IP address) is then transmitted to YouTube/Google. More in the privacy policy
Key Takeaways
- A perforation must run as a continuous line from one edge to the opposite edge or to a line running at a right angle.
- Lines may only run horizontally or vertically. For folded flyers, only the vertical direction is allowed.
- You need a distance of 10 mm to parallel lines and edges, and for folded flyers even 60 mm to parallel lines.
- The line weight must be between one and three points. Graphic effects such as transparencies or drop shadows are taboo.
- In InDesign, you mark the perforation with a spot color named "Perforation" at 100% tint.
- The viaprinto perforation editor checks the rules automatically and doesn't let you order an unusable configuration.
Step-by-Step Guide
Getting to Know the Layout Requirements
Before you open the program, you should know what is allowed with a perforation and what is not. Stefan names seven ground rules that you should keep in mind while designing. It's best to have the perforation data sheet from viaprinto ready, which is available for download on the website. It serves as a roadmap through all the requirements.

Rules 1 to 3: Continuous, Straight, and Properly Connected
The first rule is that a perforation must always form a continuous line. It must therefore completely cut through the entire paper, otherwise it is unusable. The second rule concerns direction: lines may only run vertically or horizontally. With a folded flyer, only the vertical direction works, because a horizontal line would cross the fold. Diagonal lines are excluded in any case.


The third rule requires that every line begins at an edge and ends at the opposite edge or at an orthogonal line. A line that ends in nowhere doesn't work. If, on the other hand, it meets a continuous line at a right angle, that is permissible.

Rules 4 to 7: Distances and Line Weight
Rule four states that there must be no line parallel to a non-continuous line. If a perforation lies directly next to a short line that doesn't reach the edge, an unclean cut results, and that is exactly what should be avoided.

Rule five sets the distance between two lines. It is 10 mm, and for folded flyers even 60 mm. Two perforation lines therefore must not lie directly next to each other.

The sixth rule concerns the distance to edges. Here, too, you need at least 10 mm so that the perforation is not too close to the bleed. A safety margin ensures that the perforation stays clean even with slight shifts in printing or cutting.
Finally, rule seven concerns the line weight. It must be at least one point and may be a maximum of three points. Four points is already too thick, and below one point the line is too thin.

Understanding Possible Combinations
These rules result in a few permissible patterns. A single line across the paper works, as does a cross or two parallel lines with sufficient distance. An orthogonally placed line that starts at an edge and ends at a continuous line is also allowed. With these patterns in mind, designing becomes much easier.

Creating a Swatch for the Perforation
Now we continue in InDesign. Open the Swatches panel, click on the menu, and choose a new swatch. In the dialog, first remove the checkmark next to "Name with Color Value" and assign a custom name. It must be exactly "Perforation". The spelling is important, because the print shop reads the name automatically. A typo means that the perforation will not be recognized.


As the color type, you choose a spot color, not a process color. You set the tint to 100%. In the example, Stefan sets the black slider to zero and the magenta slider to 100%. The color itself is secondary here; what matters is the name and the spot color with 100% tint.
Drawing the Perforation Lines
Now you place the lines. Select the Line tool and set the stroke weight to two or three points. Hold down the Shift key while dragging so that the line stays perfectly straight and doesn't wobble. Draw the line from bleed to bleed so that it cuts completely through the paper. Then assign the spot color "Perforation" to the line. You draw the second line in the same way, assigning the same color.

Be sure to avoid effects. Gradients, drop shadows, and transparencies must not be used. So don't set the opacity to 50%, but leave it at 100%.

Checking the Back Side
A frequently overlooked point is the back side. If you activate the bird's-eye view with the key combination Ctrl and zero, you will see a clean front side. But whether something is in the way on the back side can only be seen in the double view. To do this, click on the small icon at the bottom of the document window. You get a split screen with both sides, and now you can check whether the separated area on the back side stays free.

Exporting the File and Checking It at viaprinto
Then export the document as a print-ready PDF. After that, you can upload the file in the upload area of viaprinto. To do so, select the desired product, such as the DIN A5 flyer in portrait format, and drag the PDF into the field via drag and drop. The markings become directly visible in the preview. If you then select the desired perforation in the configurator, the system automatically recognizes the lines, both on the front side and on the back side.


Using the Perforation Editor
If you don't feel like creating the perforation manually in InDesign, you can use viaprinto's perforation editor directly. You need neither a special color nor a prepared file with markings. Select a perforation in the configurator, and a third tab with the settings opens.

In full-screen mode, you drag the handles, i.e. the draggers, to the desired position. The safety margin of 10 mm is marked in color. As soon as you grab a dragger, the editor hides the areas that are not relevant for the line. You can either enter the position as a millimeter value or drag it freely. An option also lets you specify whether the print image is displayed semi-transparent while dragging. In addition, you can decide whether the restricted areas at the edges should be displayed.

With a click at the bottom right edge, you flip the document over and see the perforation mirrored on the back side. This way you keep an overview of both sides.

Avoiding Invalid Settings
If you change the parameters or switch the product, the editor displays a notice that the perforation lines have changed and should be checked. The product then cannot be added to the shopping cart until you have checked the position. For a wrap-fold flyer, for example, there is no option for horizontal lines, and the restricted area of 60 mm is automatically taken into account. So you won't run into a dead end, but will always end up with a printable solution.


Summary ??? Setting Up Perforation Correctly: Step by Step in InDesign and in the Perforation Editor
Good perforation starts with understanding the layout requirements. Continuous, straight lines with sufficient distance from edges and other lines are the foundation. In InDesign, you mark the lines using a spot color named "Perforation" with 100% tint, without using any effects. If you would rather hand off the work, the viaprinto Perforation Editor takes care of the check for you and prevents errors before you even order. This way you get a flyer whose vouchers can be detached effortlessly.
FAQ
How many rules are there for a perforation?There are seven rules concerning line routing, distances, and line weight.
Do I absolutely have to use a spot color in InDesign?Yes, if you set up the perforation yourself, you need a spot color named "Perforation" with 100% tint. With the viaprinto Perforation Editor, this is not necessary.
What minimum distance do I need from edges?A distance of at least 10 mm from parallel edges is required.
How large is the distance between two parallel perforation lines?For standard products it is at least 10 mm. For fold flyers it is 60 mm.
May I apply transparencies or drop shadows to the perforation line?No, graphic effects such as gradients, drop shadows, and transparencies are not allowed. The line must be created with 100% opacity.
Why should I check the back of my flyer?After detaching, nothing on the back may be in the way. The dual view in InDesign shows you whether the area remains clear.
What happens if the perforation name is misspelled?The print shop reads the color name automatically. If it is misspelled, the perforation will not be recognized.
Can I make mistakes in the Perforation Editor?No, the editor takes all plausibility rules into account. Invalid settings are prevented before the product can be added to the shopping cart.

