

A business card looks good on screen, but it can still fail in offset printing. Then the bleed is missing, the colors are wrong, or spelling mistakes are already on the paper. This guide shows you how to create a PDF in InDesign that a print shop can process without any follow-up questions. You will learn the most important settings in the export dialog, get the right color profile, and check the text with the spell checker before you hand in the file.
The video is only loaded from YouTube when you play it – data (including your IP address) is then transmitted to YouTube/Google. More in the privacy policy
Key Takeaways
Key Takeaways
- A print-ready PDF is created via the Adobe PDF (Print) export and not via the web export.
- PDF/X-1a:2003 is the common standard for offset printing; your print shop determines the compatibility.
- The bleed is taken over via the document's bleed settings.
- You download the color profile ISO Coated v2 300% (ECI) from the website of the European Color Initiative and place it in the system folder for color profiles.
- You will find the spell checker before the export, and it reliably detects transposed letters and typos.
Open the export dialog and name the PDF
Open your finished business card design and call up the export dialog via the File menu. You already know the process from the previous lessons, only this time you choose a different target.

In the Format field, select the option Adobe PDF (Print). Give your file a unique name, for example "Visitenkarte_Druck.pdf". This way you won't confuse the print file with the web version later.
Set the standard and the compatibility
At the top of the dialog you set the PDF standard. Choose PDF/X-1a:2003, because this standard contains no transparencies and no color modes that cause problems in offset printing. You set the compatibility to Acrobat 4 (PDF 1.3). Your print shop can tell you the exact specifications; if in doubt, ask them.

Select pages and spreads
In the next section you specify which pages are exported. A business card with a front and back consists of two pages that belong together as spreads. Therefore, activate the Spreads option and select all spreads. Then you end up with a PDF with one front side and one back side.
If you have set up the document so that the pages are not separated in the middle, you can alternatively choose Pages. For a classic double page with front and back, however, the Spreads option remains the safe way.
Set view, layers, and compression
The options under View, such as Optimize for Fast Web View or Create PDF with Text, are not relevant for printing. You can therefore ignore them. You turn off interactive elements such as hyperlinks, since they play no role in print.

Under Layers, you choose Export Visible and Printable Layers. This automatically excludes auxiliary layers that should not be printed. This protects you from unwanted elements on the paper.
In the Compression section, you set the image resolution to 300 ppi and define 450 ppi as the threshold. Images with more than 450 ppi are thereby reduced to 300 ppi. This is sufficient for offset printing and keeps the file manageable.
Set bleed and marks
In the Marks and Bleed section, you specify how the bleed is carried over into the PDF. If your design extends elements to the edge, the bleed must be included. Therefore, do not use manual values and choose the document's bleed settings. Then InDesign takes the 3 mm bleed allowance from your document and carries it over correctly.
Set the output profile
In the Output section you will find the color conversion. Choose Convert to Destination and keep the values preserved. Most print shops use ISO Coated v2 300% (ECI) as the target profile. This profile is not included in InDesign by default, so you must download it first.
Download the ICC profile
Open the website of the European Color Initiative (eci.org) and switch to the Downloads section. There you will find the color profiles in the ECI Offset 2009 package. The package contains the standard profile and variants with a slight yellow tint. For most print shops you need the profile ISO Coated v2 300%. Download the package and then unzip it.


After unpacking, pay attention to the file extension .icc. In the next step, you need to move these files to the correct folder.

Placing the Profile in the System Folder
For InDesign to find the profile in the export dialog, it must be located in your operating system's color profile directory. The path differs depending on the system. On Windows, it is C:\Windows\System32\spool\drivers\color. On a Mac, the folder is located elsewhere. The best thing to do is to enter ICC in your system's search, and you will quickly find the right path.

Copy the downloaded profiles into this folder. After restarting InDesign, they will be available for selection in the export dialog.
Checking the Advanced Settings
Next, go through the remaining tabs in the export dialog. In the Advanced tab, you will find options such as transparency flattening, high resolution, and fonts. Set the fonts to 100 percent so that all fonts are fully embedded. For transparency flattening and output, you can keep the presets if they suit your document.
Exporting and Checking the Result
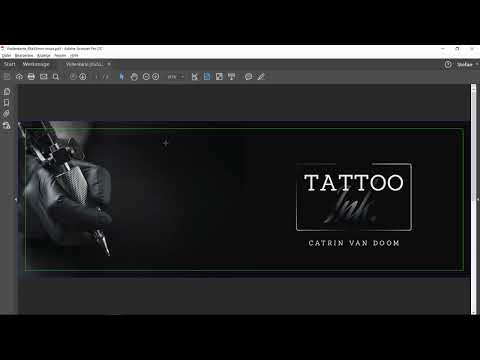
Click Export to create the PDF. Then open the file in Acrobat or another PDF viewer. You will see the lines for the bleed: the blue area shows the bleed allowance, the green frame the final format. On the second page, you will find the same layout.

A look at the file properties shows you the size. In this example, it is around 1.55 MB, so significantly more than the web version, but in return the file is print-ready and reproducible.

Save the export settings as a preset, for example under the name "Data export print shop XY". Then you won't have to set everything individually again for the next job.
Coordinating with the Print Shop
If you are placing a print order for the first time, talk to the print shop beforehand. Ask which standards and profiles they want. Most print shops are happy to help, because they want to receive clean data.

Using the Spell Checker
Before you hand over the file, it is worth taking a look at the spell checker. You will find it in the Edit menu. It highlights words that are not in the dictionary and suggests corrections. It often does not recognize names like "Doom", so you can skip them. For typos like "geht's" and abbreviations like "Mo." or "Di.", you have to decide whether to accept the correction. For typing errors, you choose the appropriate correction and click Change. It is best to let the text run through completely once before you hand over the file.


Summary ??? Exporting a Business Card as a Print-Ready PDF
With the Adobe PDF print export, the PDF/X-1a:2003 standard, the spreads, and the bleed settings, you create a file that works reliably in offset printing. You can download the ICC profile ISO Coated v2 300% (ECI) for free and place it in the system folder. The spell checker helps you discover errors before they are printed. For the details, follow your print shop's specifications.
FAQ
Do I really need the PDF/X-1a PDF standard?Yes, for offset printing it is the common standard because it excludes transparencies and problematic color modes.
Why is my PDF file so large?Print files contain more information, such as embedded fonts, bleed, and high image resolutions, so they are larger than web files.
Do I have to install the ISO Coated v2 300% color profile?Yes, the profile must be located in the system folder for color profiles so that InDesign offers it in the export dialog.
What do I do if the profile does not appear in the export dialog?Check whether you copied the files to the right location, and then restart InDesign.
Can I save the export settings?Yes, save them as a preset so that you can reuse them for every further job with the same print shop.
Does the spell checker detect all errors?No, proper names and abbreviations are often flagged as errors, so you have to check the suggestions yourself.
Should I talk to the print shop before sending?Yes, especially for the first job, because the print shop will tell you the exact specifications for standard, compatibility, and profile.

