

A miniature desk calendar looks unassuming, but it stays on the desk all year long and shows your company logo anew every day. That is exactly why the Mini Desk Calendar is well suited as a promotional item in the B2B sector. In this tutorial, you will learn how to download a ready-made template, build a double-sided layout in Adobe InDesign, and finally export a print-ready PDF.
The video is only loaded from YouTube when you play it – data (including your IP address) is then transmitted to YouTube/Google. More in the privacy policy
Key Takeaways
- Download the InDesign template directly from viaprinto. It already contains the final format, bleed, and header and footer areas as guides.
- Place the logo in the header area of the front side, because it is most visible there.
- Work with layers: The information layer is locked, and you work on the design layer.
- Pay attention to the 3 mm overlap into the calendar block and to the resolution of your images.
- Use the CMYK mode for colors and export with the PDF/X-1a standard.
- Check the data check in the viaprinto configurator before ordering.
Step 1: Download the Right Template
The first step takes you to the viaprinto website. On the home page, you will find the calendar icon on the right. Click on the Mini Desk Calendar there and scroll to the "Data Sheet and File Template" section. Select the template for InDesign there, and the download starts automatically. So you don't have to start from scratch, but can get started with the design right away.

Step 2: Understand the Structure of the Template
Open the downloaded file in InDesign and first take a look at the Pages panel. The template consists of two pages: the front with the calendar block and the fully printable back. Zoom into the template, and you will see details about the final format, the header section, and the footer bar. The header section is best suited for your logo, while in the footer bar you place your slogan or contact details. The calendar block remains unprinted, since it will be glued on later.

Step 3: Work Correctly with Layers
In the Layers panel, you will find two layers. The information layer contains all the notes of the template and is locked, so that you don't accidentally move anything. The design layer is the area where you work. If you can't place any fonts or images later on, first check whether the right layer is active.

Step 4: Place the Background Image in the Header Area
Select the Rectangle tool and drag out a frame from the top left corner. The frame should extend to the bleed guide and additionally protrude about 3 mm into the calendar block. This way, a minimal offset when gluing later will not be noticeable. For the example, you use the dimensions 101 x 54 mm. Then you place your image with Ctrl + D (Mac: Cmd + D). Choose the image that fits your business model, such as a characteristic motif that symbolizes your activity. You can find free photos with commercial use on unsplash.com, for example. With a right-click and "Fitting," then "Fill Frame Proportionally," you adapt the image to the frame.

Step 5: Check Image Resolution and Lock the Image
Before you continue working, check the resolution of the image in the Links panel. The original resolution is displayed there, which in the example is 72 ppi. As a guideline for printing, 300 ppi applies. The instructor rates the file in the example as sufficient, so you should pay close attention to the values for your own image. Once the image fits, you lock it with a right-click or Ctrl + L. After that, you can no longer move it by accident.

Step 6: Set the Logo and Corporate Color in the Header Section
Draw a square of 35 x 35 mm and place it in the center of the header area. Use the magenta guides for this. Then you create your company color via the Swatches panel. In the example, the CMYK value C87, M18, Y15, K69 was used. Make sure that the document works in CMYK mode, since this is the print-ready color space. Place the square with the corporate color in the center and copy your logo onto this area.

Step 7: Creating the Tile Effect
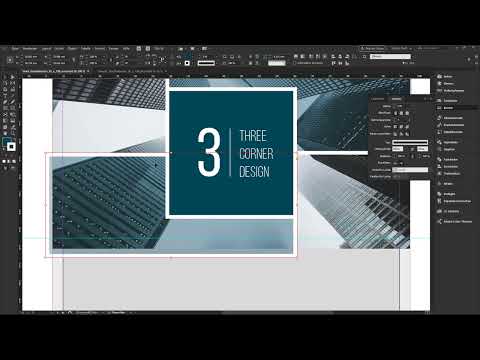
The tile effect gives the design its characteristic look. To do this, draw a rectangle within the square, fill it with the brand color, and give it a white stroke of 3 points. In the Stroke panel, set the stroke to "Align Stroke to Outside" so that it does not shrink inward. Move the rectangle exactly to the edge of the square so that no gaps appear. Then arrange the rectangle behind the square in the Layers panel.

Step 8: Adjusting the Opacity of the Fill
If you change the opacity using the slider at the top, the white stroke also becomes transparent. You want to avoid that. Therefore, open the Effects panel, which you can find under "Window". There you can set the opacity of individual components. Set the stroke to 100% and the fill to 30%. This way the brand color appears subtle over the image. If the color strip extends beyond the bleed, position the stroke again to "Align Stroke to Outside". That solves the problem.

Step 9: Designing the Footer Bar and Claim
In the lower area, draw a rectangle in your company color. Place a text box on it with a short claim, such as "Architecture that inspires". Choose your brand font as the typeface and white as the color. Additionally, copy the text box while holding down the Alt and Shift keys to create a second line with the web address. Space is limited, so the web address and slogan are enough. Phone numbers or addresses do not belong in this small area. The font size should not be below 12 points.

Step 10: Soft Gradient Feather for More Depth
If you want to give the footer bar rectangle more impact, you can add a gradient feather. Select the shape, open the Effects panel, and activate the gradient feather. In the example, a radial gradient works better than a linear one. Set the opacity of the fill to 100% and the opacity of the gradient color to about 85%. The edges then remain fully opaque, while the center appears gently more transparent.

Step 11: Designing the Back Side as a Split Screen
On the back side, the principle "less is more" applies. Create a guide at 47.5 mm and divide the page into a kind of split screen. On the left, place an architecture photo, on the right a text in blue and white. Place the image with Ctrl + D, adjust it with "Fill Frame Proportionally", and double-click to select the image content in order to set the right crop with the arrow keys. Confirm with W. Add a very light drop shadow beneath the rectangle on the right side with a distance of 1.5 mm, a size of 1 mm, and an opacity of about 42%.

Step 12: Inserting a Triangle with the Polygon Tool
For an additional design idea, use the Polygon tool with the number of sides set to three. Make the triangle white and place it exactly on the guide in the middle. Then select the triangle and the background while holding down the Shift key, open the Pathfinder via "Window", and click "Subtract". Afterwards, enlarge the image frame so that the image shines through the cut-out corner. Finally, place a rectangle in the company color with 30% opacity over the image and under the polygon.

Step 13: Exporting the PDF
Go to "File" and "Export" and choose PDF/X-1a:2003 as the format. For compression of color images, set 300 and 450. For marks and bleed, use the document's bleed settings. For output, choose "Convert to Destination" and the color profile ISO Coated v2 300% (ECI). The preview then shows you whether everything is correct.

Step 14: Checking the Information Layer Before Export
The information layer should not be included in the output. Check this by double-clicking the layer to open it and verifying that "Print Layer" is deactivated. To be safe, you can also delete the layer completely. Then open the PDF preview and check the front and back once more. You will upload this file to viaprinto later.

Step 15: Check the Design in the 3D Generator
Upload your PDF in the viaprinto configurator. There you will find the 3D generator, which shows you the calendar from all perspectives. This way you can see how the logo, colors, and text look on the finished product. If you are working on a client commission, you can save the project under "My Projects" and share it via a link for viewing. The client will then see the preview directly in the browser.

Step 16: Complete the Order
In the configurator, you select the print run and data check. The professional data check costs a small additional fee, but it checks all the data completely. You can also choose climate-neutral printing with CO2 offsetting. Add the file to the shopping cart, enter an order reference if needed, and confirm the privacy policy. Then you can complete the purchase.

Summary ??? Designing the Mini Desk Calendar in InDesign: Guide to a Print-Ready PDF
You have learned how to download the template from viaprinto and set it up in InDesign. You now know where the logo works best, how to build the tile effect, and why bleed, overhang, and resolution are important. You also know the settings for the PDF export and the order process via the viaprinto configurator. With this knowledge, you can design the Mini Desk Calendar for your own company or for your clients.
FAQ
Where do I find the InDesign template for the Mini Desk Calendar?You can find it on the viaprinto website. On the homepage, select the calendar icon, then the Mini Desk Calendar, and in the "Data sheet and file template" section, the InDesign template.
How large should the logo on the desk calendar be?In the example, the logo is placed on a 35 x 35 mm square in the header area. It should be centered and clearly visible.
Why does the image have to extend into the calendar block?When the calendar block is glued on, it may be attached half a millimeter lower. An overhang of 3 mm prevents unprinted edges from becoming visible.
What resolution does an image need for printing?As a guideline, 300 ppi applies. You check the resolution in the Links panel in InDesign.
Which color profile should I use for the PDF export?In the example, the profile ISO Coated v2 300 % (ECI) with the format PDF/X-1a:2003 is used.
Why should I adjust the opacity in the Effects panel instead of using the slider at the top?The slider at the top changes the opacity of the entire object, including the stroke. In the Effects panel, on the other hand, you can darken only the fill, while the stroke remains fully visible.
Do I have to delete the information layer before exporting?The layer is not printed in the export if "Print Layer" is deactivated. To be safe, however, you can delete it.
What does the 3D generator at viaprinto show?It displays your desk calendar live from all perspectives. This way you can check the front and back before ordering.
What does the data check do when ordering?The data check examines your file for problems. The professional data check costs an additional fee, but it checks the data completely.

