

At first glance, a door hanger seems like a small thing, until you realize how much design goes into 100 x 240 mm. This guide takes you through the entire workflow: from the print template through colors, fonts, and images to the print-ready PDF. Along the way, you will also learn how to check the result realistically before printing. The guide builds on the restaurant design from the first part, but you can also follow the steps with your own colors and fonts.
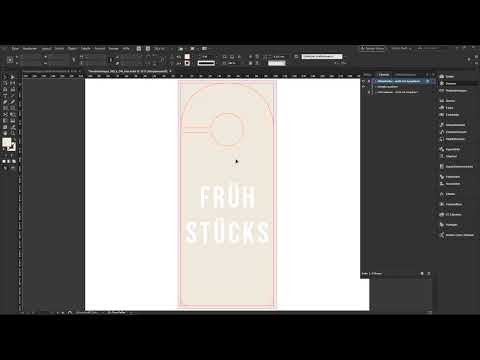
The video is only loaded from YouTube when you play it – data (including your IP address) is then transmitted to YouTube/Google. More in the privacy policy
Key Takeaways
- Download the InDesign template directly from the print service provider. It contains the die-cut contour and all important printing instructions.
- The die-cut contour is only a guide. You neither have to create it yourself nor include it in the final PDF.
- Work with a few clearly defined colors, fonts, and spacings. This makes the design look consistent and recognizable.
- Remove white backgrounds from an image using the "Multiply" blend mode and fine-tune the white value in Photoshop if needed.
- Before exporting, check the total ink coverage over 300% and the image resolution. The data check at the print service provider is a good second review.
Step-by-Step Guide
Step 1: Download the Right Template
Start on the print shop's website. There you will find the door hanger in various shapes and sizes. The classic format of 100 x 240 mm is a sensible starting point. Next to the product there is usually a data sheet with the technical specifications, which you should ideally open in a second tab. You will find the InDesign template in the download area. Read the accompanying document carefully, even if you later only use it as a safeguard. It contains important information on bleed, safety margin, and color profile.

Step 2: Open the Template and Understand the Layers
Open the INDD file and first get an overview in the Layers panel. There you will usually find three layers: a design layer on which you work, an information layer with notes on printing, color profile, and image resolution, and the die-cut contour. Change the color of the design layer to light blue so that your frames stand out better from the background later. You can show and hide the information layer. It is not printed, which you can recognize by the italic font and the missing printability.

Step 3: Properly Classify the Die-Cut Contour
The magenta line is the die-cut contour. It shows you where the door hanger will be cut later and serves as a visual boundary for the front and back. You do not have to create it yourself and do not have to take it into account during export. The printing machine cuts the shape according to the template; your PDF is simply output with your design. Therefore, only show the contour during the design process and remove it before export. It is helpful to keep the contour at the top of the layer order so that you can see it at all times.

Step 4: Create the Background Area with an Ivory Tone
First, create a new swatch with an ivory tone in CMYK mode. Then drag a rectangle from the top left corner to the bottom right corner on the correct layer and assign the color to it. The Swatches panel in the template often contains many colors that you do not need. Delete them, and you will work more clearly. Then lock the background layer with Ctrl/Cmd + L so that you do not accidentally click on it while designing.
Step 5: Set the Headline with Bebas Neue
Select the Type tool and drag out a generous text frame. Type the word "Frühstücks" into it and choose the font Bebas Neue. In the video, it is used at 90 pt with a tracking of 100. Since this makes the line very wide, a centered paragraph helps. Change the color to white and align the text to the center. If needed, activate the smart guides under "View", "Grids & Guides" so that InDesign shows you the center as soon as you approach it.

Step 6: Add the Script Accent with Alfresco
For the second typeface, create another text box on the design layer and type "kennen Sie unseren" into it. Choose the font Alfresco and initially set it to 48 pt so that you can see it at all. Reduce the line spacing to about 32 pt. Then align the text box to the center again. Alfresco is a Typekit font that you can use via Adobe Creative Cloud. Alternatively, any easily legible script font with flowing forms is suitable, such as a handwriting font with a pronounced swing.

Step 7: Using the color palette and designing the word "Service"
Your design uses a total of five colors and three fonts. Create the colors as swatches so you can reuse them at any time. In the video, the CMYK value 57, 62, 71, 60 is used for the second color accent. You then set the word "Service" while holding down the Alt key (Option on the Mac) and the Shift key so that the lettering fits into the area similarly to the breakfast lettering. Set the word to 80 points, align it in the center, and reduce the line spacing so that both words move closer together.

Step 8: Designing the footer with a rectangle and text box
For the footer, draw a rectangle 100 mm wide and 26 mm high. Choose a dark CMYK value as the color, in the video 24, 20, 20, 88. The rectangle extends to the bleed, that is, to the edge of the document. Keep the safety margin in mind: important content such as logos, text, or dots should always stay a few millimeters away from the trim edge. On top of it, you place white text at 25 points in the Baskerville font, for example "Dreh mich um, dann weißt du Bescheid". The font thereby looks calmer and forms a counterpoint to the large headline.

Step 9: Lines, circle, and alignment for the details
Hold down the Shift key and draw a horizontal line, choose a dashed stroke with 6 points and the hatched variant in straight form. Color: in the video a vibrant green with the values 48, 15, 88, 0. Use the "Align" tool to align the line to the vertical center axis and duplicate it with Ctrl/Cmd + D until the spacing is right. Then you create a circle with a 52 mm diameter in the same green color and give it a white stroke of 3.5 points. Align the circle with the rectangle behind it on the horizontal center axis so that it frames the door handle. For the fine-tuning, zoom in briefly to check the position precisely.

Step 10: Placing the image and removing the white background
Place your image via Ctrl/Cmd + D and center it. In the video, a fruit motif is used, which can be found for free on Pixabay. Move the image down in the Layers panel so that the text above it remains legible. In the Transparency area, you switch the blend mode to "Multiply". This makes the white areas of the image invisible. On close inspection, however, a hard edge may appear at the borders because the white value is not exactly 100%. In this case, you open the image in Photoshop, reduce the white value in the Levels adjustment, and brighten the shadows until the background becomes pure white. With a layer mask and a soft brush, you then paint the effect back in only where it is needed. Afterwards, you mask out the fruits again so that they keep their colors.

Step 11: Bringing the edited image back into InDesign
Save the PSD file and return to InDesign. With Ctrl/Cmd + D, you replace the old image with the edited PSD file. In the Links panel, you check the resolution. For print, at least 300 ppi should be reached; in the video, the value is around 686 ppi and thus well above that. Then you align the image more finely with a selection frame so that the fruit does not protrude over the text. With that, the front side is finished.

Step 12: Building the back side
The back side uses the same die-cut shape, just mirrored. Again draw a rectangle from the top left to the bottom right corner and fill it with black. Remove the fill of the die-cut contour so that you can still see it. Copy the circle from the front side with Ctrl/Cmd + C and paste it in place. This way it stays exactly centered without you having to realign it. Insert the note "täglich von 9 bis 11 Uhr" in green at 34 points and below it place the text about the service offering in Baskerville with 36 points of line spacing and white color. For the "Business Frühstück", you use Baskerville in Bold, centered, at 9 points. The description gets an Italic style so that it stands out from the title. The price of €8.90 is also set in italics or in the Regular style, depending on preference.

Step 13: Duplicate the offers and adjust the spacing
For the other breakfast options, you copy the finished formatting. In the video, three elements consisting of lines, title, and price are duplicated for this. One option is called "American Breakfast," another "Healthy Start to the Day" with a price of €7.90. When duplicating with the Alt key, make sure that the spacing is preserved. Finally, you add a text box at the bottom with a note such as "Please reserve at the reception desk or via extension" in Bebas Neue, 14 pt, green. Group the elements at the top so you can move them together and arrange them symmetrically. The upper area may be placed almost right up to the limit, so that the back doesn't look cramped.

Step 14: Check the template and evaluate the design
Before you export, you hide the die-cut contour but leave your design layer visible. Check the image resolution in the Links panel and open the Separations Preview. There you can see whether the total ink coverage is over 300%. If that is the case in some areas, you can try increasing the value until it becomes uncritical. The print shop usually reduces values that are too high to 300% anyway. So you don't need to worry about small overages. A direct comparison of the front and back also shows you whether both sides harmonize.

Step 15: Export the print-ready PDF
Go to "File," "Export," and choose PDF/X-1a:2001 as the format. For compression, you set a resolution of 300 dpi for color images and 450 dpi for line art. Activate the marks and the bleed, use the document settings, and convert the output profile. In the video, you also choose the standard ISO Coated v2 300% (ECI). Under the advanced settings, you should fully embed the fonts and set the transparency flattening to "High Resolution." No die-cut contours are visible in the exported PDF anymore, which is exactly right.

Step 16: Place the order and use the data check
In the print shop's online store, you configure the door hanger with four colors, printed on both sides. As paper, you choose, for example, 300 g/m² matte picture printing paper with dispersion varnish on both sides. You can adjust the quantity to your needs; in the video, 100 pieces are chosen. Upload your PDF for the data check. The check examines around twelve criteria, such as format, bleed, and ink coverage. In the video, a notice about a total ink coverage of over 300% is displayed. This is automatically reduced by the print shop and is uncritical with such small deviations. The 3D preview additionally shows you what the hanger looks like on the door, including the rounded corners.

Summary – From Draft to Print: Designing a Double-Sided Door Hanger in InDesign
You have learned the complete workflow: You loaded the template, worked with layers and die-cut contours, and coordinated colors, fonts, and images. On the back, you implemented offers with a clear structure and checked the design. Finally, you exported the PDF and used the data check. The most important idea here: A consistent design made of few colors and fonts looks more high-quality than many different elements. If you keep to this logic, your next door hanger will also be completed much faster.
FAQ
Do I have to remove the die-cut contour in the final PDF?Yes, hide it before exporting, since the printing press cuts the shape based on the template.
What resolution do I need for images in print?At least 300 ppi, ideally already at the size at which the image is placed.
Can I replace the fonts from the video with others?Yes, you need a sans-serif font with poster impact, a script font, and a serif font. The specific typefaces can be chosen freely.
What is the "Multiply" blend mode used for?It hides white areas of an image so that the background appears transparent.
Why should I use the data check?It checks key print criteria before ordering and shows you problems before expensive misprints occur.
What does the safety margin mean?Important content should be placed a few millimeters away from the trim edge so that it is not cut off during trimming.

