

Introduction
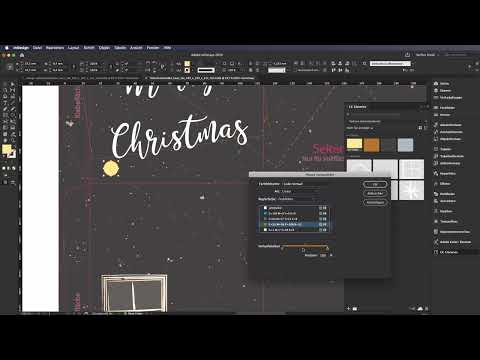
The video is only loaded from YouTube when you play it – data (including your IP address) is then transmitted to YouTube/Google. More in the privacy policy
An Advent calendar in the shape of a tea house looks like a small work of art on the table, and with InDesign and a suitable template it can be reliably turned into a print-ready file. This tutorial guides you through the entire process: from the template, through the design on the design layer, to the export, the order, and the 3D preview. You need basic InDesign knowledge, and then you can follow along step by step.
Key Takeaways
- The print partner's template contains a die-cut shape, bleed allowances, and non-printable areas. This information is located on a locked layer and must be removed before export.
- You design exclusively on the designated design layer. This way you keep an overview and prevent errors during production.
- With swatch entries in CMYK mode, gradients, duplicated groups, and prepared graphics, you create impact and variety without having to draw everything from scratch.
- Deliberately plan the front, side, and bottom areas of the house, because the side flaps are only suitable for solid-color areas.
- Exporting as a reproducible PDF with 3 mm bleed, selecting the product options, and the professional data check determine the quality of the final product.
Step-by-Step Guide
Step 1: Find and Download the Template
Open the product page of the print partner viaprinto and navigate to the Advent calendar section. There you will find the House model, which already gives you a first impression of the final product. Under Data Sheet and File Templates, you download the template for the tea house. The download contains four files, one each for the chocolate and tea variants as an IDML and as an INDD file. Since you are working with the current InDesign version, you choose the INDD file for the tea variant.

Step 2: Open the Template and Get an Overview
Double-clicking the INDD file opens the document directly in InDesign. Before you get started, get an overview of the workspace. You see four large areas that can be used for advertising purposes, for example for your corporate design, your identity, or a Christmas greeting. The roofs, the front, and the third swallow offer enough space for design ideas. Also pay attention to the notes in the template: the lid must remain fully visible, the side flaps are only suitable for solid-color motifs, and the glue areas as well as the non-printable areas must not carry any important content.

Step 3: Working with the Pages Panel and the Layers
In the Pages panel, you can see that the file has only one page. In the Layers panel, you find two layers: the die shape and the design layer. Try showing and hiding the die shape to see that it represents a flat surface with all the information for production. You should delete this layer at the end. Work exclusively on the design layer throughout the entire design process. It is marked in orange, and you can freely place rectangles, texts, and graphics there.

Step 4: Clean Up the Swatches
The Swatches panel usually contains many default colors that you do not need. Select all unused swatches and delete them using the trash can icon at the bottom right. Your workspace stays organized, and you will find your own colors faster later on.

Step 5: Create the Dark Background
Use the Rectangle tool to draw a large area that starts at the top left and ends at the bottom right. Make sure to include the 3 mm bleed so that the background extends to the trim edge. Then create a new swatch in the CMYK color mode, which is a process color. Enter the values for cyan, magenta, yellow, and black, confirm with Add, and assign the swatch to the rectangle. Then lock the layer with Command or Control plus L so that you do not move anything while continuing to work.

Step 6: Understand the Bottom Flap
In the tea house, the bottom flap is not a door opening. The individual tea bags are removed one after another through the slot at the bottom. The flap is already pre-perforated, so you can simply tear out the excess area with your finger later. Take this into account in your design and do not place any important motifs there.
Step 7: Add a snowstorm as atmosphere
Zoom to the artboard with Control and zero so that it is fully visible. Then insert a prepared component, for example from your Creative Cloud Libraries. The component consists of vectors that you can create in Illustrator. Alternatively, high-resolution PNG files are suitable. Drag the snowstorm across the artboard from top left to bottom right. With the W key you can view the preview without guides, and using the opacity in the Control panel you can reduce the motif to about 70 percent so that it does not look too dominant. Lock the group afterwards, since you will not need to move it later.

Step 8: Design and duplicate windows
For the floors, an arrangement of two rows of windows is recommended. Place a prepared window on the artboard and add a rectangle as the window pane. To do this, create a new color swatch, light enough to stand out from the background, and reduce the opacity to about 60 to 70 percent. Arrange the rectangle behind the window frame in the Layers panel, select both elements and group them with Command or Control plus G. Hold down the Alt key to duplicate the window. Rotate individual copies by ninety degrees or shift them slightly so that the design looks lively and not symmetrical.

Step 9: Set the lettering
Lettering works particularly well on the roofs. Use the Type tool to draw a wide text frame, set the text color to white and the alignment to centered. Choose a font with a handwritten character, for example a script font from your library. In the example, the font Stella Wilson is used, which comes very close to the desired look. Set the font size to 82 pt and write a phrase such as Merry Christmas. Rotate the text about six to eight degrees to the left. With the Alt and Shift keys held down, you can copy the lettering, and the Shift key keeps the alignment on the axis. This creates a second line, which you move around on the surface.

Step 10: Create Christmas baubles in flat design
With the Ellipse tool and the Shift key held down, you draw a symmetrical circle. Then create two color swatches for a gradient, such as a dark blue tone and a second, lighter tone. Create a new gradient swatch from them, for example with the name Gold Gradient. Select the left and the right color stop and set both to gold tones. To make the gradient look three-dimensional, click in the middle of the gradient slider to add a third color stop. This one gets a lighter gold tone and should be positioned at about 50 percent. Rotate the bauble slightly, duplicate it with the Alt key held down, and reduce the size of the copies with the arrow keys. This creates different baubles that you can repeat anywhere you like.

Step 11: Place and vary snowflakes
You can download the snowflakes directly as illustrations from the print partner's offering and insert them into InDesign. Place several flakes in different spots, including on the roofs. Variation is important: change the size with the arrow keys, rotate the flakes slightly and use different motifs. An additional color, such as a glacier blue with the CMYK values 38, 19 and 5, adds depth. Create it as a new color swatch and assign it to individual flakes. Afterwards you can view the layers again with the W key.

Step 12: Highlight ornaments and perforation
With the Pen tool you can draw decorative wavy lines that wrap around your design. Another option is to emphasize the perforation in the lower area with a suitable element. This creates a border that finishes off the calendar and visually holds it together. Use these elements sparingly so that the design does not look overloaded.

Step 13: Work carefully and plan enough time
Take enough time for the design. A draft created in haste often only reveals itself in the form of inaccuracies after the order has been placed. Check spacing, bleed margins and placements several times before you continue.

Step 14: Remove the die-cut template
Before you export, unlock the die shape in the Layers panel, select it, and delete it using the trash can icon. The die-cut shape must not remain in the print file, as otherwise it will be printed.
Step 15: Export the reproducible PDF
In the File menu, choose the Export command and set Adobe PDF as the format. Follow the specifications of the print partner, which you can find on their help page. All the necessary settings are described there, such as the bleed of 3 mm and the color settings. After exporting, open the PDF in Acrobat and check whether the bleed has been set up correctly. You will upload this file to the print partner's website later.

Step 16: Choose product options in the configurator
In the print partner's product configurator, you define the format, color, and paper; in this case, the selection remains unchangeable. For the filling, you can choose between the chocolate and the tea variant. For the tea house, you choose the tea variant with 24 individually wrapped tea bags. The flavors have names such as Himmelszauber, Wintertraum, or Pfefferminze, which makes your choice easier.

Step 17: Define packaging, quantity, and data check
For the packaging, you choose between a variant with an enclosed single carton, a single carton for packing, and the assembled calendar, which is already packed in the single carton. The assembled variant is particularly practical if you want to send the calendar as a gift to customers or business partners. For the quantity, you enter the desired number of pieces, in the example 24. Then you start the professional data check. It checks your file in real time and shows you whether anything needs to be improved. Finally, you choose the climate-neutral option with CO2 offsetting. This means production is on FSC-certified cardboard, and the greenhouse gases released by the print order are offset through a rainforest protection project.

Step 18: Upload, 3D preview, and order
Drag and drop the PDF file into the upload area. The 3D preview of the tea house then appears. Rotate the model using the buttons and view it from all sides to check your design before you put it into production. Then start the data check. If the check is successful, you put the product in the shopping cart. In the shopping cart, you can enter an order reference or cost center and, if applicable, redeem a voucher code. Accept the privacy policy and complete the purchase.

Summary ??? Designing an Advent calendar tea house in InDesign: Use the template, export, and print
You have learned how to open the print partner's template, use the design layer, and build an atmospheric design with a background, windows, lettering, baubles, and snowflakes. You also know how to remove the die shape, export a reproducible PDF, choose the product options, and check the result with the 3D preview before ordering. With this approach, you create an Advent calendar that not only looks beautiful but can also be produced cleanly.
FAQ
Why should I delete the die shape before exporting?The die shape is only intended for orientation and must not be printed. Therefore, delete it before exporting.
Which file version should I open?Choose the INDD file if you are working with the current version of InDesign. The IDML file is suitable for older versions.
Why do I only work on the design layer?The design layer is intended for your content. The die shape remains unchanged, and you avoid errors in production.
How large does the bleed need to be?According to the template, the bleed is 3 mm. Let backgrounds and motifs extend beyond the cut edge.
Can I use snowflakes and baubles from the print partner's website?Yes, the illustrations are available for download on the website and may be used for your tea house.
What does the professional data check examine?The professional data check examines your file immediately and shows whether all requirements are met or whether you still need to make improvements.
What does the CO2 option mean?With CO2 offsetting, the print order is made climate-neutral. The greenhouse gases released are offset through a rainforest protection project.

