

Imagine your layout calls for a banner with a notched end or a card diamond that looks like the original from a deck of playing cards. With the basic shapes Polygon, Rectangle and Ellipse, you quickly hit limits. This is exactly where the Pathfinder and the Pen tool come in. With the Pathfinder you merge or cut objects, with the Pen tool you draw your own paths, and with the anchor point tools you refine the final outline. In this tutorial you will learn all the techniques and apply them step by step using examples.
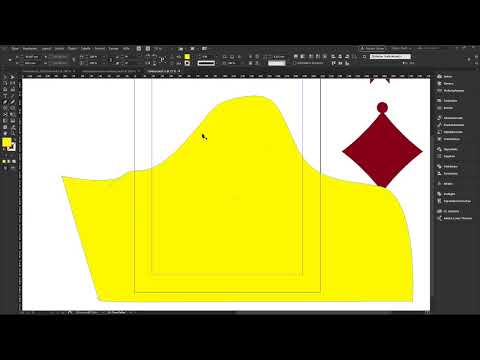
The video is only loaded from YouTube when you play it – data (including your IP address) is then transmitted to YouTube/Google. More in the privacy policy
Key Takeaways
The Pathfinder combines two or more objects. When subtracting, the front object is cut out of the back one; when adding, all objects merge into one shape.
The result is a single, closed object that you can move, rotate and scale as a whole.
The Pen tool (keyboard shortcut P) creates your own paths. If you hold down the mouse button while placing a point, curves are created.
With the Direct Selection tool, the "Delete Anchor Point" tool and the "Convert Direction Point" tool, you modify individual points precisely.
A cutout in an already closed rectangle cannot be achieved with the Pathfinder. For this, you draw an additional path with the Pen tool.
Step-by-Step Guide
Creating a Banner with the Pathfinder
Open a new document; the dimensions don't matter for this example. Select the Rectangle tool and drag out a shape that will serve as the flag. Place it in the center of the page by using the guides you pull from the ruler. Then zoom in close, because you want to create a triangular cutout at the bottom edge.

Next, select the Polygon tool and click once in the document. In the options, set three sides and make sure that no star shape is activated. Color the triangle yellow so you can distinguish it from the rectangle, and place it at the bottom edge of the banner.

Open the Pathfinder via "Window", "Object & Layout", "Pathfinder". The order is crucial: the object that is at the very front is cut out when subtracting. Therefore, first click the yellow triangle, which is in front, and then hold down the Shift key while clicking the rectangle. After all, the rectangle should remain.

In the Pathfinder, click "Subtract". The triangle disappears, and the desired cutout appears at the bottom end of the banner. You can see the effect immediately in the changed outline.

The result is a single, closed object. You can now move, scale or rotate it as a whole without the parts falling apart. That is exactly the practical advantage: everything is retained as a unit, so you don't have to readjust individual shapes later.
Building a Diamond Shape from Basic Shapes
For the diamond, you start with a rectangle that you place in the center of the area. An ellipse that you place on one edge of the rectangle forms the first cutout. Align it precisely by snapping it to the center axis and fine-positioning it with the arrow keys. With Shift and an arrow key press, you move the object by one step.

To create an even rounding at each corner, duplicate the ellipse. To do this, hold down Alt and Shift and drag the copy to the desired position. The Shift key ensures that the copy stays on the same axis and doesn't slip. Repeat the process until you have four ellipses, and rotate one of them if necessary so that it fits the other positions.
Now select the first ellipse, hold down Shift and click the rectangle. In the Pathfinder, click "Subtract". Repeat this process for each of the remaining ellipses. After the fourth pass, the rectangle has lost its roundings on all sides, and the diamond clearly emerges.
To make the diamond resemble the playing card, rotate it by 45 degrees. To do this, grab the rotation handle and drag it. Hold Shift if you want to rotate in exact 45-degree steps. Without Shift, you can rotate the shape freely.
Adding shapes
With the Pathfinder, you can not only subtract shapes but also join them together. For this example, place a small circle at each corner of the diamond. Select the diamond and the circles and click "Add" in the Pathfinder. The shapes merge into a single outline. If you then set the fill color to red, the result looks like a continuous symbol.

To check the exact path of an object, choose the Direct Selection tool instead of the Selection tool. With it you see every single anchor point of the shape. This way you can tell whether the merge worked cleanly or whether superfluous points are still getting in the way at some spot.

Drawing a wave with the Pen tool
The Pen tool is well suited for freeform shapes and waves. Activate it with the keyboard shortcut P and place the first point outside the document. Then place a second point, but keep the mouse button held down. This way you pull out direction handles, with which you stretch the curve longer or flatten it. Place more points until the wave matches your vision.

To turn the wave into a closed shape, bring the path back to the starting point and click there so that the path closes. Then remove the stroke color or choose a new color, for example blue. The shape is perfectly usable, even if it doesn't look quite perfect yet. With a bit of practice, however, you will quickly become more confident.

Deleting and converting anchor points
Every path consists of anchor points. If a point is in your way, choose the "Delete Anchor Point" tool, which you can find via the Pen tool icon, and click on the point. The path reconnects the remaining points, and the curve adapts.

To modify a curve in a targeted way, use the "Convert Direction Point" tool. Click on the anchor point with it and keep the mouse button held down. Then you can adjust the curve more finely and make the wave more uniform. The result may well be slightly irregular, because waves often look more lively when they don't run perfectly evenly.
A practical example shows how such waves can be used. Open the Pages panel and choose the master page on which the wave is placed. With the Direct Selection tool, you then see all the anchor points of the shape, and you can see how finely the curve was ultimately adjusted.

Cutout on the business card
A common case is a cutout in a rectangle, for example for a free area on the business card. To do this, draw a rectangle in white, center it on the template, and subtract it from the rectangle underneath with the Pathfinder. Unfortunately, this doesn't work here, because the rectangle is already a closed path, and the Pathfinder only cuts out the area that overlaps with the front object. Therefore, undo the action.

Instead, you draw the cutout with the Pen tool. First move the rectangle onto the pasteboard so that you don't change it accidentally. Then drag guides out of the ruler at the desired positions so that you know how large the object should be. With the Pen tool, place the points inside the rectangle and hold Shift so that the lines stay straight. Close the path by returning to the starting point.

Then remove the fill color of the new path and give the stroke the color white. You get a path that runs around the rectangle shape and leaves a gap at the top. You can use this gap as free space for a logo or a lettering. If you want to round the corners, open the Corner Options and choose a radius, for example 1 mm.

Fine-tuning the gap
If the gap doesn't quite fit yet, select the "Convert Direction Point" tool and click on the relevant anchor point. To keep the path from slipping into an unwanted curve, hold down Shift and the spacebar and drag the point with the mouse in the desired direction. Repeat the process on the opposite side until the spacing is right.
Summary ??? InDesign Pathfinder: Creating and fine-tuning complex shapes
The Pathfinder is your tool for adding and subtracting objects. With it, you can create flags, diamond patterns, and other shapes that can be further processed as a closed unit. For free-form shapes such as waves, the Pen tool is suitable, and with the anchor point tools you can adjust every curve precisely. Keep in mind: with shapes that are already closed, the Pathfinder reaches its limits, and then an additional path drawn with the Pen tool helps. It's best to try out the techniques yourself, because over time you will develop a good feel for them.
FAQ
What is the difference between the Pathfinder and the Pen tool?The Pathfinder joins or separates existing objects, while with the Pen tool you draw your own paths from scratch.
Why doesn't the cutout in a rectangle work with the Pathfinder?The rectangle is already a closed path, and the Pathfinder only cuts out areas that overlap with the front object. The inner area therefore remains unchanged.
How do I get exact 45-degree angles when rotating?Hold down the Shift key while rotating, and the rotation will snap in 45-degree steps.
How do I remove an unwanted point from a path?Select the "Delete Anchor Point" tool and click on the point. The path is then reconnected without this point.
How can I fine-tune a curve afterwards?Use the "Convert Direction Point" tool and drag the relevant anchor point until the curve matches the desired course.

