

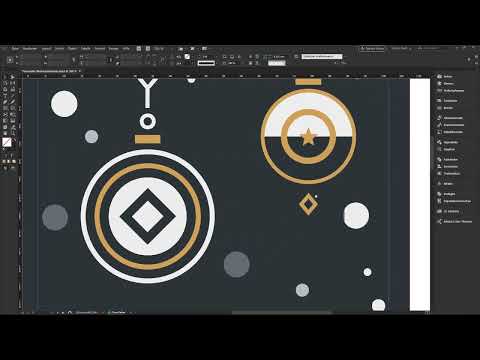
A shiny snowflake, a tactile raised logo, or golden Christmas lettering often has a stronger effect than any color. This is exactly where partial finishing comes in: instead of varnishing the entire page, you highlight only selected elements. For this to work, the print shop needs to know exactly what is to be finished. Using a Christmas greeting card in A6 format as an example, this guide shows you which layout requirements apply, how to set up the finishing in InDesign, and how to export a print-ready PDF.
The video is only loaded from YouTube when you play it – data (including your IP address) is then transmitted to YouTube/Google. More in the privacy policy
Key Takeaways
- Partial UV varnish and relief varnish finishes are set up in InDesign in an identical way; hot foil follows a slightly different process.
- Elements to be finished need a 3 mm safety margin to the bleed and must not extend to the edge of the page.
- Font sizes of 12 pt and up (14 pt and up for hot foil), lines of 1 mm or 3 pt and up, and negative lines of 2 mm and up are the most important minimum values.
- For the print shop, you need a spot color (for example "Lack" or "Heißfolie", 100% magenta) and overprinting of the affected elements.
- The layer copy for varnish is only reliable at 100% opacity, whereas hot foil does not require its own layer.
Step 1: Understanding the Types of Finishing
Before you start in InDesign, you should know which finishing suits your design. Partial UV varnish is a glossy, flatly applied layer of varnish that is barely noticeable to the touch. Partial relief varnish is set up in exactly the same way, but creates a clearly perceptible elevation that you can feel with your finger. With hot foil, a metallic-looking foil, for example in gold, is stamped on. It is raised, tactile, and completely covers the design underneath. Decide on a finishing in advance, because the further requirements depend on it.

Step 2: Checking the Technical Requirements
Not every element is suitable for finishing. The print shop sets clear limits for this, which you should observe before starting the actual work.
Safety Margin and Edge Bleed
Finished elements must not extend into the bleed. In addition, you need a safety margin of 3 mm on all edges. On an A6 card, this margin can easily be undercut. Therefore, check the view with the keyboard shortcut W and inspect the edges carefully.

Minimum Sizes for Text
Text can only be finished from 12 pt, and for hot foil only from 14 pt. Smaller font sizes are too delicate for finishing and can become blurry or illegible. If you want to finish a headline, check its size by double-clicking with the Type tool. You should exclude smaller lines of text from the finishing.
Lines and Outlines
Font weights and typographic lines must be at least 3 pt or 1 mm thick. Positive lines need the same minimum thickness. Negative lines, meaning the gaps between two lines, must be at least 6 pt or 2 mm wide. Check all outlines individually, because in an ornate design thin lines easily fail the requirements.

Step 3: Correcting the Margin in the Document
In the example document, the margin of 4 mm was too large. You change it to 3 mm via Layout and Margins and Columns. Then you move elements that extend into the safety area inward. You can also shorten or move lines that run to the edge. The same applies to snowflakes at the edge: they must lie within the 3 mm limit if you want to finish them.

If your design has too many restrictions, there are two ways out: you adapt the design, or you finish a larger area, such as the entire circle with varnish. However, the gaps in between will then also be finished, which you should keep in mind when designing. Also clarify in advance with the client whether the target format may still be changed.

Step 4: Creating a Spot Color for the Varnish
The print shop recognizes finished elements by a special color. To do this, create a new color via the Swatches panel. Deactivate the "Name with Color Value" checkbox and give the color a unique name such as "Lack". For hot foil, you name it "Heißfolie" accordingly. Choose Spot as the color type and keep the color mode on CMYK. The color value is secondary for the finishing, but in practice 100% magenta has become established. You confirm this color with OK.

Step 5: Create a Separate Layer for the Varnish
A separate layer is worthwhile for UV varnish and relief varnish. Open the Layers panel and create a new layer, for example named "Lack". Then select all elements that are to be finished. Copy them with Ctrl+C (or Command+C on a Mac), select the varnish layer, and paste them via Edit and Paste in Place. This way, each object lies exactly on top of the other on the design layer and the varnish layer. Repeat this for all desired elements. For special cases that are not so easy to copy, you can go through the steps individually.

Step 6: Keep an Eye on Opacity
A common mistake lies in the opacity. Many elements, such as snowflakes, have different transparencies, for example 100%, 75%, or 30%. For the finishing, however, only the varnish layer value counts, and it must be 100% on every finished object. So you can still leave the snowflakes on the design layer transparent, but you set the copies on the varnish layer to 100%. The opacity field then shows a uniform value, which you should check.
Step 7: Set the Elements to the Varnish Color
So that the print shop immediately recognizes what is to be finished, you must set the color of the affected elements to your varnish color. This applies to text, diamonds, strokes, and areas. To do this, select the object on the varnish layer and assign it the color "Lack", for both the fill and the stroke. In the end, your entire finishing layer should be colored in 100% magenta.
Step 8: Check the Separations Preview
Now you want to know whether everything has been set up correctly. To do this, open the Separations Preview via Window, Output. Deactivate all colors there except your varnish color. Only the elements that will be finished later are then displayed. This way you can see at a glance whether something was forgotten or whether elements are unintentionally set to varnish.

Step 9: Set Up Hot Foil Differently
For hot foil, you do not need an additional layer. Your object is finished directly, regardless of which color lies underneath. So create a new spot color named "Heißfolie" with 100% magenta, and assign it directly to the element. In the Separations Preview you will then see only the hot foil color, and this is exactly how it will later be printed in gold. The difference from UV varnish and relief varnish is that the hot foil completely covers the design. A typeface of 84 points will therefore no longer be recognizable through the foil.

Step 10: Set the Objects to Overprint
So that the finishing is printed correctly onto the design, all finished elements must be set to overprint. Select the objects, open Window, Output, Attributes, and activate "Overprint Fill" as well as "Overprint Stroke". For hot foil, you proceed in the same way. Make sure to check the setting again after any changes to the opacity.

Step 11: Export the PDF
Now comes the export. Press Ctrl+E, enter a file name, and in the export dialog select the PDF/X-1a:2001 standard or the appropriate PDF/X format, depending on the print shop's specifications. Activate all pages, include the marks and bleeds, and use the document settings. In the Output tab, you convert to the target profile ISO Coated v2 300% and keep the values. Under Advanced, the print area setting should be set to Ignore so that the finishing layer is not lost. After the export, you receive a print-ready file.

Step 12: Check the Result in the Online Preview
For verification, you can upload the file to an online print shop that offers a 3D preview. At viaprinto, you drag and drop your PDF into the upload area and select a suitable finishing in the product configurator, for example partial relief varnish on the front. Pay attention to notes about paper types, because partial finishes are not possible on every paper. For glossy paper, a matte paper is often suggested as an alternative. The 3D view then shows you how the finishing will look on the finished product.

Summary – Partial Finishing in InDesign: Guide for UV Varnish, Relief Varnish, and Hot Foil
Partial finishes make individual elements visibly and tangibly stand out. To do this, you must follow the layout guidelines, set up elements correctly on a spot color, activate overprint, and check with the separations preview. For UV varnish and relief varnish, you work with a separate varnish layer, while for hot foil a separate solid color is sufficient. Finally, you export the PDF in the appropriate PDF/X format and ideally check the result in the print shop's online preview. Always coordinate the exact process with your print partner.
FAQ
Do I have to create a separate layer for each finish?For UV varnish and relief varnish, a separate varnish layer is recommended; for hot foil, a solid color applied directly to the object is sufficient.
What font size do I need for a partial finish?At least 12 points. For hot foil, 14 points are required.
Why must the opacity of the varnish elements be 100%?The print shop can only reliably apply finishes at full opacity. Transparent objects on the varnish layer lead to inaccurate results.
What happens if I don't set elements to overprint?The finish may not be printed correctly in the affected areas, which is why all finished objects should be set to overprint for both fill and stroke.
Can I check my finish with the separations preview?Yes. Deactivate all colors except your finishing color, and you will immediately see which elements will be finished.
What do I do if my lines are too thin?You can thicken the lines, adjust the design, or finish a larger area. An emergency solution is to finish the entire area, such as a circle, across the full surface.
How do I export the PDF for the print shop?Use the print shop's PDF/X standard, activate all pages, include marks and bleeds, and convert to the target profile ISO Coated v2 300%.

