

Images are among the most important design elements, and in InDesign they work differently than you may know from Word or other Office programs. The reason: InDesign separates every image into two independent objects, the image frame and the image content. Once you have understood this principle, you will insert images into your layouts precisely and without frustration.
The video is only loaded from YouTube when you play it – data (including your IP address) is then transmitted to YouTube/Google. More in the privacy policy
In this tutorial, you will learn how to insert images via drag and drop and using the Place command, how to adjust frames and crops, and how to place multiple images into a grid at the same time. At the end, you will also know the difference between linked and embedded files. A business card serves as the example.
Key Takeaways
Image frame and image content are separate objects. The image frame acts like a window through which you look at the actual image. Both can be moved, scaled, and modified independently of each other.
The layout takes priority over the image. You first create a frame of the appropriate size and then place the image into it. The aspect ratio of the original does not matter at first.
The "Fill Frame Proportionally" command is your most important helper. With it, the image fills the frame completely without being distorted.
Images can be inserted via drag and drop, via "File > Place", or several at once into a grid.
Placed images are linked by default. Via the Links panel, you keep track of things and can embed files if needed.
Step-by-Step Guide
Step 1: Understanding the Template
Before you get started, take a look at the template. A layout often already contains placed placeholder images, for example for an image crop or a fold. These images serve as orientation and show you where your design should lead. It is important that you regard the layout as a guideline into which the images fit.

Step 2: Creating a New Document
Create a new file that initially remains empty. This way you can calmly try out how images behave without anything already being in the way.

Step 3: Inserting the Image via Drag and Drop
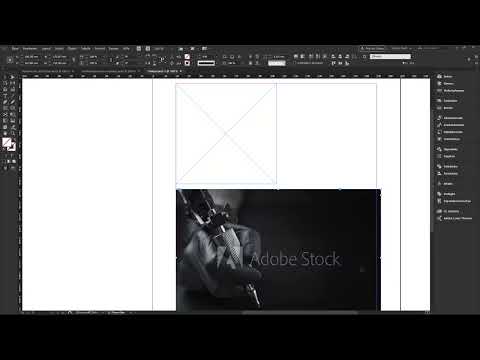
The simplest way is via Explorer or Finder. Drag an image file directly into your InDesign document. Your mouse pointer then displays a thumbnail of the image. Click at the desired spot, and the image appears with a frame whose aspect ratio exactly matches that of the image. Feel free to try this with any photo from your hard drive.

Step 4: Drawing the Rectangle Frame
Especially in everyday layout work, it usually makes sense to define the frame first. To do this, select the Rectangle Frame tool. You can find it in the toolbar or quickly via the keyboard shortcut F. Hold down the mouse button to display other frame shapes such as ellipse or polygon frames. For this example, however, you need the Rectangle Frame tool.
Then draw a frame. If you want a square image, hold down the Shift key while drawing. This keeps the sides proportional to each other.

So that you can easily recognize the frame in the layout, you can assign it a fill color via the Swatches panel, for example black.
Step 5: Dragging the Image into the Frame
Now drag your image via drag and drop into the frame you drew earlier. As soon as you release the mouse button, the image sits in the frame. At first glance, everything looks as usual, but behind the scenes there are two levels.
Step 6: Distinguishing Between Image Frame and Image Content
Click in the middle of the image with the Selection tool. This activates the image content, and you see the entire image, including the parts that lie outside the frame. Often the image is many times larger than the frame. The frame is thus just a small peephole.

When you move the mouse pointer to the center of the image content, it turns into a hand. With it, you can move the image freely within the frame and thus define the crop. The layout remains unchanged, because only the visible part of the image changes.
Step 7: Scaling the image
If you want to adjust the size of the image, drag a handle in the corner. Hold down the Shift key while doing so so that the image is scaled proportionally. However, this method is tedious if you have to edit many images. There is a faster way for that.
Step 8: Fill the frame proportionally
Right-click the image and choose "Fitting" in the menu. There you will find the command "Fill Frame Proportionally". It ensures that the image completely fills the frame without being distorted. Afterwards, you can use the image content to choose the desired crop.

Further commands are available in the same menu. "Fit Content Proportionally" shows the entire image, but can result in empty space at the top and bottom. "Center Content" places the image in the middle of the frame. The most important command for everyday use, however, remains "Fill Frame Proportionally".

Step 9: Modifying the image frame afterwards
The image frame can be enlarged or reduced at any time. To do so, click on the frame until the blue outline appears. Then drag a handle to change the size. The image content stays in its position, so you can choose the crop again at any time. If the frame is larger than the image, the remaining area stays empty or fills with the selected color.
Double-clicking a handle limits the frame directly to the extent of the image content. This is particularly handy when you quickly need a suitable frame for an image.

Step 10: Removing the image content again
To remove the image content from a frame, click once in the center of the image. Wait until the frame turns beige, which marks the image content. Then press the Delete key or choose "Remove". The empty frame is retained.
Step 11: Inserting images via the Place command
Besides drag and drop, there is the command "File > Place", keyboard shortcut Ctrl+D or Command+D on macOS. Pay attention to whether an object is selected beforehand. If nothing is selected, the file dialog simply opens, and you can choose an image.

At the bottom of the dialog you will find the import options. Activate the checkbox if you want more control over the import. This dialog is a powerful tool, because in InDesign numerous file types can be placed, including PDF, PNG, JPEG, vector files, PSD, and text files. With JPEGs there are hardly any options. With a PDF file, on the other hand, InDesign asks you which pages you want to import.

Step 12: Placing with the loaded mouse pointer
After opening, a loaded mouse pointer appears. You have two options. Either you drag out a frame into which the image is fitted exactly, or you simply click on a spot, and the image lands there at its original size. With Ctrl+Z you undo the action and have the mouse pointer loaded again.
Step 13: Placing multiple images at once
With extensive documents, you often want to insert many images at once. To do so, open the Place dialog, select all desired files while holding down the Shift key, and click "Open". The mouse pointer now shows a thumbnail of the first image and a number indicating how many images are loaded.
With the left and right arrow keys you switch between the images. As soon as the right image appears in the preview, you click on the desired spot.
Step 14: Defining a grid for multiple images
The second option is to drag out a frame with the loaded mouse pointer. InDesign then adopts the aspect ratio of the first image. If you press the up or down arrow key while dragging, you define the number of rows. With the right arrow key you determine the columns.
Additionally hold down the Ctrl key while the mouse button is still pressed, and use the arrow keys to change the spacing between the columns. When you release the mouse button, InDesign places all selected images in the predefined frames of the grid.
If the images are not yet filled correctly, select all frames, open the context menu, and choose "Fitting > Fill Frame Proportionally" again. Afterwards, all images have the same size and align with the grid.

Step 15: Designing the Business Card
Now you apply what you have learned to the business card. With the Rectangle Frame tool, draw a large frame that extends from the left edge across the bleed to the fold in the middle. Place your image there with Ctrl+D and choose "Fill Frame Proportionally" again.

You can then fine-tune the image composition. To do this, click in the center of the image to select the image content, and move it while holding the Shift key until the crop is right.

Step 16: Keeping an Eye on the Links
Placed images in InDesign are linked, not embedded. This means that the file is not part of the InDesign document but only contains a reference to it. You can find the "Links" panel on the right in the sidebar or under "Window > Links". There you can see the name of each file, the page number, and further information. Via the panel, you can also jump directly to the spot where the image is placed with one click.


If you move the original file to another hard drive or delete it, InDesign loses the reference. The next time you open the document, the program alerts you and asks for the correct path. This happens particularly often with removable media such as USB sticks.

Step 17: Embedding Images
If you want to ensure that the document works independently of the original files, you can embed images. To do this, right-click the file in the Links panel and choose "Embed". The icon next to the file name changes, and the InDesign file becomes larger because the image is now part of the document. Keep in mind that this can significantly increase the file size.
Summary ??? Placing Images in InDesign: Mastering Image Frames and Image Content
Images in InDesign consist of an image frame and image content, which you can edit separately from each other. You first define the layout with frames and then insert the images. With "Fill Frame Proportionally" you get clean results without distortion. With the Place command, via drag and drop, or with a grid, you bring images into the document quickly. The Links panel helps you keep track, and by embedding you secure your document. Try out the steps with your own images, and the difference between frame and content will quickly become routine.
FAQ
What is the difference between image frame and image content?The image frame is the window in the layout, the image content is the entire image that lies behind this window. Both can be moved and scaled separately.
Why does my image only appear as a crop after inserting it?The image is often larger than the frame. You only see the part that fits into the frame. With "Fill Frame Proportionally" or by moving the image content, you adjust the crop.
How do I completely fill a frame with an image without distorting it?Right-click the image, choose "Fitting" and then "Fill Frame Proportionally".
How do I create a square frame?Hold down the Shift key while drawing the rectangle frame. This keeps the sides the same length.
How do I place an image via the menu?Choose "File > Place" or press Ctrl+D on Windows or Command+D on macOS and select the desired file.
Can I place multiple images at once?Yes. In the Place dialog, select multiple files while holding the Shift key. With the arrow keys you switch between the images and then draw a grid.
What does linked mean and what does embedded mean?Linked means that InDesign only stores a reference to the original file. Embedded means that the image is part of the InDesign document.
What happens if I move a linked file?InDesign loses the reference and reports a missing image the next time you open it. You then have to specify the path again.
Where do I find all images used in my document?In the "Links" panel, which you can find on the right in the sidebar or under "Window > Links".
How do I remove an image from the frame without deleting the frame?Click once in the center of the image until the image content is selected, and then choose "Delete" or press the Delete key.

