

Setting hyperlinks in InDesign used to be tedious. You had to fight your way through nested menus, and mistakes often only showed up during proofreading. With the CC 9.2 update, Adobe has improved a lot here. In this tutorial, I will guide you step by step through the most important new features. You will learn how to create links in just a few clicks, how to keep track of everything with the Hyperlinks panel, and how to define your own character styles for links.
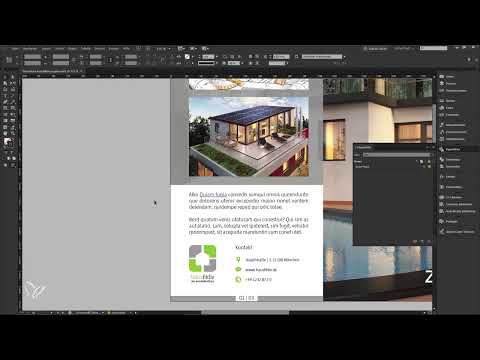
The video is only loaded from YouTube when you play it – data (including your IP address) is then transmitted to YouTube/Google. More in the privacy policy
Key Takeaways
Hyperlinks can be created directly via the context menu. Simply select a passage of text, right-click to open the dialog box, and enter the address there.
The Hyperlinks panel shows you with a traffic light icon whether a link is valid. A green light means that the link works.
With a double-click in the panel, you jump directly to the link's location in the document. This saves a lot of time in large documents.
You can recognize email links by an envelope icon. Custom character styles ensure that all links look consistent, and they can be changed centrally at any time.
Links that are used multiple times are grouped in the panel. This way, you keep an overview even with many references to the same destination.
Step-by-Step Guide
Step 1: Select a text passage and create a hyperlink
Start with the Type tool. Select the passage that is later to serve as the link. A right-click opens the context menu, where you will find the entry for a new hyperlink. As soon as you select it, a dialog box opens in which you can set the destination. This way is much shorter than the previous search through the menus.

Step 2: Enter the destination URL and confirm
In the dialog box, you choose the option "Link to URL". Then enter the internet address the link should lead to. Watch out for typos, because a misspelled link is unusable later. Confirm your entry by clicking "OK". The selected text now receives the typical hyperlink formatting, usually blue and underlined.

Step 3: Open the Hyperlinks panel and check the link
Open the Hyperlinks panel via the "Window" menu and then "Interactive". Every link is listed there. Besides the name, you can also see on which page and at which position the link is located. If you have selected the text passage in the document, the text appears in the panel as an entry. This gives you an overview of all links in your document within seconds.

Step 4: Jump to the location with a double-click
In large documents, you quickly lose track. That is exactly what the jump function is for. Scroll to any page, say page 3, and perhaps forget where a particular link is. In the Hyperlinks panel, a double-click on the entry is enough, and InDesign takes you straight to the right place in the document. This is especially helpful if you want to revise links later.

Step 5: Understand the traffic light icon
Next to each link in the panel, you will find a small icon reminiscent of a traffic light. Behind this icon is a background check. InDesign checks whether the link is valid and can actually be reached, or whether a typo may have crept in. A green light signals that everything is fine. This feature makes follow-up checks considerably easier, because you no longer have to laboriously search for errors by hand.
Step 6: Create an email link
Besides web addresses, you can also set email links. To do so, select a new text passage, open the context menu again, and choose the entry for a new hyperlink. This time, in the dialog box, you choose the option for an email address and enter it, for example name@beispiel.de. You can leave the subject line blank; it is optional. After confirmation, the new link appears in the panel.

Step 7: Define your own character style for hyperlinks
Maybe you don't like the default appearance of links, and the underline disrupts the overall look? Then create your own character style. To do so, open the Character Styles panel and choose "New Character Style". Give it a meaningful name, such as "Hyperlink new". Then set the font, font size, and character color. For example, choose a shade of green. Remove the underline by deactivating it in the options. With the Preview option, you can see the result directly in the document before you confirm.

Step 8: Apply the character style to links
Once the character style is set up, you can apply it to existing links. In the Hyperlinks panel, you can recognize the email link by an envelope icon. This is handy, because you can see at a glance what type of link it is. To change the style, select the old link, remove it, and replace it with the new link using the character style. The appearance then adjusts automatically. If you change the style later, all affected links will update as well.

Step 9: Manage multiply used links in the panel
If a link appears multiple times in the document, the Hyperlinks panel groups these entries. Using the small arrow, you open the dropdown menu and see all occurrences. Validity is still indicated with the traffic light icon. A double-click on one of the entries takes you to the respective location, such as page 2 or page 1. This way you can jump back and forth between the individual references without having to search for them each time.

Step 10: Use the workflow in everyday work
With these functions, working with hyperlinks becomes noticeably easier. It's best to try out the individual steps on a test document. You will quickly notice how much time the panel saves during review and navigation. The traffic light icon in particular is a feature that quickly proves its worth in everyday use.

Summary – Using hyperlinks in InDesign CC 9.2 with the Hyperlinks panel
With InDesign CC 9.2, hyperlinks can be created and managed much more conveniently. You select a text passage, create the link via the context menu, and keep an overview thanks to the Hyperlinks panel. The traffic light icon shows you whether a link works, and a double-click takes you directly to where it appears. You can recognize email links by the envelope icon. With your own character styles, you design all links consistently, and multiply used links are clearly grouped.
FAQ
How do I create a hyperlink in InDesign?Select the desired text passage, right-click, and choose the entry for a new hyperlink in the context menu. In the dialog box, enter the URL and confirm with OK.
How can I tell whether a hyperlink is valid?In the Hyperlinks panel, a small traffic light icon shows the status. A green light means the link works.
How do I quickly jump to a hyperlink in the document?Open the Hyperlinks panel and double-click the desired entry. InDesign then jumps directly to the location in the document.
How do I recognize an email link in the panel?Email links are marked with an envelope icon in the Hyperlinks panel.
How do I style all hyperlinks consistently?Create a new character style for hyperlinks and set the font, color, and underline there. Then apply the style to the links. If you change the style later, all affected links adjust automatically.
What does the grouping in the Hyperlinks panel mean?If a link appears multiple times in the document, its entries are combined into a group. Using the arrow, you open the dropdown menu and see all occurrences.

