

As soon as your project consists of several chapters, a table of contents for a single document is no longer enough. Imagine your book has six chapters, and each one is in its own InDesign file. Then you need a table of contents that covers all chapters. For this, you work with a book file. In this tutorial, you'll learn which settings are important, how to set up the table of contents, and how to design it cleanly using paragraph styles, tabs, and character styles.
The video is only loaded from YouTube when you play it – data (including your IP address) is then transmitted to YouTube/Google. More in the privacy policy
Key Takeaways
- A table of contents that spans the whole book only works if the table of contents document is part of the book and the option "Include Book Documents" is activated.
- Consistent paragraph style names across all book documents are the basic requirement. Otherwise, the style list becomes confusing and long.
- Tabs with leader characters and character styles for the page numbers determine the appearance.
- You need to specifically check breaks, missing chapter names, and objects on master pages.
- If possible, create the table of contents at the end so that you hardly have to do any rework later.
Step-by-Step Guide
Step 1: Create a separate document for the table of contents
Do not create the table of contents on a chapter page, but in its own new document. To do this, open your template file and create a new document. You don't need the default page here. So delete all contents and apply the master page "Inhaltsseite" to page 1. After that, you have the right foundation for your table of contents.

Step 2: Add the table of contents document to the book
So that the table of contents can capture all chapters, the file itself must be in the book. Save the new document first. Then open the "Book" panel and add your book file. Move the table of contents document all the way to the front so that it comes before the chapters. Afterwards, check the page order and adjust the pages if necessary.

Step 3: Open the table of contents and include book documents
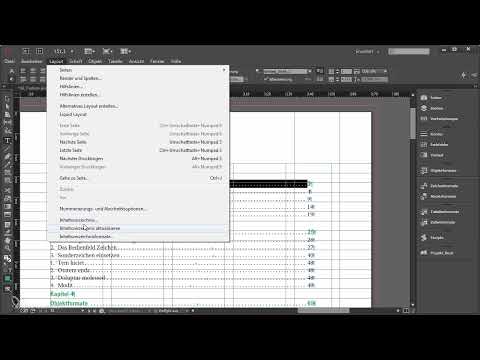
Open the dialog box via "Layout > Table of Contents". First remove the existing entries so that you can compile the table of contents yourself. The option "Include Book Documents" at the bottom of the dialog is very important. Only when you activate it will the paragraph styles of all documents in the book be displayed.

Step 4: Name paragraph styles consistently in all documents
Once the option is active, all paragraph styles from the book appear. This only works cleanly if the styles have the same name in every chapter. If the same style is called "Headline 1" in chapter 1 and "Headline 1 neu" in chapter 2, you get a long list with duplicates. Therefore, compare the style names in all documents before you continue. You then add each style only once.
Step 5: Define the order of the levels
Add the styles in the correct order. For this table of contents, these are "Einstieg Kapitel", "Einstieg Head", and "Headline 1". Move the entries in the dialog so that the chapter appears first and then the chapter heading. Headline 1 follows as the third level. You usually don't need more than that for a book table of contents.
Step 6: Keep the title and assign styles
You can leave the title in the table of contents if you give it its own paragraph style. To do this, select the entry and assign a suitable style to it. Make sure that each level gets its own paragraph style. This way, the appearance can be controlled specifically later on.
Step 7: Design the introductory chapter without a page number
The introductory chapter and the introduction always appear together on the introductory page. That's why you don't need a page number there. Remove the page number for the level "Einstieg Kapitel" and assign the paragraph style "Einstieg" to the entry. The heading of the introduction also gets a suitable paragraph style. After that, the preview already looks much tidier.
Step 8: Place the table of contents and adjust the text frame
Place the table of contents on the contents page. You will notice that page numbers sometimes end up on the next line. The reason is almost always a text frame that is too narrow. Enlarge the frame to the required width, and the title and page number will stay on one line. The dots between the title and page appear automatically as soon as you set up tabs.

Step 9: Set Up Tabs with Fill Characters
The dots between the chapter name and the page number come from the paragraph style. To set this up, open the paragraph style for the level and set up the tabs there. The first tab gets a fill character consisting of a space and a period. The space ensures that the dots don't stick directly to the text or to each other. The second tab gets no fill character and is right-aligned so that all page numbers line up beneath each other.

Step 10: Define the Colors of the Dots and Page Numbers
To make the dots visually recede, you can color them gray using a character style. To do this, create a separate character style for the dots and another one for the page numbers, for example "Pagina Inhaltsverzeichnis". Assign these styles in the tab section of the paragraph styles. Proceed in the same way for Headline 1, so that both levels look consistent.

Step 11: Match the Font Size of the Page Numbers
If the page numbers look larger than the other entries, it is often because no font size is defined in the character style. Set a font size of 8 points in the character style for the page numbers. The numbers will then visually match the titles. Remember to apply this change to your template as well, so that it is retained in future projects.

Step 12: Remove Unwanted Line Breaks After Chapter Names
Sometimes the actual chapter name should appear on the same line after "Chapter 1". However, InDesign generates a line break there. You cannot have this break removed automatically. You have to delete the break characters at these places by hand. It only takes a moment, but it is necessary for each chapter individually.

Step 13: Fix Missing Chapters by Releasing Master Page Objects
If a chapter is missing from the table of contents, the title is often located on the master page of the affected chapter. Objects on master pages are not captured in the table of contents. Open the affected chapter, select the object on the master page, and detach it from the master using the key combination Ctrl + Shift (on a Mac Cmd + Shift). Then update the table of contents, and the chapter will appear.

Step 14: Create the Table of Contents Only at the End
The most important tip at the end: Create the table of contents as late as possible. As long as chapters, headings, or page numbers are still changing, you have to keep readjusting the table of contents. If you generate it only at the end, a click on "Update" is usually enough. Individual corrections, such as a missing entry, are then done in seconds. If, on the other hand, you have to insert all character styles and tabs by hand afterwards, it costs significantly more time. Therefore, use the advanced options from the very beginning.

Summary ??? Creating a Table of Contents for a Complete Book in InDesign
A table of contents for an entire book is created in its own document, which is part of the book file. With the option "Include Book Documents", all paragraph styles of the book are available to you, provided they are named identically in each chapter. Then you define the levels, set up tabs with fill characters and right-aligned page numbers, and design the character styles. At the end, you specifically check line breaks, master page objects, and missing chapters. If you create the table of contents late, the post-processing effort remains low.
FAQ
Question: Why do no paragraph styles from the other chapters appear in the table of contents?Answer: Activate the option "Include Book Documents" in the table of contents dialog box and make sure that all documents are listed in the Book panel.
Question: Why are duplicate paragraph styles displayed in the list?Answer: The styles are named differently in the individual documents. Standardize the names in all chapters, then one entry per style is enough.
Question: Where do the dots between the title and the page number come from?Answer: They are created by a fill character in the tab of the paragraph style. A space followed by a period creates an airy spacing.
Question: Why is the page number on the next line?Answer: The text frame is too narrow for the set tab. Increase the width of the frame, then the page number will stay on the same line.
Question: How do I remove a break between the chapter number and the chapter name?Answer: You have to delete this break manually, as it is not corrected automatically.
Question: Why is a chapter missing from the table of contents?Answer: The title is probably located as an object on the master page. Detach the object with Ctrl + Shift (Mac: Cmd + Shift) and update the table of contents.
Question: When should I create the table of contents?Answer: Ideally at the end of your work, since that way you will only need to make few corrections later.


