

A book with changing chapters needs running heads that adjust themselves. If you change them by hand on every page, this quickly becomes error-prone with dozens of pages. InDesign can take over this work for you. You create the running heads once on the master page, and the software fills them with the appropriate content on every document page.
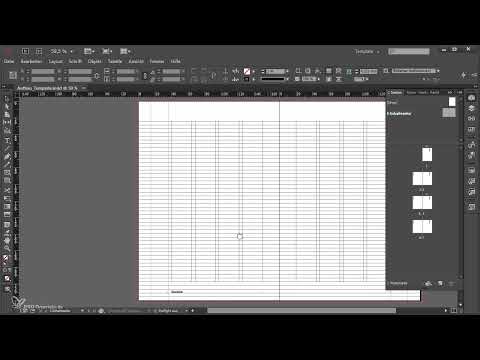
The video is only loaded from YouTube when you play it – data (including your IP address) is then transmitted to YouTube/Google. More in the privacy policy
In this tutorial, you first build a page number on the master page and then create two live running heads. The left running head works via a section marker, the right one via a text variable. Finally, you set up smart text reflow, which helps later with typesetting.
Key Takeaways
Key Takeaways
- Page numbers are special characters (markers) that InDesign updates automatically.
- A paragraph style for the page number and running head protects the formatting from scripts and mass corrections.
- The section marker supplies the chapter name, depending on which section a page is in.
- A text variable pulls content such as the heading directly from the text and updates itself.
- Smart text reflow adjusts the page number, but should be deactivated again after the correction.
Step-by-Step Guide
Creating the Page Number as a Text Frame on the Master Page
In InDesign, the page number is not normal text but a marker. You place it in a text frame, which you later apply to every page via the master page. First, hide the cap-height grid, since you don't need it for this step. Then select the Type tool, zoom in a little closer to the spot where the page number should be, and drag out a text frame there.

Setting the Font, Size, and Color of the Page Number
For the page number, you use the house sans-serif font in the Demi weight at 8 pt. Align the text to the baseline grid so that it fits cleanly into the type area. As the text color, choose 60% black. This way the page number looks subtle and doesn't push itself into the foreground.
Aligning the Page Number Toward the Spine
On facing pages, the page number should be on the outside. On the left page it is therefore set flush left, and on the right page flush right. For this you use the "Align Towards Spine" function. It ensures that both pages are aligned as mirror images relative to the spine.
Inserting the Current Page Number as a Marker
Place the cursor in the text frame and open "Insert Special Character" via "Type". There, under "Markers", you will find the option "Current Page Number". After inserting it, the frame on the master page shows a placeholder, which will later be replaced by the real number on the document pages.
Saving the Formatting as a Paragraph Style
Before you continue, save the page number settings as a new paragraph style, for example under the name "Pagination". This is worthwhile because scripts that delete formatting overrides often affect master pages in particular. With a paragraph style, the formatting is retained even if such a script runs over the document.

Duplicating the Frame to the Right Page
Instead of setting everything up again, you drag the finished frame to the opposite page and duplicate it there. Now you have the page number on both the left and the right. The alignment toward the spine is retained.

Applying the Master Page to Document Pages
Drag the master page in the Pages panel down onto several new document pages. On each of these pages, the frame appears with the correct page number. With that, you have the foundation for pagination ready.

Understanding the Running Head Layout
Before you build the running heads, it's worth taking a look at the client's layout proposal. On the left page is the chapter name, on the right page the respective first-level heading. You adopt this principle in your document. In InDesign there are different approaches for the two sides: on the left you use a section marker, on the right a text variable.

Defining sections in the document
The section marker requires sections. To do this, select the page in the document where a new chapter begins, for example page 5. Open the "Numbering & Section Options" via the "Pages" panel or the context menu with a right-click. There you activate "Start New Section". You can recognize by the small triangle in the Pages panel that a new section begins here. Pages 1 to 4 then form one section, pages 5 to 7 the next.

Placing the section marker in a text frame
The section marker works similarly to a text variable. You place it in a text frame, and depending on which section this frame is in, it picks up the name of the first or the second section. For the running header, you therefore draw a separate text frame on the master page next to the page number. Make it wide enough so that long chapter names also fit in. If the frame is too small, the characters will be heavily compressed.

Formatting the running header on the master page
Position the frame and align it to the baseline grid. On the left side you set the text left-aligned, on the right side right-aligned. Unlike the page number, the running header is not aligned to the gutter. Use the sans-serif font again at 8 pt and 100% black. Then you insert the section marker via "Type," "Insert Special Character," and "Markers." The placeholder "Section" appears on the master page.

Entering chapter names at the section starts
At first you see nothing on the document pages. This is because you still have to enter the chapter name at each section start. To do this, open the Numbering & Section Options for this page and enter the chapter name in the "Section Marker" field. The name then appears on all pages of this section. If you scroll further, you will see the entry "Workflow" on page 2 and page 4, until a new section marker follows on page 5.

Saving the paragraph style for the running header
As with the page number, you save the settings of the running header as a paragraph style. To do this, click on the text and choose "Create New Paragraph Style." All current settings are adopted. Give the style a descriptive name such as "Kolumnentitel."

Storing the paragraph styles in a style group
So that the styles are not accidentally used in the body text later, you create a new style group in the "Paragraph Styles" panel and name it "Layout." Move the styles for the running header and the pagination into it. In the typesetting, you then no longer have to touch these styles.

Building the right running header with a text variable
On the right side you need a separate text frame for the heading. Draw it large enough so that long headings also fit in. Assign the paragraph style "Kolumnentitel" to the frame. This way the formatting will automatically be correct later. Then you open the "Insert Variable" dialog via "Type" and "Text Variables." There you will already find options such as creation date, file name, or last page number. InDesign pulls this content automatically from other sources instead of you typing it in by hand.


Creating a new text variable for the heading
In the dialog, choose the "New" command to create your own text variable. Name it "Kolumnentitel Headline 1." In the lower area you specify on what basis the running header is generated. You can choose a paragraph style or a character style. Since the entire heading is to be adopted, you opt for the paragraph style.


Prepare a paragraph style for the heading
A problem shows up at this point: there is no paragraph style for the heading yet. So create it now, before you insert the variable. Name it "Headline 1" and set the most important properties. In your example, the font size is 15 points. You can refine the style later. Then you insert the text variable. It appears in angle brackets as a placeholder.

Check the running head with a test heading
At first glance at the document pages, nothing happens again, because there is no heading yet. That is normal. So create a heading on a document page and choose the paragraph style "Headline 1". Type "Headline 1" into it as a test. The generated text appears immediately in the running head at the bottom. If you go to the next page and insert a heading there with the "Headline 2" style, it is picked up as well.


Remove the test frames again
Then delete the test frames on the document pages and check whether a section marker is still in the text anywhere. It doesn't belong there. Make sure to remove only the test elements so that your master page stays complete.

Set up Smart Text Reflow
Finally, on the master page you create two text frames and thread them together. They serve to use the "Smart Text Reflow" function. You can find it in the Preferences via Ctrl + K. This function ensures that InDesign automatically creates new pages when there is overset text and deletes superfluous pages again when the text is shorter. This is particularly helpful with long Word documents that you format bit by bit, since the document length then adjusts by itself.

Limit text reflow to the primary text frame
So that InDesign orients itself to the type area, you check "Limit to Primary Text Frame". In this document you work with four columns. Without this setting, the text would run across all four columns, which can lead to unwanted pages. After the first or second round of proofreading, you should deactivate the function again so that no pages are created unnoticed.
With that, your first master page is finished, and the page number as well as the running head automatically carry through on all pages.
Summary ??? Running heads in InDesign: Creating live running heads via the master page
With the page number as a marker, the paragraph style, and the "Layout" style group, you have laid the foundation for a clean layout. The left running head is created via a section marker, which you supply with the name at the start of each chapter. The right running head gets its heading via its own text variable, which is based on the paragraph style. Smart Text Reflow helps you with typesetting work, but should be switched off again after proofreading.
FAQ
Why should I put the page number in a paragraph style?A paragraph style protects the formatting of the page number, even if scripts delete formatting deviations in the document.
Do I have to enter a separate chapter name for each section?Yes, at the start of each section you enter the name via the Numbering & Section Options, since otherwise InDesign doesn't know it.
Why don't I see a running head on the document pages at first?The section marker and the text variable only become visible once section starts have been given names or suitable headings exist.
What happens if I make the text frame for the running head too small?The characters get heavily compressed. So draw the frame large enough so that long names fit in as well.
Why is the running head linked to a paragraph style?The paragraph style ensures that the text variable picks up the entire heading and that the formatting is automatically correct.
When should I deactivate Smart Text Reflow?You should deactivate it after the first or second proofreading round so that no pages are created unnoticed.


