

As soon as the layout is approved, the message comes that the type area should become a bit larger. For a document with 300 pages, this quickly turns into a tedious afternoon if you move every text frame by hand. InDesign can take a large part of this work off your hands, you just need to know where the right settings are and what to watch out for. That is exactly what I will show you in this guide, using a typical correction as an example: The head margin is reduced, and the type area grows by two lines upwards as a result.
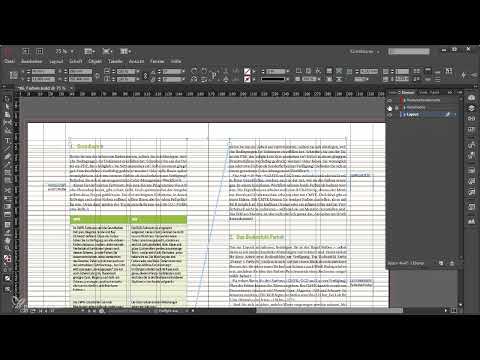
The video is only loaded from YouTube when you play it – data (including your IP address) is then transmitted to YouTube/Google. More in the privacy policy
Key Takeaways
- The layout adjustment in InDesign automatically moves and scales text frames along with it as soon as you change the type area or margins.
- The layout adjustment only works properly if your frames are cleanly snapped to column guides.
- InDesign does not always move the cap height grid and baseline grid along with it. You have to adjust these yourself afterwards or change them via the preferences.
- With the right setting for paragraphs and lines that are kept together, the correction effort stays low.
Step-by-Step Guide
Starting Situation: Reducing the Head Margin and Enlarging the Type Area
Imagine the stakeholders have looked at the pages and decided that the head margin should be smaller. The entire type area thereby moves up by two lines. It is best to make this change on your master pages, because the content pages are controlled from there. You can find the appropriate setting via the Layout menu and there under Margins and Columns.

Calculating the Value
For two lines, you calculate with 12.75 points each, so a total of 2 x 12.75 pt. You subtract this amount from the previous head margin. InDesign calculates such entries directly in the field, so you can simply type in the expression. The margin is thereby reduced and the type area becomes correspondingly larger.
The Problem: The Text Frames Stay Put
When you switch to the content pages after the change, you will notice that the text frames are still in their old position. With 300 pages, it would be tedious to adjust every single frame. The Layout Adjustment function exists for this. You can also find it under Layout, Margins and Columns, at the very bottom of the dialog. Activate the checkbox there.

Activating Layout Adjustment and Applying Values
After you have activated the layout adjustment, you enter the values again, so again -2 x 12.75 pt, and confirm with OK. Then switch to a content page. You will see that the text frames have now moved along with the type area. That is exactly what this function is intended for.

Checking the Result
On the content page you can see that the text frames have indeed adjusted. The layout adjustment thus ensures that text frames automatically follow the type area. Nevertheless, this change has two catches that you should keep in mind. The first shows up in the cap height grid.

Recognizing the First Catch: The Cap Height Grid
Open the Layers palette and take a look at the cap height grid. There you will notice that it has shifted, although it was supposed to stay in the old place. Before you correct it, it is worth understanding the layout adjustment in more detail, because only then can you control it in a targeted way. To do this, undo the last change with Ctrl+Z (on Mac Cmd+Z) and set the type area back to the old value.

Undoing and Taking a Closer Look at the Function
After undoing, you will find the layout adjustment in older InDesign versions directly under Layout. Since the introduction of Liquid Layout, the location has changed. There it is now a palette called Liquid Layout. In the panel menu of this palette you will find the option Layout Adjustment. As long as you are not using Margins and Columns, it is deactivated here. If you click on it, you receive a notice that the Liquid Layout rules will then no longer be used. In this project, that is not a problem.

Understanding the Alignment Range
At the top of the settings, you will find the alignment range. It specifies that frames that are no more than 0.25 mm away from a column guide move together with that guide. This only works reliably if your frames are docked to the column guides with no gap. If that is the case, the setting suits your layout. At the bottom, you can also specify whether graphics or groups may be enlarged.
Turning Off the Second Checkmark: Movable Guides
Here is the second catch. If you have movable guides that are not column guides, these would also be changed. But you don't want that, because your cap height grid should stay the same, even if the type area becomes taller. Therefore, you remove the corresponding checkmark in the layout adjustment settings. After that, you can enter the values again, that is, -2 x 12.75 pt, and confirm with OK.
Manually Adjusting the Cap Height Grid
After confirming, check the cap height grid. It is now where it should be, but it still needs to be adapted to the new type area height. To do this, unlock the guides and select the two upper guides. Then go to Edit and then to Step and Repeat. Set two repetitions, upward. For this, you enter a negative value that corresponds to one line, that is, -12.75 pt. After that, the height of the cap height grid also matches the new type area.

Adjusting the Baseline Grid
When creating the template, you decided to make the baseline grid dependent on the page rather than on the type area. Therefore, you have to change it separately. To do this, open Edit, then Preferences, and select the Grids section. There you can see the current value, in this example 24 mm. Subtract 12.75 pt from it twice. Then confirm the entry.

Checking the Result and Keeping Paragraphs Together
Go back to the layout and check all points: The text frames are adjusted, the baseline grid is correct, and the cap height grid is positioned correctly. To keep the correction effort within limits for changes like these, you should specify in your paragraph styles that related paragraphs and lines are kept together. This prevents headings from becoming separated from their text or paragraphs from breaking awkwardly after an adjustment. With these settings, the effort for future layout changes remains manageable.

Summary – Layout Changes in InDesign: Cleanly Adjusting Type Area, Text Frames, and Grids
A subsequent layout change seems threatening at first glance, but with clean preparation it is quite manageable. You adjust the type area centrally on the master pages, use layout adjustment for the text frames, and then check the cap height grid and baseline grid. Make sure that your frames are docked to column guides and that movable guides do not move along with them. With this approach, changes remain clear and manageable even in large projects.
FAQ
Why don't my text frames move along after the type area change?Layout adjustment is deactivated in the settings under Margins and Columns. Activate it and apply the values again.
Do I always have to adjust the cap height grid by hand?If movable guides are deactivated, the cap height grid stays in place. You then have to adjust it to the new type area height using Step and Repeat.
Where do I find layout adjustment in newer InDesign versions?It is located in the Liquid Layout panel in the panel menu. If it is deactivated there, you must first check the settings for Margins and Columns.
What does the alignment range of 0.25 mm do?Frames that are no more than 0.25 mm away from a column guide are moved together with that guide during layout adjustment.


