If you regularly work with Premiere Pro and create content for different target audiences, you know how important subtitles and transcriptions are. Not only for accessibility but also for the discoverability of your videos. Fortunately, Adobe has integrated some very helpful features for automating transcription in the latest version of Premiere Pro CC. This guide not only provides you with an overview of the new features but also walks you step by step through the process of automatically transcribing in Premiere Pro CC.
Key Insights
- Premiere Pro CC allows automatic transcription of audio to text.
- Thanks to cloud technology, subtitles can be created in up to 13 languages.
- The transcription can be customized with a variety of settings.
- Subtitles are easy to edit and allow for quick adjustments to your needs.
Step-by-Step Guide
To utilize automatic transcription in Premiere Pro CC, follow this clear step-by-step guide:
Step 1: Locate the User Interface and Subtitle Options
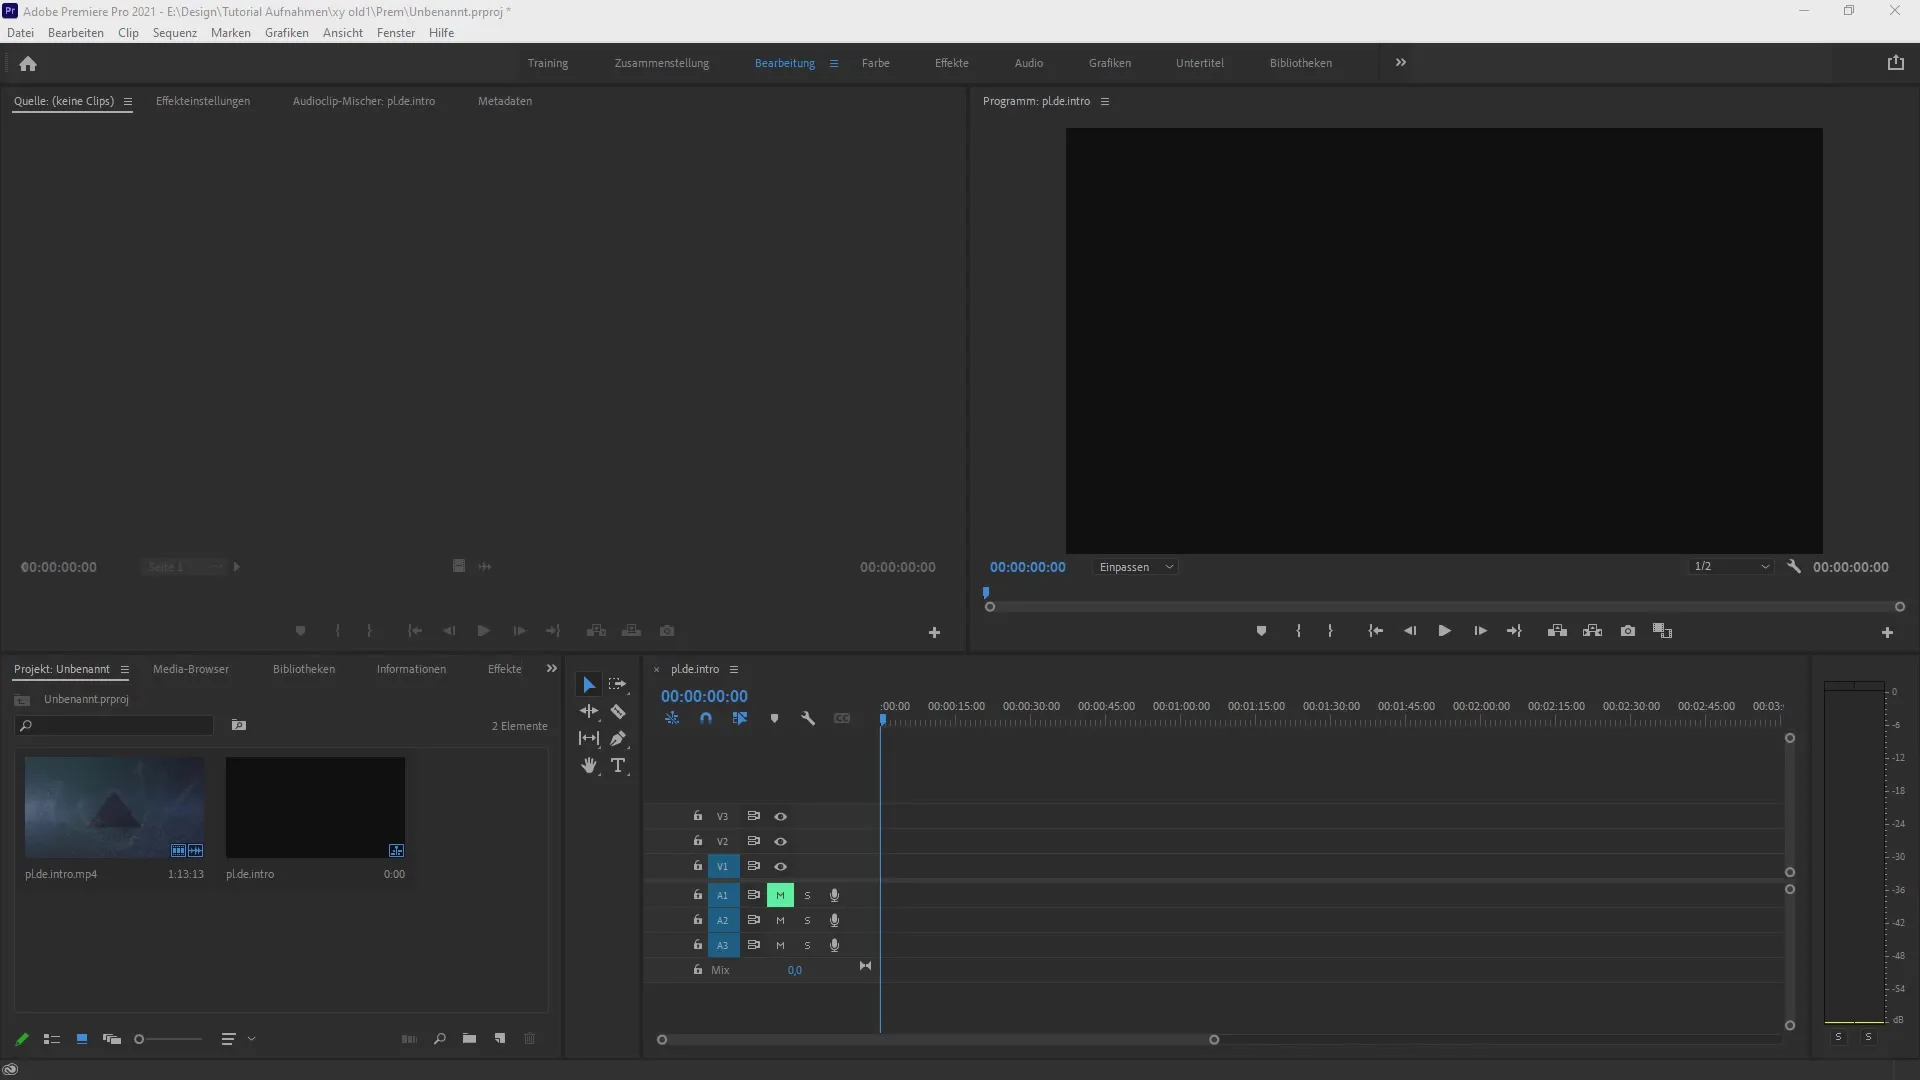
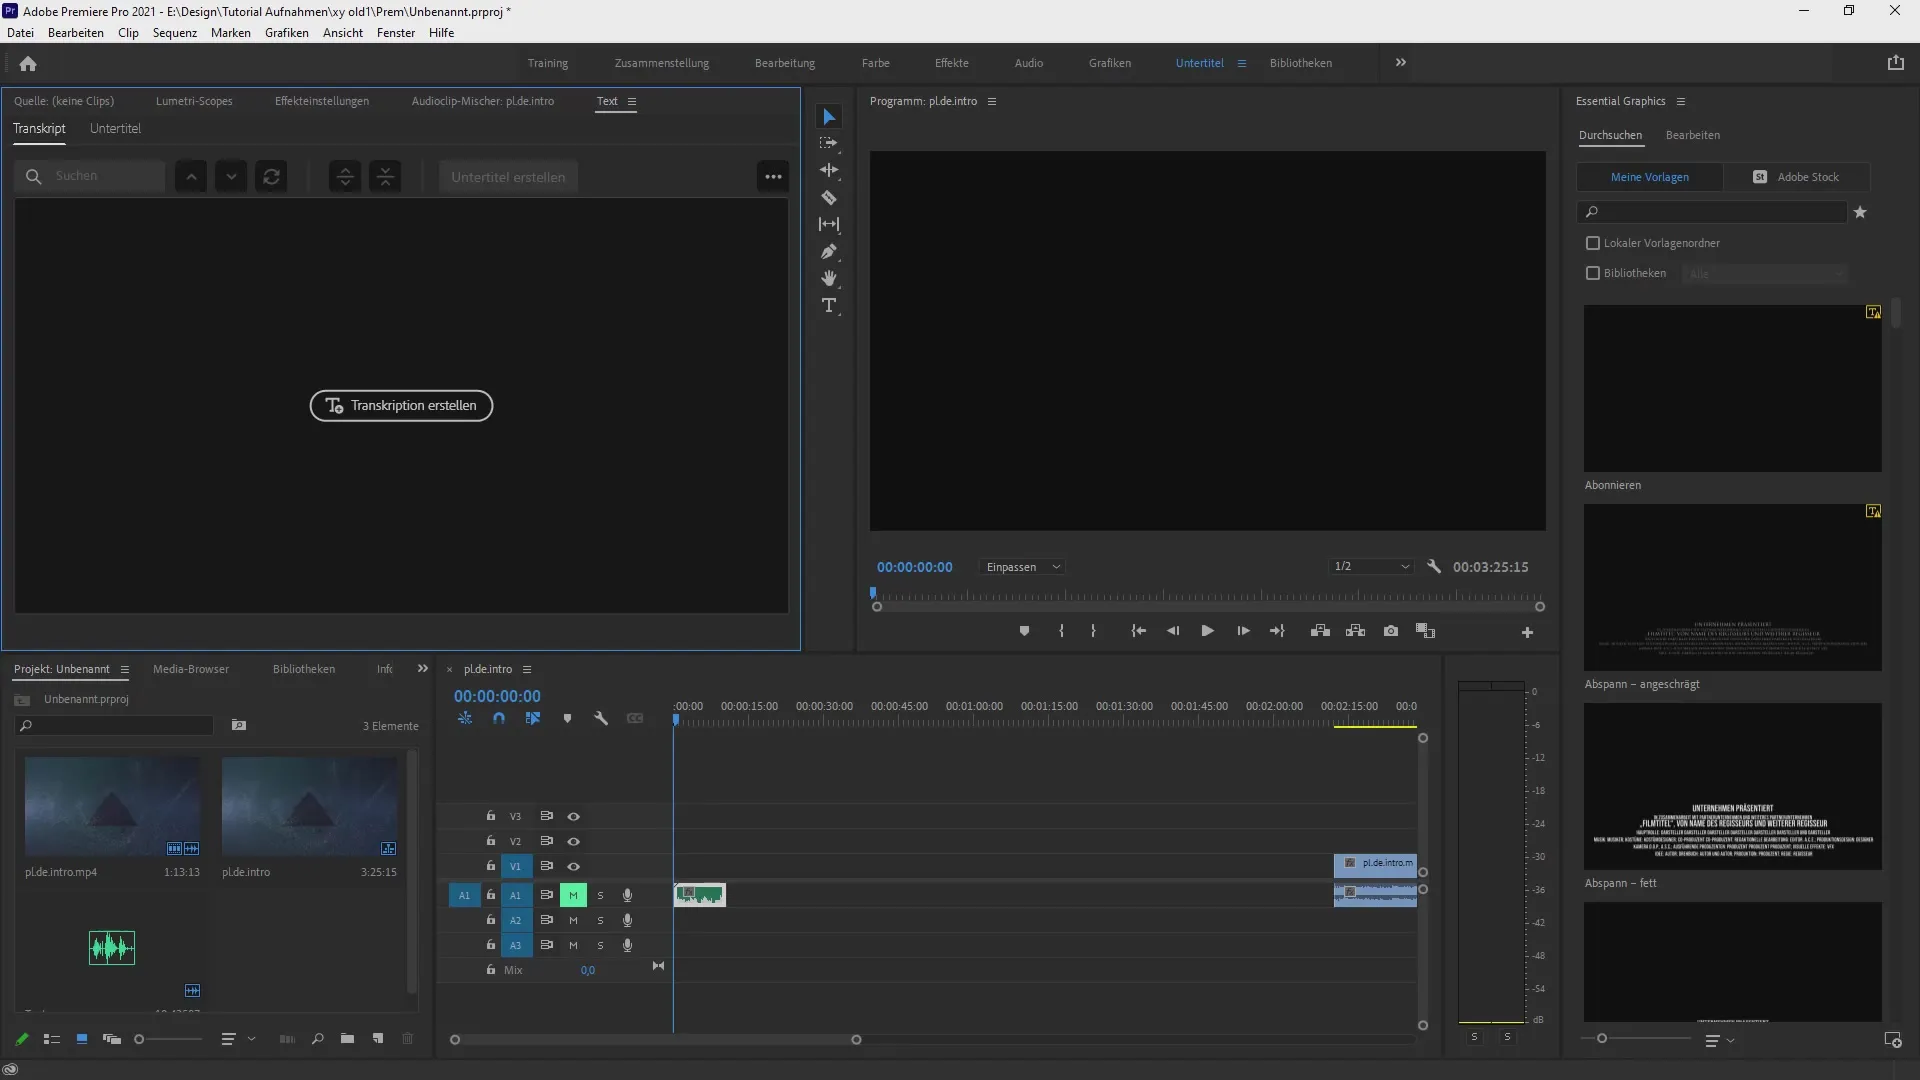
Open your project in Premiere Pro and familiarize yourself with the user interface. You can find the subtitle options in the top menu under "Subtitles." If this bar is not visible, you can activate it through the "Window" menu and then "Workspaces." Here, you can access the subtitle workspaces to utilize the functionality.

Step 2: Access Transcription Settings
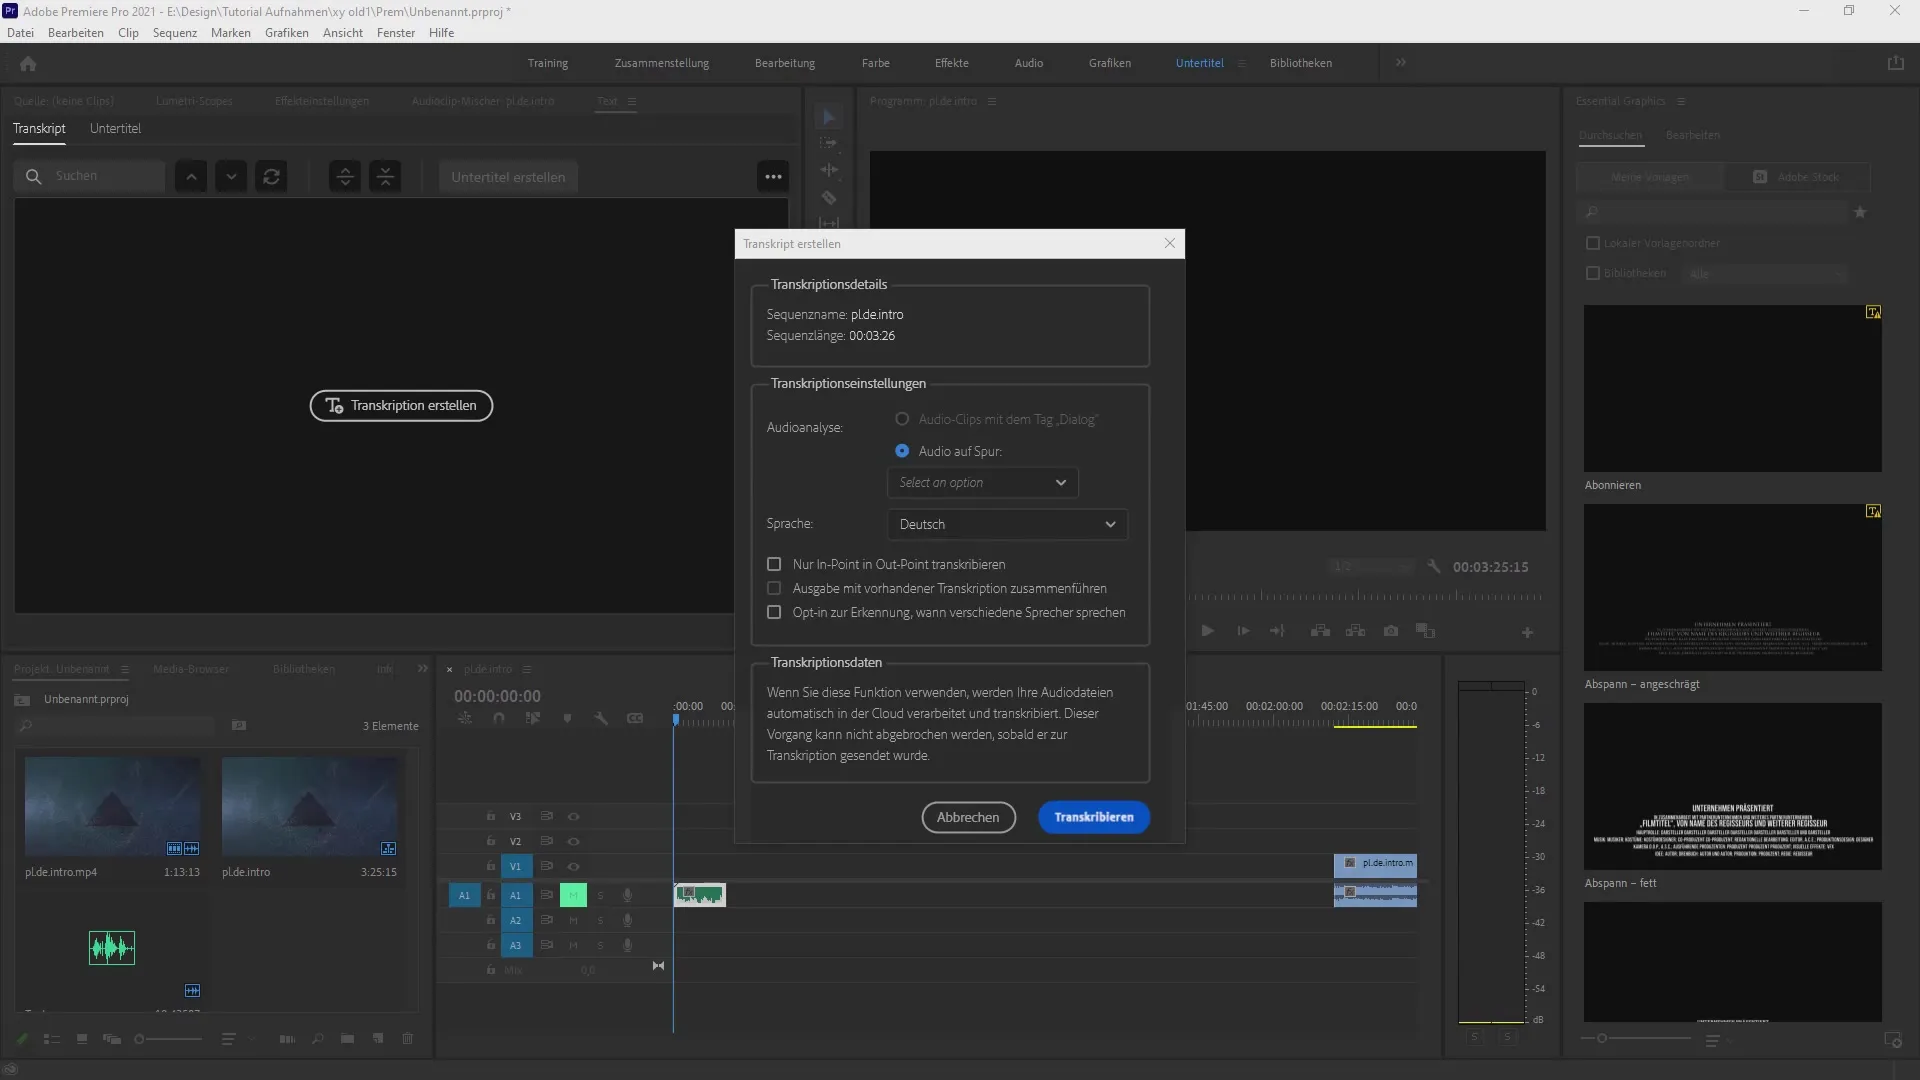
In the top menu, go to the "Transcript" option. This will open the transcript window where you can make various settings. Choose the language for the transcription. In this case, you should set it to German if your audio is in German.

Step 3: Start Transcription
Once you have chosen your language, you have the option to make additional settings, such as selecting in and out points or identifying different speakers. When everything is set, click "Transcribe." Premiere Pro will analyze the audio and create a transcription .

Step 4: Check the Transcription
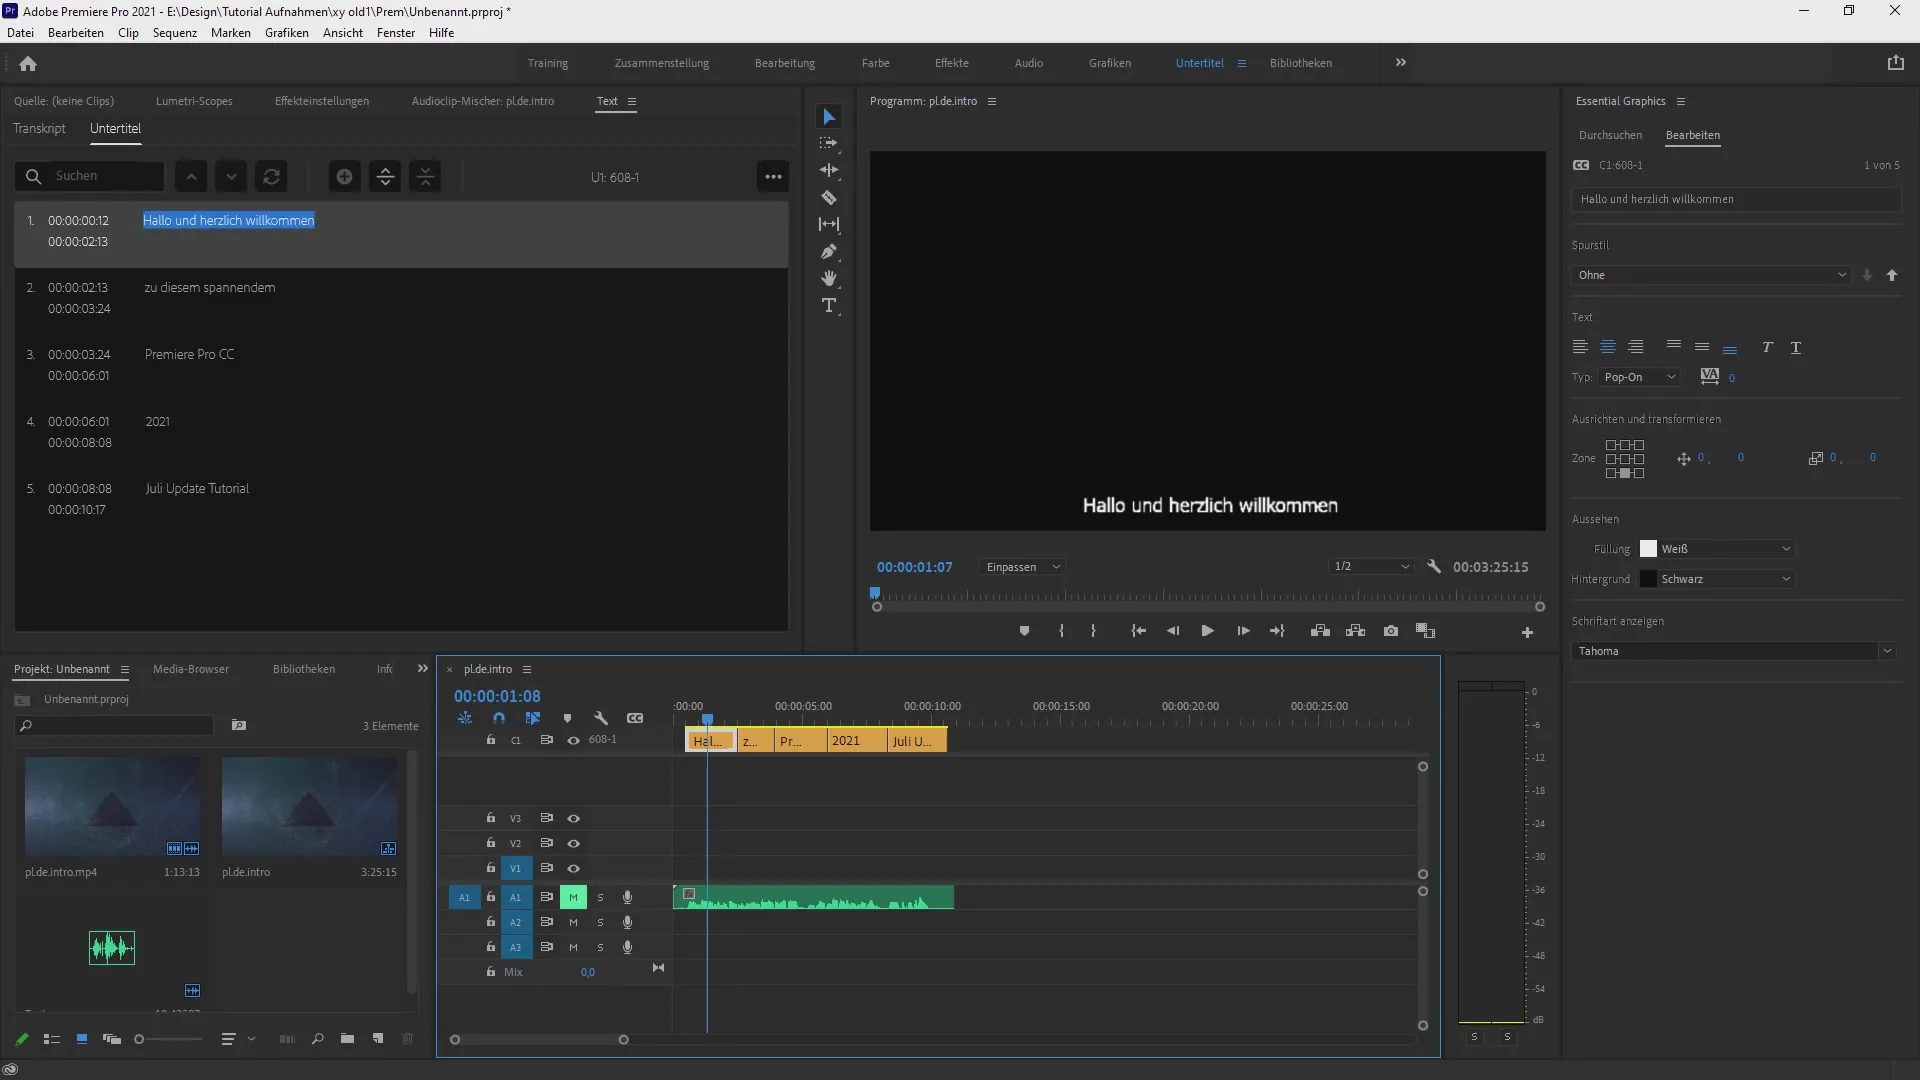
Once the transcription is complete, the text will appear in the subtitle area. Check the transcription for accuracy. You can navigate through the video to ensure that everything is rendered correctly. Pay attention to small errors or inaccuracies that you may want to quickly adjust.

Step 5: Edit Subtitles
To adjust the subtitles, you can select and change individual text boxes. It is also convenient to remove unwanted pauses or errors. Use the CTRL key to select multiple areas and merge them if necessary. This ensures a smoother reading flow in the video.
Step 6: Adjust Style and Formatting
When you are satisfied with the text, you can adjust the visual design of your subtitles under "Essential Graphics." Here, you have options to change fonts, add backgrounds, and adjust colors. This way, your text perfectly matches the style of your video.
Step 7: Export Subtitles
After all adjustments are made, export your subtitles. To do this, click on the three dots in the subtitle area and choose the desired export option, such as an SRT file or a text file. This is important to ensure that you can further process the files accordingly.
Summary - Automatic Transcription in Premiere Pro CC: Explained Step by Step
You have now learned how to use automatic transcription in Premiere Pro CC and how to benefit from the new features. The cloud-based technology not only allows you to save time but also makes your videos accessible to a broader audience. By following the steps in this guide, you are well-equipped to create and customize subtitles easily and effectively.
Frequently Asked Questions
How do you start the transcription in Premiere Pro?Select the "Transcript" menu and click on "Transcribe."
Can I edit the created subtitles?Yes, you can adjust the subtitles in the subtitle area as needed.
Which languages are supported?Premiere Pro allows transcription in up to 13 different languages.
How do I export my subtitles?Use the export function in the subtitle area to save your file as an SRT or text file.
Is there a way to distinguish speakers?Yes, you can enable speaker recognition to identify different speakers.


