If you add subtitles to videos, you know how important it is for them to be easily readable and visually appealing. With the latest updates of Premiere Pro CC in July 2021, you can now not only visually customize your subtitles but also create, save, export, and use global styles in other projects. Here you will learn how to effectively utilize these features to give your subtitles a professional look and feel.
Key Insights
You will learn how to style subtitles, how to save these styles, and use them in other projects. Additionally, various customization options will be presented to optimize the readability and design of your subtitles.
Step-by-Step Guide
First, you should open Premiere Pro CC and load your project. If you haven’t created any subtitles yet, you can do so now or work on an existing project.
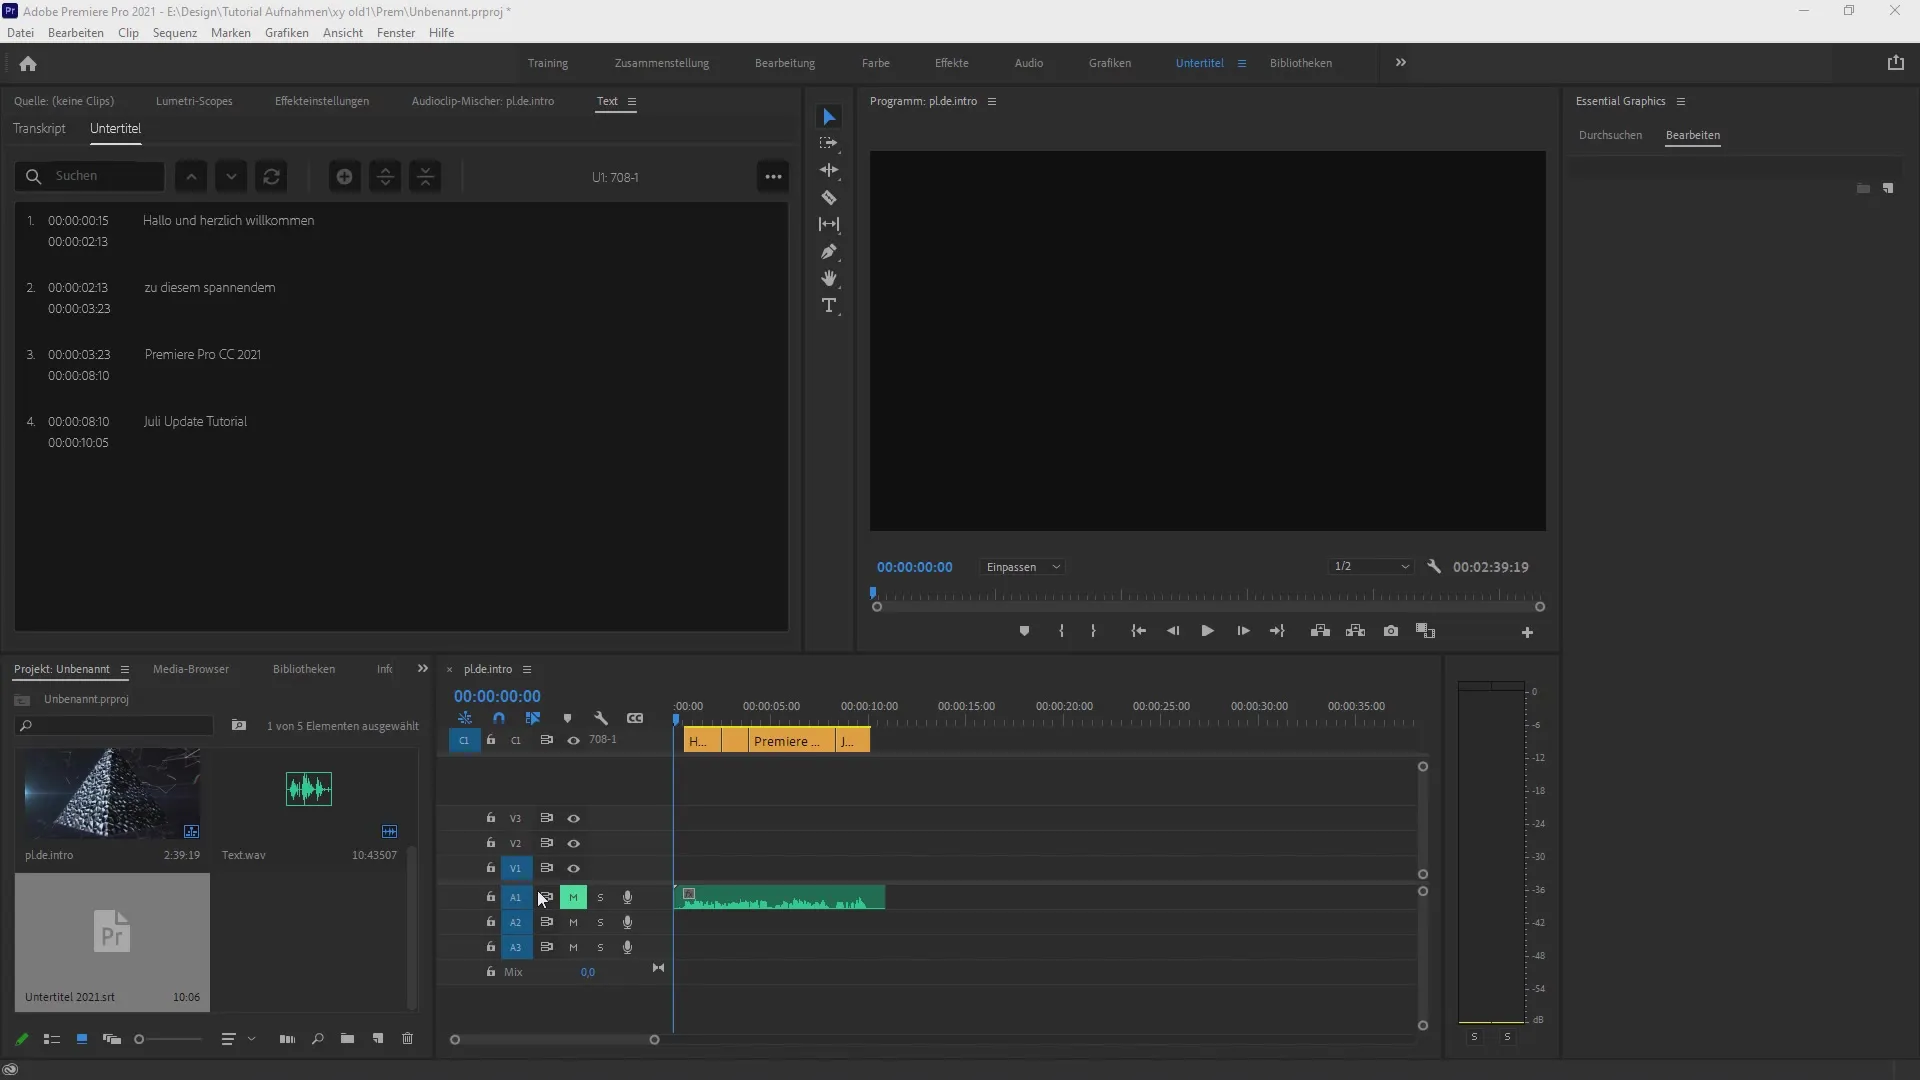
Once you have opened your project, take a look at the subtitles you have created. You can now adjust the readability, font size, and position of the subtitles. Start by selecting your text to make the corresponding adjustments in the menu.
You go to the "Essential Graphics" tab for this. Once you have selected the subtitles, all customization options will be available here. Use the interface to format the text – from font to size to alignment.
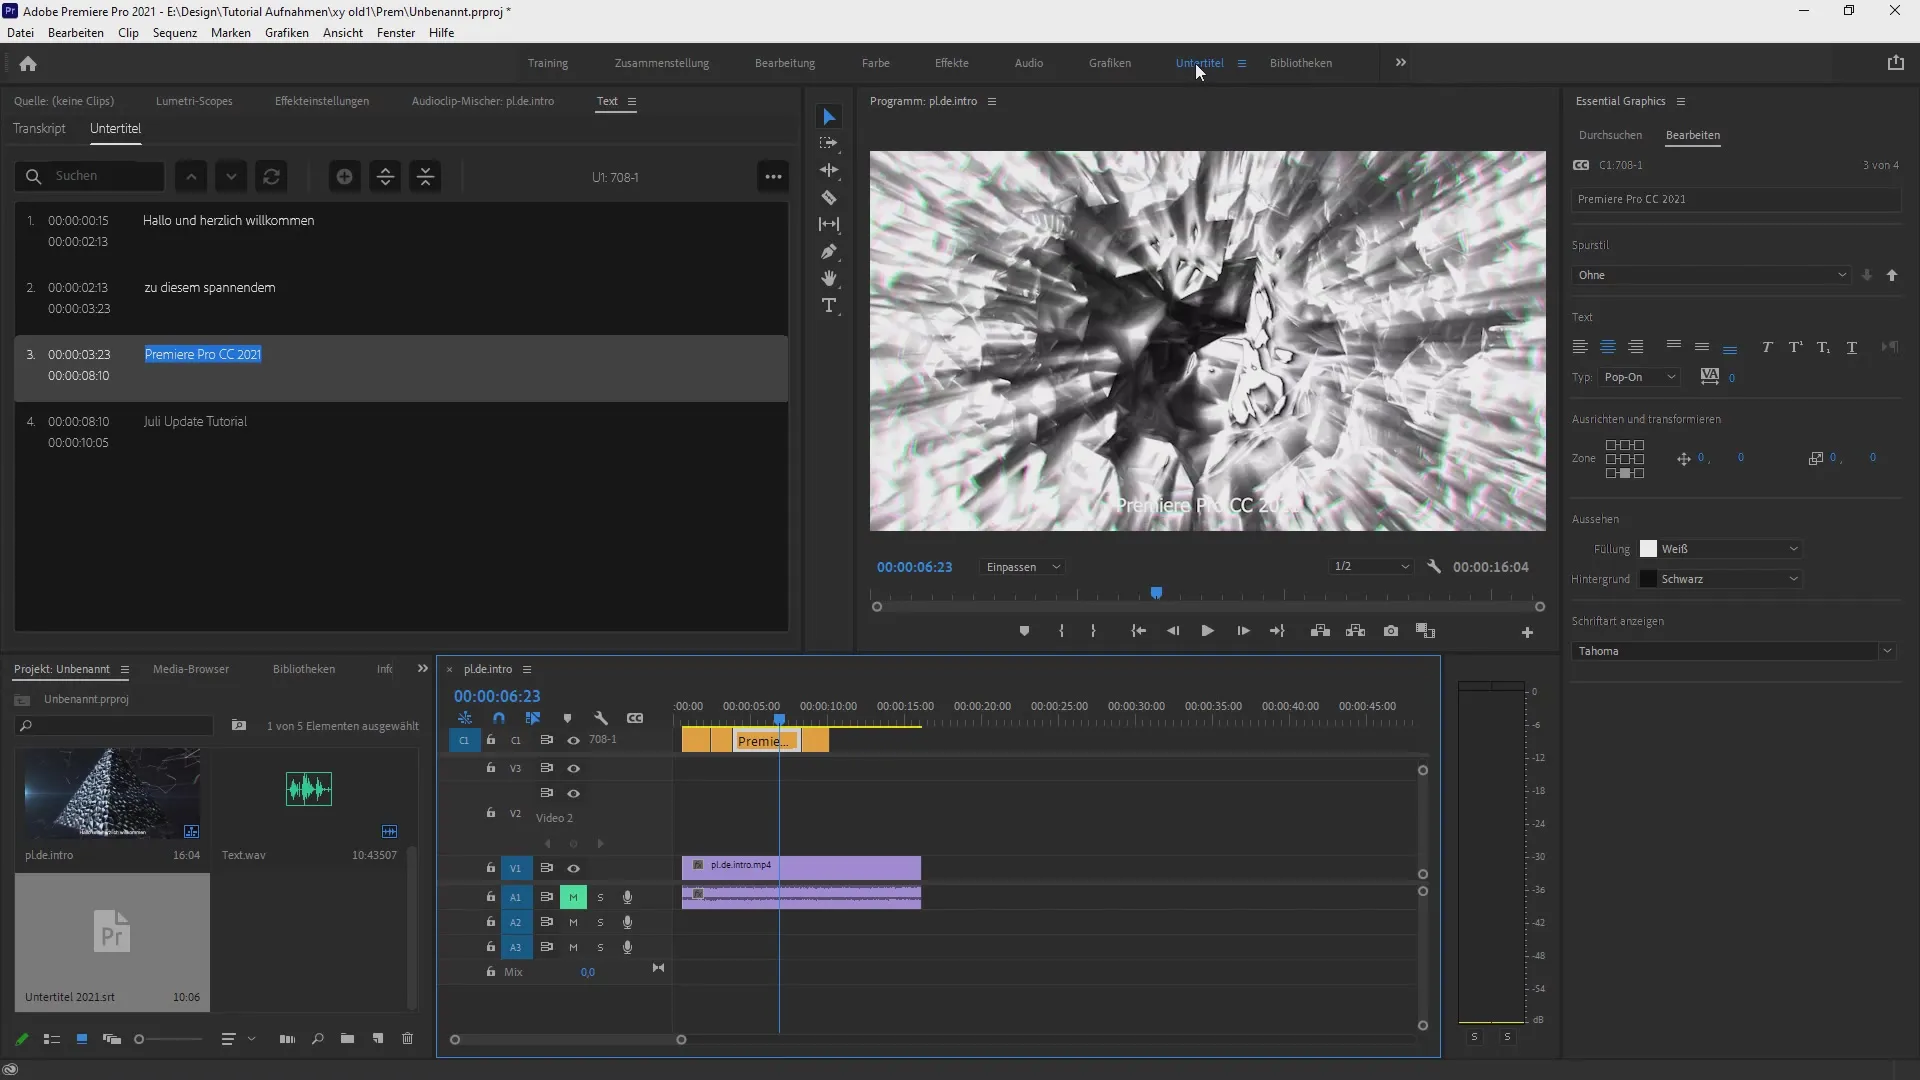
An important step is aligning the text. You can align your text left, center, or right. When you double-click on your subtitle, a box will open where you can position the text as needed.
After alignment, you also have the option to stylistically modify the text. You can present it in italics, change the font size, or even add underlines. Try out different options to find what looks best for your project.
If you are satisfied with the visual style of your text, you can create a global style. To do this, go to the dropdown arrow for styles and select "Create Style." This allows you to name this style and reuse it later.
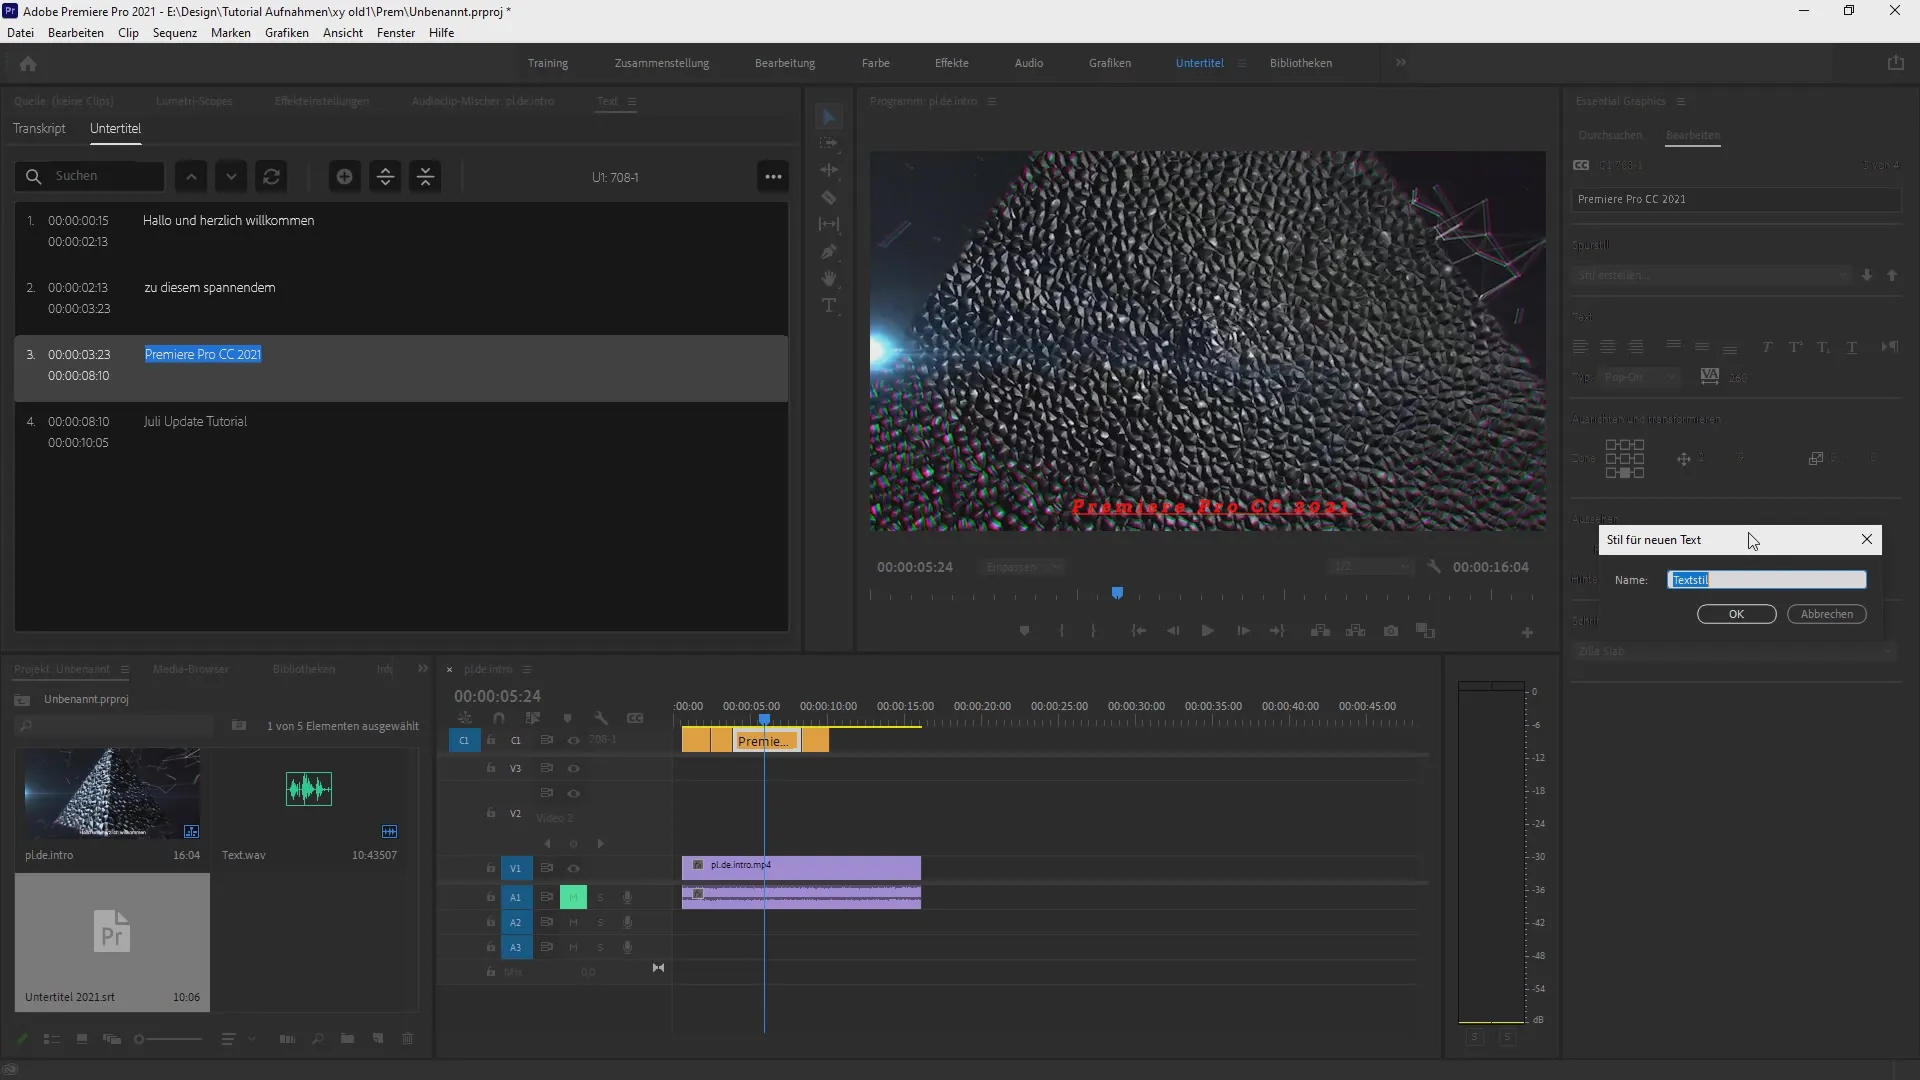
Don’t be afraid to be creative. Choose fonts and colors that give your video a consistent look. If you are not satisfied with your chosen style, you can make adjustments at any time or change the style.
To apply your styles to other subtitle tracks, select the required subtitle tracks and click on the style attribute shift arrow. This shifts the style attributes to all selected subtitles and ensures that your chosen style looks neat everywhere.
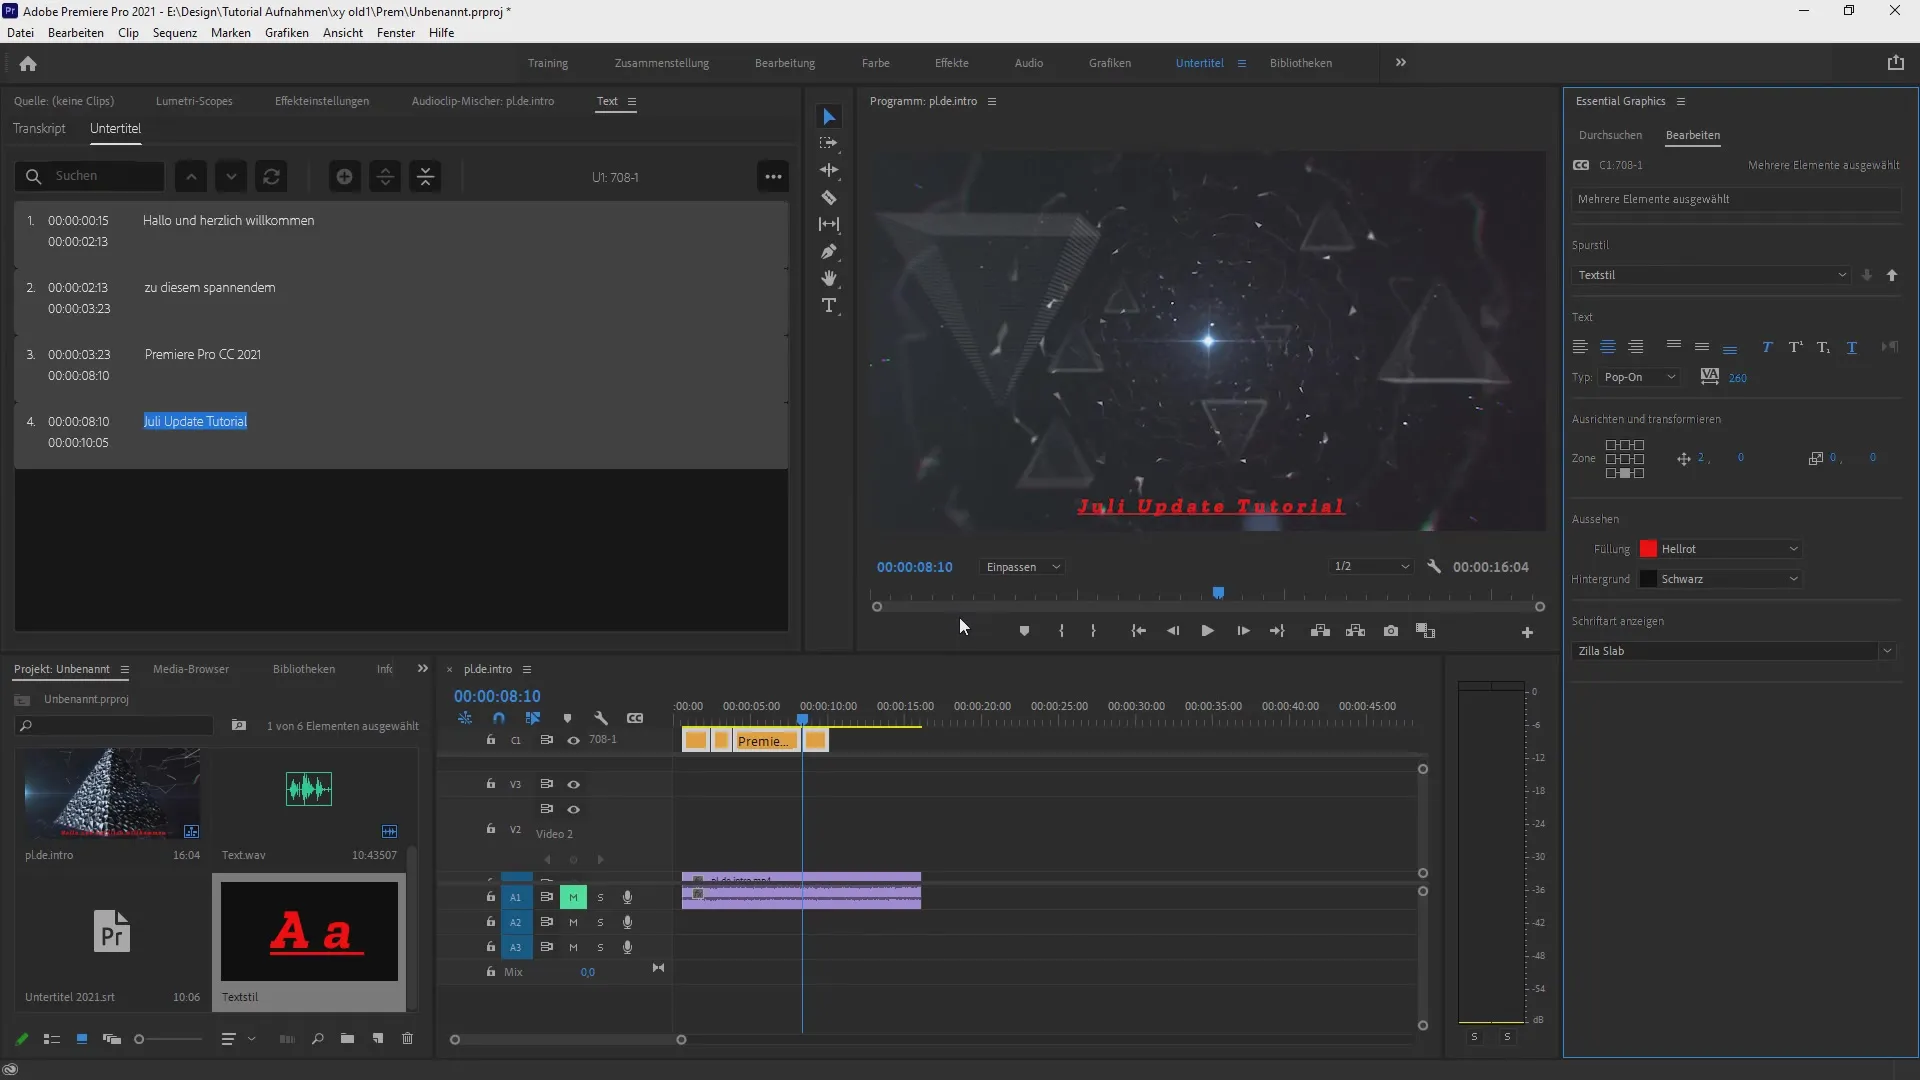
Another useful feature is the ability to export your text style. Right-click on your style in the browser and select "Export." This allows you to import it into other projects and ensures that you don’t have to repeat your hard work.
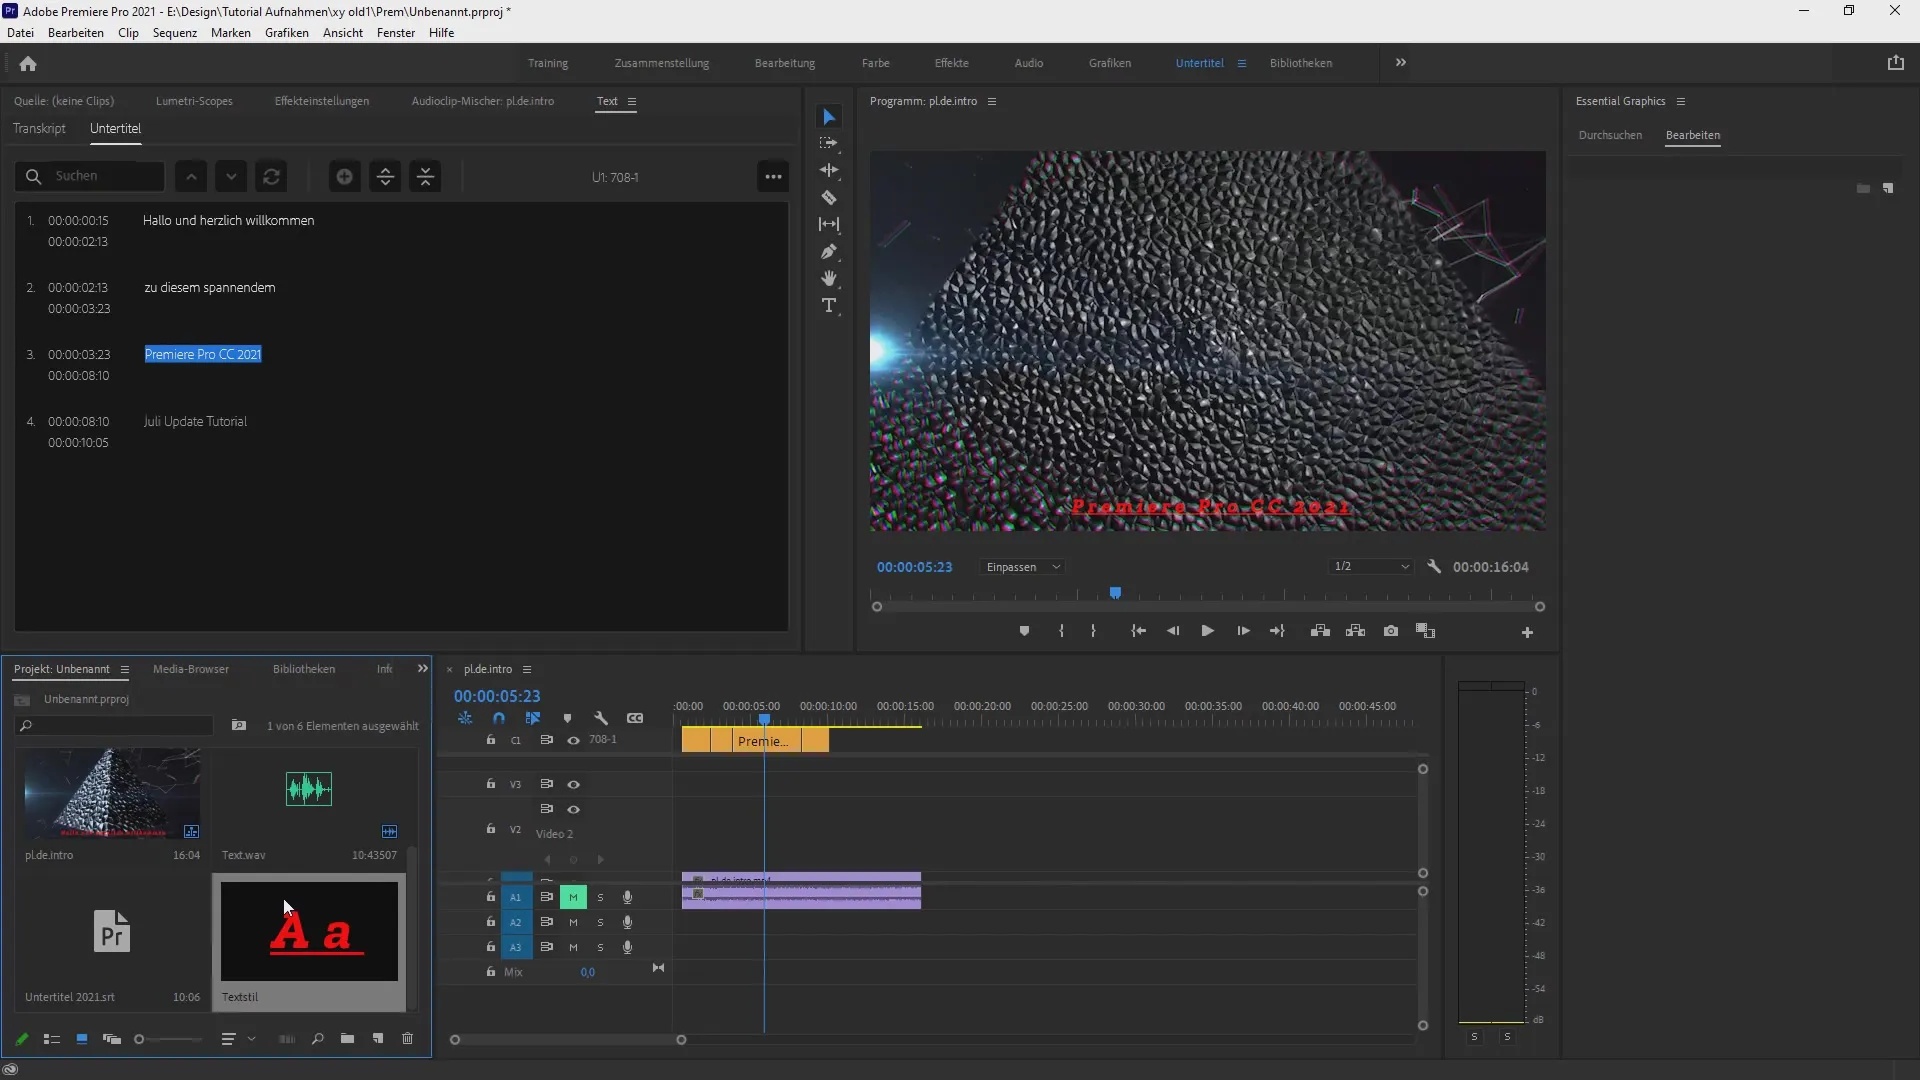
By exporting styles, you can easily reuse recurring design elements in future projects, saving you time and effort.
This entire process shows you how to effectively style subtitles, save them, and make them available for other projects, so you are always ready to make your videos look professional.
Summary – Customizing Subtitles with Styles in Premiere Pro CC
In this guide, you learned how to customize subtitles in Premiere Pro CC to make them visually more appealing. You now know how to create global styles, apply them to different subtitles, and export styles between projects. With these skills, you can significantly enhance the quality of your videos and achieve impressive results.
Frequently Asked Questions
How do I create subtitles in Premiere Pro CC?You can create subtitles directly in the program by selecting the subtitle option from the menu.
Can I save styles for subtitles?Yes, you can create and save styles to use them later in other projects.
What fonts can I use for subtitles?You can choose from a variety of fonts and styles available in Premiere Pro.
Is there a way to export my styles?Yes, you can export your styles and import them into other projects for use there.
Can I customize the colors of my subtitles?Yes, you can customize the colors of your subtitles as desired to optimize readability.


