

Imagine there is only a single cube in your scene, and you still want to know what the final surface will look like. This is exactly where this tutorial begins. You subdivide a cube, edit it with extrusion tools, and then place it into a Greebler object. This turns a simple shape into a base that already reveals the character of a hangar scene.
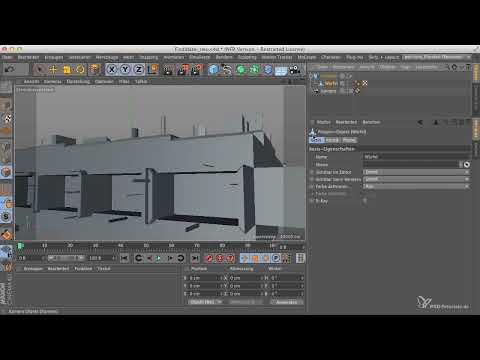
The video is only loaded from YouTube when you play it – data (including your IP address) is then transmitted to YouTube/Google. More in the privacy policy
For this you need Cinema 4D with the Greebler plugin installed. The work follows a clear sequence: first prepare the base object, then select and extrude faces, and afterwards fine-tune the Greebler values. Pay particular attention to the Alt key, as it accompanies you through almost all the steps.
Key Takeaways
- A base object designed early on quickly reveals the direction in which the scene is developing.
- The subdivision of the cube determines how precisely you can later select and extrude faces.
- With the Alt key held down, values change only in tenth-unit steps, which prevents gross errors.
- Before greebling, you should deselect everything, otherwise later changes will only affect the selected faces.
- The Greebler plugin reacts strongly to extrusion and bevel, so small values are usually the better choice.
Step-by-Step Guide
Step 1: Subdivide the Cube
Start with the cube you created in your scene. Increase the segments in the X and Z directions to 12 each. Leave the segments in the Y direction at 1, because the four hangar openings only need a finer subdivision across the surface. More subdivisions create the foundation for many base faces that you can edit later.

Step 2: Convert to a Polygon Object
Convert the cube into a polygon object using the Convert function. Then switch to Polygon editing mode. Only then can you select individual faces that are later meant to become openings. You can switch off the camera during this phase so that you can concentrate on the object undisturbed.

Step 3: Select Four Faces
Move in close to the camera and find the spot on the front where the four hangar openings are to be created. Select the faces with the Live Selection tool. With this method, selections go quickly, and you keep an overview of the areas you are currently marking.

Step 4: Extrude Inner
Call up the Extrude Inner tool using the shortcut M, W. Alternatively, you can find it in the menu under Create Mesh. Drag the selected faces inward in the viewport until a sensible wall thickness is created. If you want to set the values more precisely, use the input fields in the Attribute Manager.

Step 5: Refine the Wall Thickness with the Alt Key
Hold down the Alt key while adjusting the values. This makes the values jump only in tenth-unit steps instead of whole steps. The goal is a realistic wall thickness without building a gigantic hangar. It is about several small openings, so the extrusions should turn out rather restrained. You do not need to preserve the groups, as this brings no advantage in this case. You can select or deselect them at any time.

Step 6: Extrude Backward
Next, activate the Extrude tool using the shortcut M, T. Now drag the faces backward, that is, in the opposite direction to your first extrusion. Make sure you are working in the right direction, because the depth later determines the space in the hangar. In the tutorial, the values first end up at about -3 and are then increased to roughly -17 to -20 so that enough room is created.

Step 7: Deselect
Before you continue working, be sure to deselect all selections. Otherwise, every later edit will only affect the selected surfaces, and you will no longer see them properly. The problem occurs quickly and is confusing. A quick look at the viewport shows you whether anything is still selected.

Step 8: Create the Greebler Object
Load the Greebler plugin via the Plugins menu and place it in your scene. Then drag your edited cube into the Greebler object so that it is used as the base. Afterwards, switch the camera back on to see how the character of the surface changes. The base often looks overloaded right away, and that is exactly what the following adjustments are for.

Step 9: Dose the Base Extrusion
The base extrusion currently produces elevations that are too strong. Therefore, first set the maximum and minimum values to zero. Hold down the Alt key while clicking and then work your way up step by step. In the tutorial, the maximum value ends up at 0.5 and the minimum value at 0.1. These values are only a guideline; you can freely adjust them to your scene.

Step 10: Set the Bevel Carefully
Also set the bevel to zero at first and then increase it gently. In the tutorial, the value is about 0.2. With this bevel, the edges look softer without the shape losing its character. Feel free to play with the values, because what matters is a coherent overall impression and not exact numbers.

Step 11: Adjust the Heights of the Stock Greebler
The Stock Greebler initially produces clunky blocks reminiscent of building blocks. Therefore, set the height to zero and slowly feel your way upward with the Alt key held down. In the tutorial, a value of about 0.1 to 1 turns out to be good. The offset as well as the maximum and minimum height can also be adjusted. One third of the original height is often enough to make the image calmer.

Step 12: Increase the Number of Greebles
The scene still looks a bit sparse. Therefore, increase the value for the maximum number of greebles per polygon from 1 to 10. The result becomes noticeably livelier, but it also brings additional objects that you have to control in the next step.

Step 13: Control Shapes and Frequencies
Open the settings for the shapes. Reduce the tubes to about 30 percent and the cylinders to around 10 percent. For the cylinders in the foreground, you can also choose 0 percent so that fewer round shapes appear. The angular shapes are often more appealing because they fit the hangar aesthetic better. If you would rather keep round elements, you can set the cylinders to 100 percent and reduce the hexagons to 33 percent. It is also worth taking a look at the Random Seed, with which you can try out different arrangements.

Step 14: Evaluate the Result
Activate the camera again and assess the result. After just a few minutes you can recognize the character of the scene, even though lighting and materials are still missing. You can return to earlier steps at any time and readjust values until the base matches your vision.

Summary ??? Cinema 4D Basics of Greebling: Hangar Scene Step by Step
You have subdivided a simple cube, designed four hangar openings using the Inner Extrude and Extrude tools, and then placed the object into a Greebler object. The Alt key helped you set values precisely, and the Greebler settings gave the base its character. With this preparatory work, you get an early feeling for how your scene will look later.
FAQ
Why do the Y segments stay at 1?In the tutorial, the four hangar openings only need a finer subdivision in the X and Z directions, so one segment is enough in height.
Why should I deselect all selections before greebling?Without deselecting, all later edits only affect the selected surfaces, and you can easily overlook that nothing is happening elsewhere anymore.
What is the Alt key used for with the values?With the Alt key held down, values change only in tenth steps, so you can work more finely and carefully.
Do I have to adopt the values from the tutorial exactly?No, the values are guideline values. A coherent overall impression is what matters, so you are free to experiment.
What happens if the groups are kept?The tutorial advises against it, as the groups can make editing the individual openings unnecessarily difficult.

