

Glass in a 3D scene often looks convincing only once the edges are right. Without them, the object quickly looks like a milky film. In this tutorial, I show you in Cinema 4D how to build a realistic glass material with just a few steps, set the refractive index correctly, and create clean, high-contrast edges with the Fresnel effect. At the end, you apply the principle to a filled wine glass and learn how to fix typical display errors at the glass edge.
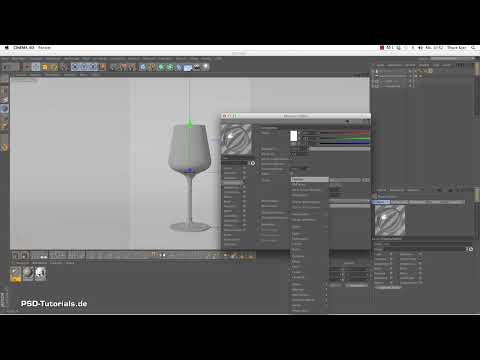
The video is only loaded from YouTube when you play it – data (including your IP address) is then transmitted to YouTube/Google. More in the privacy policy
The starting scene is a cyclorama (infinity cove) with an HDRI sky and three light sources: a main light from the left, a fill light from the front, and a second fill light for the background. The glass stands in the center in front of a frontally aligned camera.

Key Takeaways
Key Takeaways
- For glass, you usually need neither color nor specular highlight. Both can be disabled.
- The Transparency channel controls most of the glass look. A refractive index of about 1.4 to 1.6 is a good starting point.
- The Fresnel effect makes the edges appear darker and more clearly defined. Without it, the edges look too bright.
- Reflection and the brightness of the transparency influence each other. Only when the brightness is reduced does the reflection become clearly visible.
- A filled glass is created using a duplicated, closed spline with hard interpolations. The liquid gets its own material with a different refractive index.
- If the liquid lies exactly on the inner edge of the glass, artifacts appear. Slightly shifting the points into the glass body fixes the problem.
Step-by-Step Guide
Creating and Naming a New Material
To create a new material, simply double-click in the Material Manager. Cinema 4D immediately creates an empty material. Then open it with a double-click and assign a descriptive name such as "Glass" in the name field at the top. That way you keep an overview when several materials are in the scene later.

Disabling Unnecessary Channels
For uncolored glass, you need neither the Color nor the Specular channel. Disable both channels. The specular highlight in Cinema 4D usually looks artificial on glass and disturbs the realistic appearance. Color stays switched off as long as you don't want to create tinted glass.

Activating Transparency
Next, activate the Transparency channel. In the preview image you can immediately see that the material is completely see-through, since all other channels are disabled. That is exactly the starting point. However, glass is never just transparent, it also refracts light. You control this effect via the refractive index.
Setting the Refractive Index
A pure glass body without refraction looks unnatural. If you look up the refractive index of glass, you will usually find values between 1.4 and 1.6. The exact value depends on the material; acrylic glass, for example, deviates from this. For glasses, I like to work with 1.6. Feel free to try different values yourself and choose the one that looks most coherent for your scene.

Applying the Material to the Object
Drag and drop the material onto your glass object. With the region render in the viewport, you can directly check how the glass looks in the light. The look is already quite glass-like, but you notice that the edges are clearly too bright.

Using the Fresnel Effect
The Fresnel effect solves the actual problem of the bright edges. In principle, it is a gradient that determines where the material reflects strongly and where it stays transparent. To do this, click in the texture field in the Transparency channel and select the Fresnel shader. Without further adjustment, however, the material looks less like glass again. That is normal, because the gradient still has to be matched to the refraction.

Enable Physical Refraction
In the Fresnel area, you will find an option that lets you control refraction physically. This feature was not available in older versions. Enable it and enter the refractive index here. You can use a different value than in the transparency area further up. Here too, the rule applies: try out which value looks visually convincing.

Invert the Gradient
If you check the Invert box, the gradient is reversed. The material then becomes darker in the edge areas and lighter in the center. Delete the texture for a moment to see the original look. Then enable it again and keep an eye on how the dark edge area behaves. This is exactly the typical Fresnel gradient: where the glass is angled obliquely to the camera, it becomes more opaque and the edges become clearly visible.
Check and Refine the Edges
In the preview region, you can now clearly see how the glass edges stand out. The glass appears somewhat darker overall, but more clearly defined. If this is too strong for you, reduce the mix strength of the Fresnel effect. The edge area will then be less dark. With a value of about 50, you often achieve a good compromise.

Variations via the Refractive Index
Not every glass shape tolerates the same value. Therefore, test different refractive indices, such as 1.2, and compare the result in the preview region. With a lower value, the glass often looks softer. If you like a variant, keep it and leave it as it is.

Enable Reflection
It is striking that a reflection already appears even though you have not yet enabled the Reflection channel. This is due to the entered refractive index, which automatically generates a reflection. You can still additionally enable the Reflection channel to control the reflection in a targeted way. However, its effect is slight as long as the transparency is high.

Reduce the Brightness of the Transparency
The reflection only really comes into its own when you lower the brightness of the Transparency channel. At 100 percent brightness, the reflection is barely noticeable. If you reduce the value, the glass becomes darker, and the reflection stands out clearly. In this way, you can balance reflection and transparency against each other.

Fill the Wine Glass with Contents
For the wine glass, duplicate the glass object with Command C and Command V. Deactivate the original so that you can work with the copy. Switch to the front view and to point mode. With Command A, you display the points of the spline. Then use the Knife tool to make a cut at the desired fill height and delete the points below it. The spline is then open, so you have to close it. To do this, make another cut, select the topmost point, and set it to the zero point of the height. Transfer the Y value to the opposite point. Set the interpolation of the affected points to Hard, since they do not need handles. Finally, use the Chamfer command to add a slight rounding to the upper area.

Create a Material for the Wine
For the liquid, you can use the glass material as a basis, since the setup is very similar. For red wine, I researched a refractive index of about 1.3. Additionally enable the Color channel and choose a dark red. If you reduce the transparency, the Color channel has a stronger effect. Also reduce the mix strength of the Fresnel effect, then the liquid becomes less transparent and looks richer.

Test Rendering and Fixing Artifacts
For a quick test, first render only a region. Artifacts are often noticeable here. They occur when the liquid lies exactly on the inner edge of the glass. This also happens in reality, but in the 3D program it is seen as an error. Select the affected points of the wine spline and move them minimally into the glass body. Repeat this at the lower edge. Then render again; the artifacts should have disappeared.

Rendering the Final Result
For the final image, you set the antialiasing to High or Best and render the entire scene. Now your wine glass looks cleanly edged, with clear edges, believable refraction, and a colored liquid.


Summary ??? Creating Realistic Glass Material in Cinema 4D
With the right setup, glass in Cinema 4D is created from just a few channels. You deactivate Color and Specular, activate Transparency, and set a suitable refraction index. The Fresnel effect with an inverted gradient gives the edges contrast, and you control the reflection via the brightness of the Transparency. For a filled wine glass, you duplicate the glass object, cut out a liquid from the spline, assign a separate material with color, and let the edges blend cleanly. Try out the values in your own scene, because every glass object requires a bit of fine-tuning.
FAQ
Which refraction index should I use for glass?For most glass, the value is between 1.4 and 1.6. A good starting value is 1.6, but depending on the type of glass you can also deviate from it.
Why does my glass look so bright without the Fresnel effect?Without the Fresnel gradient, the transparency at the edges is too strong. The Fresnel effect makes the edge areas darker and ensures more clearly defined glass edges.
Do I always have to deactivate Specular for glass?Not necessarily, but Cinema 4D's Specular often looks artificial on glass. That is why it is worth turning it off for uncolored glass.
How do I achieve a stronger reflection on the glass?Reduce the brightness of the Transparency channel. Only then does the reflection become clearly visible.
Why do artifacts appear in the filled glass?The liquid then lies exactly on the edge of the glass. Move the affected points slightly into the glass body, and the artifacts will disappear.
How do I create a material for the wine?Duplicate the glass material as a base, adjust the refraction index to about 1.3, activate the Color channel, and choose a dark red.

