

A car paint only looks convincing when color, reflection, and surface structure work well together. You build up exactly this interplay step by step in Cinema 4D. You start with a scene that is deliberately free of any existing paint finishes, and then work your way through color, Fresnel effect, blend modes, and matte effect to a believable result.
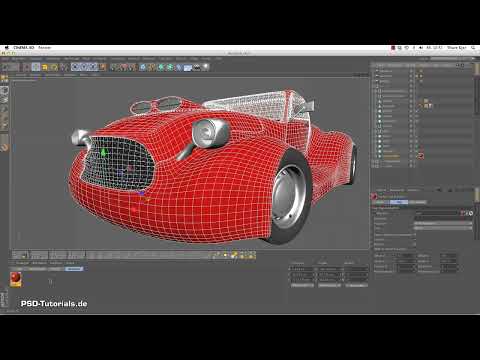
The video is only loaded from YouTube when you play it – data (including your IP address) is then transmitted to YouTube/Google. More in the privacy policy
It is worth taking a close look at the settings, because even small changes shift the image significantly. You will also learn why the Fresnel effect is in most cases the better choice compared to a classic specular highlight.
Key Takeaways
Key Takeaways
- The specular highlight often produces an unrealistic, white cone. The Fresnel effect is usually the better solution for paints.
- The Fresnel effect strengthens the reflection at shallow viewing angles, so the color remains visible in the center.
- With the blend mode "Multiply," the reflection is tinted, so that no pure chrome look arises.
- The matte effect breaks up the reflection and allows variations from high gloss to silky surfaces.
- Samples and accuracy control the quality and the render time, so you should adjust these values deliberately.
Step-by-Step Guide
Preparing the Scene: Vehicle, Light, and Environment
Begin with a vehicle from the Content Browser in Cinema 4D. In the video, a hot rod is used. Remove the existing textures until the body no longer has any paint. This gives you a neutral base on which you can build everything yourself.
Next, set up a light source that illuminates the car from the front. A background object with a white surface helps distribute the light evenly. An environment object with a value of about 10% provides subtle brightening. As the last element, you add a sky object carrying an HDRI. This image provides the reflections that will later be visible in the paint.
In the Content Browser, under Presets, then Materials and the HDRI folder, you will find a good selection of environment images. The choice of HDRI strongly influences the reflections, so it is worth experimenting.

Setting Up the Camera and Creating a New Material
Align your camera so that the vehicle looks good in the frame. With a double-click in the Material Manager, you create a new material. Name it, for example, "Paint".
A separate layer for the paint material is not strictly necessary, but it keeps things organized once several materials are in the project. To do this, create a new layer via right-click and assign the material through it.

Disabling the Specular Highlight
In the "Specular" channel, you should first remove the checkmark. The reflections that this channel produces usually look very artificial. You will see in a moment why a simple specular highlight is not sufficient for car paints.

Defining the Base Color
In the Color channel, you now choose the paint color. In the video, a punchy red is used. Make sure that the color remains visible in the center later thanks to the Fresnel effect, so do not choose too pale a tone.

Using Reflection Sparingly
If you activate the reflection directly with default values, a chrome look quickly emerges rather than the desired red paint. The color from the Color channel is almost ignored in the process. Therefore, first reduce the reflection significantly so that your color dominates. You will bring back the stronger reflections later via the Fresnel effect.

Activating Fresnel
In the Reflection channel, open the texture and activate the "Fresnel" section. As soon as it is active, the preview image changes noticeably. In the middle, that is, where you look at the object head-on, your color shows through. Toward the edges, the reflection increases.

Understanding the Fresnel Effect
Imagine you are standing directly in front of a window pane and looking through it. Then you can see through it without any problem. But if you look at the same pane from a very shallow angle, it becomes increasingly reflective. This is exactly the physical behavior that the Fresnel effect replicates.
In the course of the gradient, you determine how far the color area extends toward the center. If you move the right slider toward black, the area with your color becomes significantly larger. The white area represents the strong reflection at the edges.
Using the Physical Mode and Refractive Index
With the "Physical" option, the result becomes more realistic. You then no longer control the gradient freely, but via a refractive index, which you already know from the glass material. You can either adopt a preset or enter your own value. For paints, this works exactly the same way as for glass.
Inverting the Fresnel Gradient
The "Invert" option reverses the gradient. For your classic car paint this is not necessary, and so you leave the option deactivated. In other cases, however, it can be very useful, for example when an object should show a subtle color more at its edges.
Applying the Material to the Car Body
Drag and drop your material onto the car body. To make the object appear smoother, you can give it a HyperNURBS object. The result already looks significantly more convincing than the earlier chrome experiment.

Using Blend Modes in the Reflection Channel
In the reflection channel you will find various blend modes. By default it is set to "Normal," which lets the reflection come through unfiltered. If you set "Multiply" instead, the reflection is combined with your color. A red vehicle then no longer reflects white, but tinted. This is often exactly the desired result for paints.

Fine-Tuning Reflection and Color
With the two sliders for strength and mix, you find the right balance between color and reflection. You don't have to hit the perfect result right away, but can approach it step by step. The interactive render region is a great help here, because you see every change immediately.
Comparing the Specular Highlight
If you switch the specular highlight back on, you quickly see why it is problematic for car paints. It creates a white cone that looks unnatural. You can adjust it using metal or plastic presets, but it rarely becomes convincing that way. That is why you prefer to work with the Fresnel effect in the reflection channel.

Matte Effect for Different Surfaces
With the matte effect in the reflection channel, you break up the reflections. This adds a fine roughness. The higher the value, the more diffuse the reflection becomes. Many manufacturers now offer paints that look like plastic but still have a slight reflection. This is exactly where you can achieve nice effects with small values, because not every paint has to be high-gloss.
Balancing Samples and Accuracy
The values for Min Samples and Max Samples determine how often the program samples the scene. Higher values deliver more accurate calculations, especially at critical spots where many objects meet. At the same time, render time increases significantly. In the video, the values are mostly kept as they are and only increased when needed.
The accuracy value also plays a role. A value of around 20% saves render time, while 50% yields a more homogeneous display. With the matte effect, a value of 5 is sometimes enough for an appealing result. The interplay between the strength of the matte effect and accuracy determines the quality.

Adding Creative Accents with the Luminance Channel
If you want an eye-catching look, such as a color gradient like on pimped cars of the 80s, you can add a Fresnel shader in the luminance channel. In the video, a blue color is chosen. Make sure the result does not become too bright, since the effect takes the channel's color into account and multiplies it with your overall settings. The gradients then appear only in certain places.

Using Relief for Structure
For additional surface structure, you can use the Bump channel. If you insert a texture there, nothing visible happens at first. The reason is the option "Use UVW for Bump". If it is enabled, the bump is not calculated. If you uncheck it, the structure appears.
A Turbulence shader with a small global size, about 1%, and low strength, for example 5%, creates a fine grain. This is similar to the matte effect, but can be combined specifically with rust or other structures. The relief is suited for real elevations. For small values that only create a similar impression, the matte effect remains the better choice.


Summary ??? Car Paint in Cinema 4D: Creating Realistic Paint Materials with Fresnel
You have seen how a car paint is built in Cinema 4D. You start with a neutral scene, disable the specular highlight, and set the base color. With the Fresnel effect, you get a realistic distribution between color and reflection. The blend mode "Multiply" prevents the chrome look, and the matte effect allows you fine gradations from high gloss to satin. Samples, accuracy, and relief round off the result. With these basics, you can develop your own paints that look credible in your scene.
FAQ
Why should I disable the specular highlight on car paint?The specular highlight creates a white cone, which usually looks unrealistic on paints. The Fresnel effect replicates the behavior of real surfaces better.
What exactly does the Fresnel effect do?It increases the reflection depending on the viewing angle. Head-on, the color remains visible; at shallow angles, the reflection dominates.
Why is my paint color covered by the reflection?Without adjustment, the reflection can strongly displace the color. The blend mode "Multiply" combines the reflection with the color and thus prevents the pure chrome look.
What is the difference between the Physical mode and the free gradient?In physical mode, you control the transition via a refractive index. The result looks more realistic, as it follows the behavior of real materials.
What do I use the matte effect for?With the matte effect, you break up the reflection. This creates silky or satin-like surfaces with slight reflection.
Why does the Bump channel show no effect?If the option "Use UVW for Bump" is enabled, the bump is not calculated. Uncheck it, and the structure becomes visible.
How do samples and accuracy affect the result?Higher values deliver more accurate calculations but increase render time. Adjust the values once you are looking for a good balance between quality and speed.


