

A headlight only looks credible once you add the small details. A screw that holds the bracket to the housing hardly stands out at first glance, but if it is missing, everyone notices. In this tutorial, you will build a slotted screw with a washer in Cinema 4D. The starting object is an oil tank, which you reshape into the screw slot using a cube and the Boole object. The washer is created from a cylinder, and in the end you align the finished screw so that it sits in the bracket.
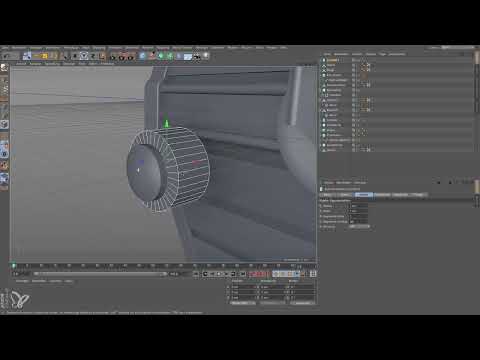
The video is only loaded from YouTube when you play it – data (including your IP address) is then transmitted to YouTube/Google. More in the privacy policy
Key Takeaways
- An oil tank is suitable as a basis for the screw head because it can be easily adjusted via its parameters.
- With the Rectangle Selection in an isometric view, with the option "Select only visible elements" activated, you delete superfluous polygons much faster than with the Live Selection.
- The Boole object creates the screw slot by subtracting the cube from the oil tank.
- A cylinder replaces the washer, because a additional hole in the middle would require an unnecessary number of polygons.
- With a null object, you bundle the screw head and screw shaft into one unit that you can move and rotate together.
Step-by-Step Guide
Step 1: Choose the oil tank as the basic shape
Begin with an oil tank from the primitive objects. At first glance it looks like a capsule, but it offers you more setting options. Take it from the object menu and remove the zero at both corners so that the basic shape stays clean. Then align the object in the X direction, because this way it will later fit into the position on the bracket. First set the radius to 1 cm and the height to 2 cm. Since the oil tank still looks too large that way, you increase the height to 5 cm until the proportions are right.

Step 2: Adjust the radius for the right screw size
Next, you reduce the radius to 0.7 cm. This gives the screw a diameter of 1.4 cm later on, which suits a headlight of this size. You leave the height of the oil tank at 5 cm for now.

Step 3: Modify the caps for a slim head
Now it's the caps' turn. Change the height of the caps slowly and watch the shape as you do. At the beginning it looks conical and unnatural. With a value of about 0.2 cm, it becomes flatter and gets the desired head shape. You can then set the total height to 2 cm.
Step 4: Reduce the segments
The oil tank initially has 36 segments around its circumference. For a detail that is hardly noticeable from a distance, 24 segments are completely sufficient. On the lens, however, you would see every additional polygon. Therefore, use segments specifically where they are visible, and save them on small details like this screw.

Step 5: Convert the oil tank into polygons and remove superfluous parts
The oil tank is still a parametric primitive object. Convert it into an editable polygon object with the C key. Then switch to the front view and zoom in close to the object. For the head you only need the cap and the topmost ring of polygons; you can remove everything else.

Step 6: Quickly delete superfluous polygons with the Rectangle Selection
The Live Selection would be tedious and time-consuming here. Instead, use an isometric view, for example the front view, and activate the Rectangle Selection. Make sure that the option "Select only visible elements" is not clicked, because otherwise the back sides will not be captured either. Then draw a frame over the areas you want to remove. With the Delete key, all selected elements disappear. In points mode, you can see whether any points are left over. You remove these with the "Optimize" command.

Step 7: Create the washer as a cylinder
The washer later completely covers the screw head. A ring or a tube would be unnecessary here, because you would never see the additional hole in the middle. Therefore, use a cylinder and align it in the X direction as well. Set the radius to 1 cm and initially set the height to 1 cm as well. Then place the cylinder exactly on the screw head. A height of 0.1 cm will look appropriate later, because the washer must not become too thick.

Step 8: Rounding the edges of the washer
So that the washer catches light reflections cleanly, you slightly round its edges. Choose a value of about 0.01 cm to 0.02 cm for the rounding. If you leave the washer with 24 segments, it will still look convincingly round.

Step 9: Extruding the screw shaft from the cylinder
The screw shaft is important, because otherwise you would see through the head. To do this, convert the cylinder into a polygon object and, in Polygon mode, select the outer face with the Live Selection tool. Then shrink the face using the "Create Mesh" function, then "Extrude Inner". You repeat this process until the screw reaches the desired length. With the D key you then push the face out, which corresponds to a true extrusion. Afterwards, the screw should be a few centimeters long and be able to disappear into the bracket.

Step 10: Creating the screw slot with the Boole object
A screw without a slot looks like an unstructured lump. Therefore, create a cube that you set up with 2 cm in all directions and place at the position of the screw head. Reduce the height in the Z direction to 1 cm and the width in the X direction, so that the cube later produces the right slot. Then push it out far enough that it lies exactly below the head surface. Make sure that the slot does not run exactly through the middle, but is slightly offset. Then place the oil tank and the cube into a Boole object. The oil tank acts as the base object, the cube as the subtraction. This way, the Boole object cuts the slot out of the screw head.

Step 11: Rotating the screw and positioning it in the bracket
A real screw is rarely seated exactly vertically. Therefore, rotate the Boole object by a few degrees so that the screw looks more natural. For a sailboat halyard case, where the orientation plays a role, exact angles would be important; here a slight rotation is enough.

Then combine the Boole object and the cylinder in a null object, which you name, for example, Screw. You create the group with the key combination Alt + G. Then drag the null object to the right place on the bracket. Move it only in the X direction by switching off the other axes. A small distance from the housing later creates a nice cast shadow when rendering.

Step 12: Adjusting the screw length
Finally, you check the screw from the side. It is probably not yet long enough and so far disappears completely in the cube. Click on the cylinder, open it again and pull it lengthwise until it visibly protrudes from the bracket. After that, the screw sits in the headlight as desired.

Summary ??? Modeling a screw in Cinema 4D: step-by-step guide with oil tank and Boole
With an oil tank as the base shape, a cube for the slot and the Boole object for subtraction, a believable slotted screw is created. You add the washer with a cylinder, which you round off and position at the head. Pay attention to a low polygon count, because with small details the reduction is hardly noticeable. With a null object you join all the parts together and position them in the bracket. This approach can be transferred to many other technical objects.
FAQ
Which base object is suitable for the screw head?An oil tank is well suited, because you can easily adjust its radii, heights and segments.
Why should I work with the Rectangle Selection?The Rectangle Selection is significantly faster than the Live Selection in an isometric view, especially with larger areas.
What is the Boole object used for with the screw?The Boole object subtracts the cube from the oil tank and thus creates the screw slot.
Why do I use a cylinder and not a ring for the washer?A ring would have an additional hole in the middle that you would not see and that needlessly uses up polygons.
How do I combine the screw head and the screw shaft?You place both objects in a null object and group them, for example with Alt + G. This way you move the screw as a unit.
Why should the screw not be exactly vertical?In reality, screws are rarely exactly aligned. A slight rotation therefore looks more natural.

