

A bass speaker from a simple cube? In Cinema 4D that is much more doable than it initially sounds. You only need a few tools: Polygon Pen, Extrude, Extrude Inner, a Subdivision Surface (SDS) and the Knife tool. This workshop takes you from the closed enclosure to the finished speaker with membrane, dust cap and frame. The tutorial assumes that you know the basics of the user interface and are already working with a box with an open aperture.
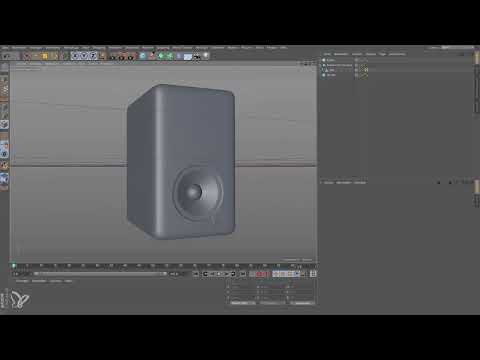
The video is only loaded from YouTube when you play it – data (including your IP address) is then transmitted to YouTube/Google. More in the privacy policy
Key Takeaways
The most important points of this workshop at a glance:
You close openings with the Polygon Pen or Bridge tool in combination with the Ctrl key, so that Cinema 4D automatically snaps to the edges. The membrane is created by alternating between Extrude and Extrude Inner, before you pull the faces inward along the Z axis. An SDS turns the roughly modeled enclosure into a round shape, but requires you to keep an eye on the segment count of the original geometry. The dust cap is created from a parametric sphere, which you position precisely with snapping. With the Knife tool, the Loop Cut and Quantize, you can sharpen edges selectively while other areas stay soft.
Step-by-Step Guide
Step 1: Closing the Openings Around the Membrane
At the start, there are still holes open between the membrane and the enclosure. You close these with the Polygon Pen. If your version of Cinema 4D does not offer the Polygon Pen, you can alternatively use the Bridge tool. Personally, I consider the Polygon Pen the more sensible choice, even though it requires a bit more finesse.
Hold down the Ctrl key while working. When you then move the tool over the edges, Cinema 4D offers you the matching edges. You can drag the connection from top to bottom or vice versa; snapping to the edge works in both directions. Take care not to accidentally dock onto a wrong edge. If you notice a mistake, undo the step immediately with Ctrl + Z before the problem spreads to further polygons.

Step 2: Thoroughly Checking the Geometry
After closing, you should definitely check the model. It is easy for a point or an edge to be set incorrectly. Rotate the object and also view it from the inside. Only when all openings are cleanly closed is the next step worthwhile. A small error in the base framework will have a clear effect later in the SDS.

Step 3: Preparing the SDS and Placing the Box Inside
To turn the angular box into a rounder shape, you place it in a Subdivision Surface. To do this, hold down the Alt key and then click the SDS object. Cinema 4D automatically nests the box beneath it, so that you can continue to edit it.
However, the original geometry has only 16 segments, which would lead to an uneven, angular dust cap. That is not a problem at first, though, because this density is sufficient for the membrane.

Step 4: Selecting the Membrane Polygons
Select the box and activate the Live Selection. With it, you first mark only the 16 polygons in the interior of the enclosure from which the membrane is to be created. Make sure that only these faces are active, because otherwise all further steps will be applied to the entire enclosure.

Step 5: Shaping the Membrane with Extrude and Extrude Inner
Now the actual core of the workshop begins. The membrane is created by a sequence of extrusions, which you perform alternately outward and inward. You access the inner extrusion with the shortcut I. Drag the mouse to the right or left to determine the depth.
Begin with a first inner extrusion of about 0.4 cm. This is followed by an inward extrusion of about 0.7 cm. It is important that you keep alternating the extrusion types, because this is exactly what creates the soft surround suspension that is typical of a bass speaker. Another short extrusion creates the necessary intermediate step before the last inner extrusion leads significantly further into the enclosure.


Step 6: Bring the Diaphragm to the Right Depth
After the extrusions, the result still looks quite flat. To give the diaphragm depth, switch to the Scale or Move tool function and pull the surface inward along the Z-axis. This creates both the suspension and the actual diaphragm at the same time.
Unneeded surfaces left over in the housing can be deleted with the Delete key. The model then looks tidier and the diaphragm is clearly recognizable.


Step 7: Build the Dome from a Sphere
For the dome, that is, the curved center cap of the speaker, get a parametric primitive from the menu, namely a sphere. It is initially too large. Therefore, scale it down by a factor of 10 and then drag it to the appropriate size.
Use snapping for placement. Drag the sphere to the spot where the diaphragm is located and align it in the Z direction. Once the position is correct, turn snapping off again so you can adjust the size freely. A sphere with a diameter of about 5 cm usually fits well; afterward you can enlarge it slightly until it looks visually coherent. It may protrude a bit further into the housing.


Step 8: Add the Optional Mount
The speaker can be visually refined with a tube as a mount. This step is optional, but it significantly improves the look. Here too, you start with the factor of 10 for scaling down. The tube must also lie in the Z direction. Then enlarge the inner radius so that it looks like a kind of frame around the diaphragm.
With snapping, the tube can be placed precisely in the center. Simply drag it to the desired edge. Make sure the height is not too large. If you make a mistake, as happens in the workshop, you can simply correct the height afterward.


Step 9: Increase the Segments and Adjust the Rounding
To make the dome and the mount look smooth, increase the segments from 36 to double that number, i.e. 72. This creates a finer mesh that looks noticeably rounder in the model.
At the same time, you can give the object a rounding. However, a value that is too high quickly looks exaggerated, and too many segments add little. Five segments are usually sufficient for this purpose. Reduce the radius of the rounding step by step, for example from 0.4 through 0.3 and 0.2 down to 0.1. Hold down the Alt key while doing so so that the values don't jump too coarsely. Then turn snapping off again as soon as the position is set.


Step 10: Correct the Height and Check the Result
View the model from several angles. Often only then do you notice that the tube has turned out too tall. Reduce its height to a few centimeters and check the proportions again. Only when the diaphragm, dome, and mount work together harmoniously is the speaker essentially finished.

Step 11: Sharpen Edges with the Knife Tool
The final finishing touch concerns the roundings. At the front the edge is usually too heavily rounded, and the back as well. With the Knife tool you can place cuts precisely. To do so, select the Loop Cut from the Mesh menu and place the cut at the desired spot. You will then see a green extension that marks the affected edge.
Before you change the distance, activate the Quantize function. It ensures that the cut lands exactly in the middle, at a distance of exactly 5 cm between the two edges. Then you reduce the distance to 1 cm. The edges now lie close together, and the rounding becomes correspondingly weaker. The result is a clearly defined, sharp front edge.
For the back, you repeat the process: Make a cut, activate Quantize again, and increase the distance in the other direction to 9 cm. This also creates a sharp edge at the back, while the rest of the housing remains round.


Summary ??? Modeling a Speaker in Cinema 4D: Diaphragm, Dome and Finishing Touches
You have now developed a bass speaker from a simple box. First, you closed the openings between the diaphragm and the housing and checked the geometry. Then you shaped the diaphragm with a sequence of Extrude and Extrude Inner and pulled it spatially into depth. The dome was created from a sphere, the mount from a tube, both precisely aligned with snapping. With an SDS, increasing the segments, and the Knife tool with Quantize, you rounded off the model and deliberately sharpened the edges.
FAQ
Why should I use the Polygon Pen instead of the Bridge tool?The Polygon Pen offers more control over the edges when closing the openings, but requires some practice. The Bridge tool is a good alternative if your Cinema 4D does not have a Polygon Pen.
Why doesn't the tool snap to the right edge?Hold down the Ctrl key and move slowly over the edge. Make sure you select the correct edge, as otherwise Cinema 4D may create a wrong connection. With Ctrl + Z you can undo mistakes immediately.
What is the SDS used for in this workshop?The Subdivision Surface smooths the roughly modeled housing and creates a round shape. You simply place the box into the SDS while holding down the Alt key so that you can continue to edit it.
How do I achieve the soft surround suspension of the diaphragm?When extruding, alternate between outward extrusions and inner extrusions. You access the inner extrusion with the shortcut I. You determine the depth of each step through mouse movements.
Why do I have to turn off snapping?As long as snapping is active, every movement snaps to predefined points. This is helpful for precise placement, but disruptive for freely adjusting the size. That is why you turn it off again after positioning.
How do I create a sharp edge with the Knife tool?Make a loop cut close to the desired edge and activate Quantize so that the cut lands exactly in the middle. The closer the two edges are to each other, the weaker the rounding.

