

A housing only looks three-dimensional when cooling fins structure its surface. In this tutorial, you form five cooling plates from simple cubes, which enclose a tube. Along the way, you learn how to use an image manager as a reference, set dimensions by eye, and round off edges. The method relies on visual checks rather than exact numbers, so it is worth taking a look at the perspective after almost every step.
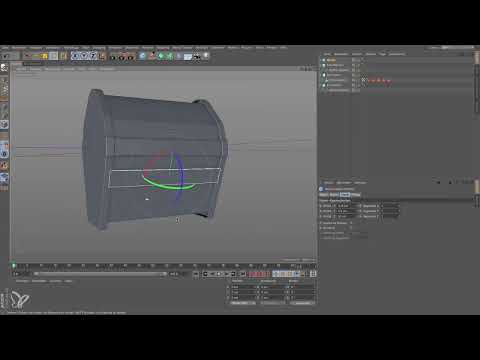
The video is only loaded from YouTube when you play it – data (including your IP address) is then transmitted to YouTube/Google. More in the privacy policy
Key Takeaways
- An image manager next to the viewport shows you the reference without you having to switch windows.
- A cube is first scaled down significantly and then brought to the sheet thickness of about 0.15 cm in the X direction.
- The rotation tool aligns the fin with the line of the housing edge.
- By holding down the Ctrl key, you create a copy that you then only need to offset.
- A rounding of 0.025 cm looks more natural than 0.075 cm and catches highlights better.
Step-by-Step Guide
Step 1: Set up the image manager as a reference window
Drag the image manager onto the small dotted square in the viewport. Afterwards, you can switch back and forth between the view and the image manager. This is especially helpful when aligning, if you want to keep a reference image permanently in view.

Step 2: Load a perspective reference
Use Open File to open a view of the housing. The perspective view is best suited for this. With the small button, you fit the image to the window size. Now you can see the fins: one to three are on the underside, four and five on the top. The round surface on top is still missing and will be added later.

Step 3: Get the first cube and scale it down
Create a cube. It is usually far too big. So remove a zero everywhere until it becomes manageable. Then you move it out of the origin and position it at the spot where the fin will later sit.

Step 4: Determine the sheet thickness
The fin must be as thin as the real sheet metal. Set the size in the X direction to about 0.15 cm. The cube then looks like a flat plate. An exact measurement is not crucial here, because the thickness is hardly critical visually.

Step 5: Align the angle with the housing edge
Switch to the full view and use the rotation tool to orient yourself along the line of the housing edge. Snapping can help, but does not always work reliably. If the front or rear point snaps into place, you already have a usable reference point. A little trick: zoom out a bit from the tool. The line becomes longer, and you work more precisely. In the video, the angle is around 19.2°, which is accurate enough for this application.

Step 6: Adjust height and length by eye
Return to the perspective view. The fin is initially a bit too tall, so you reduce the height to about 4.5 cm. You then increase the length in the Z direction to approximately 33 until the fin covers the width of the housing. Always compare the result with the reference image.

Step 7: Push the fin behind the edge
Select the move tool and drag the fin in the X direction until it disappears behind the housing edge. Then you move it upward until it sits just below the distinctive line. Always check the termination from the perspective view, because in the front view the position is easily deceptive.

Step 8: Duplicate ribs with Ctrl
Hold down the Ctrl key and drag the green arrow downwards. This creates a copy directly at the new position. This way you get the next cooling rib without having to set the properties again.

Step 9: Adjust the rib after next
Repeat the duplication for the rib after next. This one sits slightly lower and therefore needs a greater length. Drag the height to 4.5 cm and move the cube until the distance to the neighboring ribs is nearly equal. The rib remains slightly larger than the others, and that is exactly how the result should look.

Step 10: Add the lower rib
A rib is still missing on the underside. To do this, duplicate a cube with a thickness of 0.15 cm in the Y direction. It must be narrower in the X direction. Drag it downwards until it is roughly in the right place, and then adjust the height and width until it fits exactly. A small gap between the ribs is not a problem here.

Step 11: Name the bottom and prepare the upper side
The cube that represents the bottom gets the name Boden by double-clicking it. Drag it all the way down so that it no longer gets in your way during further work. You then work on the upper side using the same principle: duplicate, drag upwards, rotate using the long axis line, and check in the perspective view until the rib runs parallel to the wall.

Step 12: Insert the last copy
Use Ctrl to create another copy of the cube. Move it to the intended position and rotate it in the right direction using the long line. Check again in the perspective view here as well. After that, the housing already has a visible amount of detail.

Step 13: Round the edges
The ribs still have sharp edges. To fix this, click the first cube, hold down Shift, and click the last one so that all ribs are selected. In the Attribute Manager, you set the radius of the rounding. A value of 0.075 cm rounds the edges off completely, which is too much. A value of 0.025 cm, on the other hand, looks much better. Five roundings are not strictly necessary, but they catch highlights nicely.

Summary – Modeling cooling ribs in Cinema 4D: Building housing fins from cubes
You have now fitted one side of the housing with cooling ribs and laid the foundation for the remaining parts. The Picture Viewer, the reference view, and the Ctrl copy form the most important set of tools here. On the other side of the housing, a few sheets are still missing, which are created using the same principle.
FAQ
Why should I use a Picture Viewer next to the viewport?The Picture Viewer shows you the reference image permanently while you model, and you don't have to constantly switch between the view and the image.
Do I have to measure the dimensions of the cooling ribs exactly?No, in these steps you can work by eye, because the visual impression is what matters most.
How do I quickly create another rib?Hold down the Ctrl key while you move the cube with the arrow. This creates a copy at the new position.
Why is a rounding of 0.075 cm too strong?At this value, the edges almost completely disappear, and the ribs look soft and blurry. A rounding of 0.025 cm looks more realistic.

