

Imagine you are building a ring and only see it from the front. Whether the back is right, you only notice once you move around the object. This is exactly where many beginners fail: they get stuck with a single perspective and later wonder about errors in the shape. In Cinema 4D, you tackle this problem with three navigation tools that you will use almost unconsciously after a short amount of practice. This guide shows you how to move your camera, move toward and away from an object, and fly around it. You will also learn what to do when an object suddenly seems to have disappeared in the infinitely large space.
The video is only loaded from YouTube when you play it – data (including your IP address) is then transmitted to YouTube/Google. More in the privacy policy
Key Takeaways
A scene only reveals itself from multiple viewpoints. If you regularly move around your object, you keep the spatial arrangement better in mind.
The three navigation icons in the viewport can be replaced at any time by the keys 1, 2 and 3, which you hold down and combine with the mouse.
Moving, changing the distance and rotating are three different movements. Zooming is not one of them, because it changes the focal length and not the position of the camera.
You determine the pivot point by clicking on the desired spot on the object before rotating. Without this click, everything rotates around the center of the viewport.
If an object has disappeared, the blue arrow helps, and the default view resets your perspective.
Step-by-Step Guide
Step 1: Call up the object and make it visible in the viewport
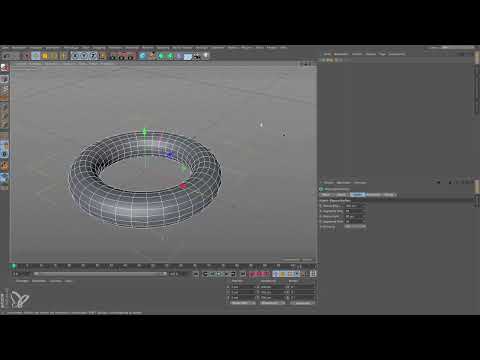
First select any object, for example the ring that you find in the Object Manager. A double-click or activating it in the viewport makes it appear in your field of view. The camera then points exactly at this element, and you can start navigating right away.

Step 2: Recognize the structure of the object via the white lines
Once the object is selected, an orange outline appears. Turn on the display of the white lines, because they show you the structure of the object. You see how it is built and recognize subdivisions or edges that are easily lost in the normal mode. Especially for beginners, this look is worthwhile before going into detail.

Step 3: Move the camera with icon 1
The first of the small icons at the top right of the viewport moves the camera. Click on it, hold down the mouse button and move the mouse. You glide left and right as well as up and down, without approaching the object or moving away from it. This is well suited when you want to bring a certain section into the center of the image.
Step 4: Change the distance with icon 2
The second icon brings you closer to the object or farther away from it. Here too you hold down the mouse button and drag forward or backward. The camera actually moves in space as you do so. Many users speak of zooming at this point, but that is wrong. With zooming, the focal length changes, whereas here only the distance between the camera and the object changes.

Step 5: Understand the difference between distance and zoom
The difference becomes especially clear when you look at an object from very close up. Changing the distance distorts the perspective and shows you things from a different position, because the camera really gets closer. With zooming, the image section would only be enlarged, while the spatial relationships would remain the same. Therefore pay attention to which movement you are currently performing when you want to analyze the scene.

Step 6: Fly around the object with icon 3
The third icon is one of the most exciting tools. Click on it and move the mouse, and the camera circles around the object. This way you view it from all sides. As soon as you want to look from below, however, you run into a problem: the upper edge of the monitor limits the movement. You have to lift off, reposition the mouse and then keep rotating. This needlessly slows down the workflow.

Step 7: Controlling Navigation with the 1, 2 and 3 Keys
It is much more convenient not to use the icons at all. Instead, hold down the 1 key and move the mouse to shift the camera left, right, up or down. With the 2 key, you control the distance to the object, meaning closer or farther away. The 3 key allows you to rotate around the object. All three keys only work as long as you hold them down. Practice the combinations until they feel completely natural.

Step 8: Combining Distance with Key 2 and Rotation with Key 3
First approach the object with the 2 key. If you then want to rotate a specific part, the 3 key alone is not enough. For that you need a pivot point, which you set beforehand. How this works is shown in the next step.

Step 9: Setting the Pivot Point Deliberately
The pivot point determines which spot the view rotates around. Proceed as follows: Place the mouse pointer exactly on the spot you want to rotate around, and click there. Then press the 3 key and move the mouse. The camera rotates exactly around this point, which does not shift in the process. If you want to rotate the tire or a part of the ring around a specific spot, you therefore set the pivot point directly there.

Step 10: Understanding the Default Center of the Viewport
If you do not click on geometry but somewhere in empty space, the view rotates around the center of the viewport. This is sufficient for simple movements, but as soon as you want to work specifically on the front or back part of an object, this default becomes a nuisance. Therefore, always pay attention to whether you are clicking on a spot of the object or into the void.

Step 11: Deliberately Viewing the Front or Back Part
The difference quickly becomes noticeable in practice. If you target the front part of an object, the camera stays focused there and no longer swings unnecessarily far away. The same applies to the back part. Try out both variants so you can see how strongly the choice of pivot point affects your work.

Step 12: Building a Three-Dimensional Understanding
Do not rely on a single view. Move around your object as often as possible, because only then do you develop a spatial feeling for what you are currently modeling. This pays off especially with complex shapes, because you spot mistakes earlier. Plan some time for navigating before you continue modeling.

Step 13: Finding a Lost Object Again with the Blue Arrow
It happens quickly: You move around in the scene, and suddenly your object has disappeared. In the infinitely large space of Cinema 4D, it can seem as if it has been lost. In this case, click on the blue arrow in the viewport. This takes you back to the object and you can see it again.

Step 14: Resetting the Default View
If you do not see the blue arrow, for example because you accidentally deselected the object, the default view helps. Open the View menu and select Default View there. Afterwards you are back in the perspective you started with.

Step 15: Displaying the White Lines Again
After resetting, the white lines are initially missing. They only reappear once you click the object again. So as a final step, go back to the object and select it, and then you will see the structure again.

Summary ??? Cinema 4D Navigation: Moving the Camera and Finding Lost Objects
Navigation in Cinema 4D is based on three movements: moving, changing the distance, and rotating. You can control them either via the icons or via the keys 1, 2 and 3, with the keys working much more smoothly. The pivot point determines the spot around which the view rotates, and you set it by clicking on the object. If an object disappears, the blue arrow takes you back, and the default view restores your original perspective. Practice these steps regularly, because a confident feel for movement in space forms the foundation for all further modeling work.
FAQ
Why should I view my object from multiple perspectives?Only this way can you reliably recognize the spatial arrangement and errors in the shape.
Is changing the distance the same as zooming?No, when changing the distance the camera moves through space, whereas zooming only changes the focal length.
Why does icon 3 reach its limits when looking from below?The upper edge of the monitor limits the movement, so you have to lift and reposition several times. With the key 3 you avoid this problem.
How do I set the pivot point for rotation?Click with the mouse pointer on the desired spot on the object and then press the key 3 to rotate around this point.
What happens if I don't click on any geometry?The view then rotates around the center of the viewport.
My object has disappeared. What can I do?Click on the blue arrow in the viewport to return to the object.
The blue arrow is not visible. What now?Select the default view in the View menu. The white lines will then only reappear when you click on the object again.

