

On top of the headlight there is a gap, and that is exactly where a curved sheet of metal should sit. With this tutorial, you build it in Cinema 4D from existing objects. You don't need to draw any new geometry; instead, you take the shape and edge from a spline and a solid, and then only cut free the polygons you actually need.
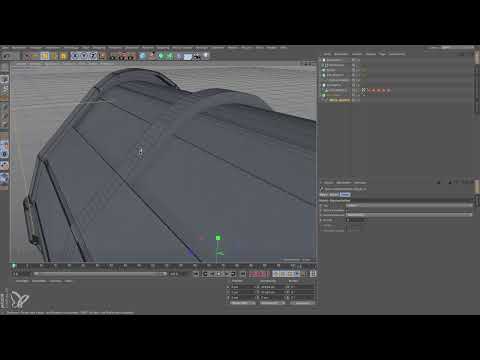
The video is only loaded from YouTube when you play it – data (including your IP address) is then transmitted to YouTube/Google. More in the privacy policy
The tutorial assumes that you have already installed and mirrored the cooling fins. The video starts with this step. After that comes the actual cover, which you build as a solid, trim, and finally give the typical sheet metal thickness.
Key Takeaways
- An evenly distributed spline produces a clean curve that is easier to transfer to a sheet of metal.
- A solid that you extend in length via the offset provides the basis for the cover between the front and back.
- You remove the caps so that the geometry doesn't overlap unnecessarily.
- You select the polygons you want to keep and invert the selection to conveniently delete the rest.
- The sheet thickness of 1.5 mm corresponds to a value of 0.15 cm in the Attributes Manager.
Adjusting the spline to the gap
Begin by shrinking the spline until its edge sits exactly on the existing cooling fin. To do this, switch to the lines display so that you can see the contour better, and take the Scale tool. While scaling, watch how the spline shrinks until it sits in the right place. The edge at the top of the headlight thus becomes the template for the later curve.

Changing the intermediate points of the spline
The original spline contains some irregular edges that would be noticeable in a curve. Click on the spline and open its settings. For the intermediate points, first choose "None", because this avoids additional support points. Then you switch the type to "Uniform". You first set the number of subdivisions significantly higher, visibly too much, and then reduce it to zero. With each value the fineness of the curve changes, and you can see directly how the edge runs more evenly. This spline now serves as a clean foundation for everything that follows.

Extending the solid in length
From the uniform spline you create a second solid that forms the cover. Select the object and enter the offset. In my case it initially had 2 cm in it. Then extend the object in length until it reaches under the sheet. You must go slightly into the sheet, but you must not let the shape emerge again on the opposite side. A side view helps you find the right depth. With an offset of 45 cm, the solid extends beyond the target, while at 35 cm it sits exactly between the rear and the front cover.

A note on snapping: Snapping may still be active and interfere with placement. Turn it off for this step so that you can move freely.
Removing the caps
The solid has caps at both ends. You don't need these for the cover. Select the object and set the caps option to "None". Hardly anything changes in the viewport, but on the inside you save yourself curves and surfaces that would only be dead weight later.

Converting the object into an editable cover
Now you can convert the solid into an editable object. Press the C key for this. You no longer necessarily need to keep the Ply solid, because the geometry is sufficient for the next work step. It is best to name the new object "Deckel" right away. That way you will immediately know later what the solid represents.

Select the desired polygons
Now the goal is to keep only the polygons on the top. Switch on X-Ray mode in the Attribute Manager. This lets you see through the object and recognize where the existing sheets are located. If you have trouble orienting yourself, switch X-Ray off briefly and back on again. That way you can identify the last sheet and the point where your cover should begin.
Instead of marking the polygons you want to delete, you select the faces you want to keep. This is faster because the selection is more compact. To do this, hold down the Shift key and click polygon by polygon until the entire top side up to the black dividing line is selected.

Invert the selection and delete unnecessary faces
Once you have selected the desired faces, you invert the selection. This automatically selects everything you want to delete. Remove these polygons with the Delete key. What remains is the curved sheet on the top. Afterwards, switch X-Ray mode off again, since you no longer need it.
Finally, I recommend using the Mesh commands to optimize the geometry. This removes excess points, and the object stays clean and light.

Give the sheet a thickness of 1.5 mm
In reality, a sheet is not infinitely thin, so you give it a thickness. Zoom in close to the object so that you can see the edges clearly. For comparison, you can click one of the cooling sheets. There you can see that they are 0.15 cm thick in the X direction, i.e. 1.5 mm.
Select the cover, open the tool for creating mesh objects in the menu, and choose Extrude there. The easiest way is to enter the direction manually in the Attribute Manager. Enter the value 0.15, and the sheet will have exactly the desired thickness. Finally, you cancel the selection by deselecting everything, for example by clicking in the empty viewport.

Summary – Cinema 4D: Modeling a rounded end sheet for a spotlight
You now have a rounded cover that closes the gap on the top of the spotlight. You adjusted the spline to the cooling sheet, distributed its intermediate points evenly, and created a body between the two cap faces from it. Then you left only the upper polygons and extruded the sheet with a thickness of 1.5 mm. With this procedure, you can also quickly implement similar end sheets for other housings.
FAQ
Why should the spline be evenly distributed?An evenly distributed spline creates a smooth curve without irregular edges, which are difficult to translate into a sheet later.
Why are the cap faces removed?The cap faces would create unnecessary geometry on the inside that you don't need for the sheet. Without them, the object stays slimmer and clearer.
Why do you select the polygons you want to keep and not the ones to be deleted?Selecting the faces to be kept is usually more compact, and afterwards you only need to invert to delete the rest.
How do you arrive at the value 0.15 cm for the thickness?The cooling sheets are 0.15 cm thick in the X direction, and 0.15 cm corresponds exactly to 1.5 mm. You adopt this value for the cover.
Why do you switch off snapping?Snapping can restrict the movement of the body or force inaccurate positions. Without snapping, the object can be placed more freely and precisely.
What happens if the body protrudes too far into the sheet?It emerges again on the other side and creates unclean geometry. Therefore, pull it into the sheet only far enough that it clearly lies beneath it.

