

Parametric primitive objects such as plane, cube, or sphere are practical because you can adjust their size and segmentation at any time. However, they don't allow true deformation. Only when you convert the object into a polygon object do you gain access to every single point, edge, and face. In this tutorial, I'll guide you step by step through the conversion, the three editing modes, and the Live Selection tool, which you can use to select specific areas.
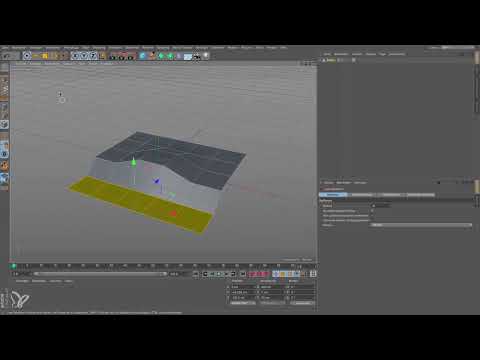
The video is only loaded from YouTube when you play it – data (including your IP address) is then transmitted to YouTube/Google. More in the privacy policy
Key Takeaways
- Parametric primitive objects can only be changed in size and segmentation, not freely deformed.
- Only converting them into a polygon object makes it possible to edit individual points, edges, and faces.
- Once the conversion is complete, it can no longer be undone via the button. Immediately afterwards, Command + Z (Windows: Ctrl + Z) helps.
- The Points, Edges, and Polygons modes determine which elements you edit. The Object mode moves, rotates, or scales the entire object.
- With the Live Selection tool, you mark the desired area with a mouse click, which you can then move.
Step-by-Step Guide
Step 1: Create the Parametric Primitive Object
First, create a plane. You can change its dimensions directly in the viewport or in the Attribute Manager. The segmentation can also be adjusted there. These options are helpful, but they are not enough to fundamentally change the shape. Make sure to set a sufficient number of segments, because later you can only edit the points, edges, and faces that actually exist.

Step 2: Recognize the Limits of the Primitive Object
Try tilting the plane or pushing a single square upward. This doesn't work, because the parametric primitive object doesn't offer any individual elements that you could move freely. The plane remains trapped within the bounds of its parameters. This very limitation is the reason why the next step is so important.

Step 3: Convert the Object into a Polygon Object
In the top toolbar, look for the button for converting the object. One click on it converts the plane into a polygon object. Afterwards, the button turns gray. This is not an error, but an indication that you cannot reverse the conversion via this button. As long as you press Command + Z immediately afterwards, undoing still works.
You can recognize a polygon object in the Object Manager by the blue triangle icon with three white dots. This icon shows you that all elements of the object are now editable.
Step 4: Understand the Operating Modes
After the conversion, the bar with the operating modes plays a central role. Here you choose what you want to edit. With the mode for the entire object, you can move the complete plane up or down, enlarge it, shrink it, or rotate it. The modes for points, edges, and faces, on the other hand, are intended for detail work. Always decide on a mode first before you begin editing.

Step 5: Work in Points Mode
Activate Points mode. The points of the object then appear as small black dots. When you hover the mouse over them, they are highlighted in white. Each point can be clicked and moved individually. If you move only a single point, only that area of the shape changes.

Step 6: Work in Edges Mode
Now switch to Edges mode. The connecting lines between the points are now available to you. You can pull a single edge outward or inward, depending on which shape you want to achieve. Edges mode is well suited for clear folds or edges that should be emphasized.
Step 7: Work in Polygons Mode
In Polygons mode, you select entire polygons. So before switching, decide deliberately whether you want to edit a face, a point, or an edge. This decision determines which elements are available to you in the first place.
Step 8: Activate the Live Selection Tool
So that Cinema 4D knows which surface you mean, you need the Live Selection Tool. Activate it and move the mouse over the object. The polygon under the mouse pointer is highlighted in white. This preview helps you hit the right area before you click.

Step 9: Pull Out a Surface
Click on the desired polygon. It is marked in orange, and the Move Tool jumps directly to that spot. If you now pull the surface upward, the adjacent polygons move along with it. This gradually turns the flat plane into a three-dimensional body. You can repeat this procedure with other surfaces to build up the object piece by piece.

Step 10: Remove a Surface
If you no longer want a surface in the object, select it with the Live Selection Tool and press the Delete key. An opening is created at that spot. This step shows you how versatile the Polygon Mode is: you can build up objects and, at the same time, add openings to them in a targeted way.

Step 11: Deform Individual Edges
Switch to Edge Mode and use Live Selection to select only one specific edge. If you pull it outward or inward, the rest of the object remains largely unchanged. This is particularly suitable for details that are meant to emphasize a shape precisely.

Step 12: Move Individual Points Asymmetrically
In Point Mode, you can click a single point and pull it in any direction. This lets you modify your object in a targeted and uneven way, turning a symmetrical basic shape into an asymmetrical one. This technique is especially useful for organic shapes.
Step 13: The Conversion Is Not Reversible
Once the object is a polygon object, you can no longer go back to the parametric primitive object. The deformations you have made cannot be represented in the plane's parameters. Therefore, plan your steps deliberately before performing the conversion, and save important intermediate states.

Step 14: Use Object Mode Deliberately
Object Mode remains important even with a polygon object. If you want to move the entire object, for example along the X-axis, you choose this mode. However, as soon as you want to move points, edges, or surfaces, Object Mode is the wrong choice.

Step 15: Combine Mode and Live Selection
To edit individual elements, you always combine the Live Selection Tool with one of the three modes: Points, Edges, or Surfaces. The tool determines which spot you hit, while the mode determines which type of element you select. With this interplay, you have the foundation to develop any shapes from a simple plane.

Summary ??? Polygon Mode in Cinema 4D: Editing Points, Edges, and Surfaces in a Targeted Way
Parametric primitive objects are the starting point, but only the polygon object opens up true creative freedom. With the conversion, you gain access to every element of the object. The Points, Edges, and Surfaces modes help you edit precisely the parts you want to change. The Live Selection Tool makes selection easy, and Object Mode remains important for moving the entire body. If you internalize these workflows, you can build up and adjust shapes step by step.
FAQ
Can I undo the conversion to a polygon object?Directly after the conversion, yes, using Command + Z (Windows: Ctrl + Z). Once the conversion is complete and you have edited the object, the object can no longer be converted back into a parametric primitive object.
How can I tell that my object is a polygon object?In the Object Manager, a blue triangle icon with three white dots indicates that the object is a polygon object.
How does Object Mode differ from the Points, Edges, and Surfaces modes?Object Mode always edits the entire object, for example when moving, rotating, or scaling. The Points, Edges, and Surfaces modes, on the other hand, only affect the selected elements.
Which tool do I need to select a specific surface?You need the Live Selection Tool. When you move the mouse over it, the element under the mouse pointer is highlighted. A click selects it.
How do I remove a selected surface?Select the surface with the Live Selection Tool and press the Delete key. This creates an opening in the object at that spot.
Can I freely deform a parametric primitive object?No. Parametric primitive objects can only be changed in size and segmentation. For free deformations, you must first convert the object into a polygon object.

