

A lens that looks as if it has already survived a few summers on the roof of a van seems more credible than a flawlessly shiny one. This is exactly the effect you will build in this tutorial: chipped paint on a metal part, controlled via a Vertex Map. The technique sounds complex at first, but it consists of just a few building blocks that build on each other logically. Once you have understood it, you can transfer the material to other components, objects, and scenes without much effort.
The video is only loaded from YouTube when you play it – data (including your IP address) is then transmitted to YouTube/Google. More in the privacy policy
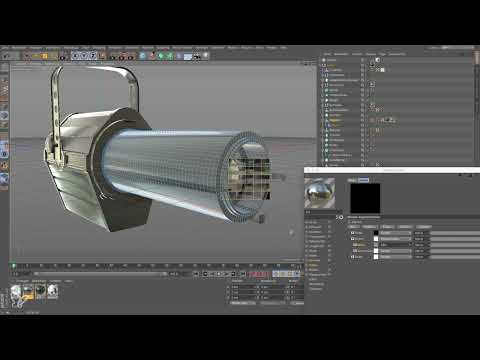
The starting point is an object whose paint layer is already marked with a Vertex Map. This map determines where the paint will later be damaged.
Key Takeaways
- A Vertex Map serves as the control. It determines where the dark paint material gives way to the light metal.
- The Layer shader bundles several shaders so that you can blend paint and aluminum together in a single material channel.
- A folder that is switched to the "Layer Mask" mode uses the Vertex Map as a mask between the two materials.
- An FBM noise, combined with the Vertex Map in "Lever" mode, creates irregular, realistic transitions.
- The parameters Strength, Opacity, and Clips determine how soft or sharp the chips look.
Step-by-Step Guide
Check the Starting Point
Before you get started, check whether the Vertex Map is correctly applied to the object. It is set up as a tag on the object and shows the areas where the paint should later chip off. Without this preparation, the material lacks the information about where it needs to change.

Name the Paint Material and Create Aluminum
First, give the existing material a clear name, for example "Paint". Then create a second material, which you call "Aluminum". This separation is crucial, because the metal lies underneath and will later become visible through the chipped areas. Assign both materials to the object.


Prepare the Alpha Channel for the Aluminum
The aluminum should only appear where the paint is missing. To do this, you control its visibility via the alpha channel. Black means invisible, white means visible. A simple texture would not be enough here, because you need to incorporate the Vertex Map. Therefore, you create a Layer shader in the alpha channel, which serves as a container for several shaders.


Set Black and White as the Foundation
In the Layer shader, you add two Color shaders. The first gets the color black and sits on top, the second gets the color white and sits below. Between these two layers, the Vertex Map will later decide how much of the metal shows through.

Set Up a Folder as a Layer Mask
Now place a folder between the black and the white layer. Into this folder goes the Vertex Map, which needs its own shader as a receiver. You will find it under the shader effects, fairly far down in the list. Drag and drop the Vertex Map into the shader's field so that it is connected.


Then switch the folder from "Normal" to "Layer Mask". From this moment on, the folder acts as a mask, and the Vertex Map determines which area of black and white becomes visible.

Perform the First Test Render
Now render a region. You should already be able to see color differences at the marked areas. However, these differences are still too smooth and regular to look like real chipping. This is exactly where the next step comes in.

Creating irregularity with FBM noise
Add another shader inside the folder. An FBM shader is well suited because it creates irregular structures. Reduce the global size of the noise, for example to 20 percent. This creates finer patterns that look much more natural than the uniform vertex painting.


Setting the Lever mode for contrast
If you blend the FBM shader in Normal mode, the effect of the Vertex Map almost completely disappears. Therefore, set the blending mode to "Lever". This mode creates a strong contrast between black and white, so that the Vertex Map remains clearly visible.

Then render again. The chipping now looks much more believable.

Fine-tuning strength and opacity
With the strength of the Lever mode, you determine how strong the effect is. A value around 60 percent is a good starting point. The opacity additionally controls the softness of the transition. At about 75 percent, you get a clean gradient in which the edges do not look too hard. Try several values and observe the result in the region each time.


Using Clipping for frayed edges
With the Clipping option, you increase the contrast between black and white and thereby remove the gray values. The result looks more frayed, and small islands form at the edges, which are typical of chipped paint. It is exactly these details that make the difference between an artificial and a believable effect.

Repainting with the alpha display
If you want to mark more areas, switch to the aluminum material and click the Vertex Map in the Layer shader. Use the triangle to display the alpha. Now you can continue painting with the paint tool. If the tool is not visible, you can find it in the corresponding menu. Take your time to try out which patterns look good.

Adjusting paint properties
In your example, the paint still reflects too strongly. Therefore, reduce the reflectivity by lowering the Fresnel reflection, the specular reflection, and the mirroring of the Diffuse channel. A roughness of about 20 percent and less mirroring often look more realistic. Then render the entire object so you can assess the overall impression.

Inverting the alpha channel
If the object is still very shiny despite the previous steps, it is usually because the alpha channel of the aluminum has not yet been inverted. Invert it so that the metal becomes visible where the paint is actually missing. Then render again. The result should now look significantly better.


Transferring the material to other components
For each additional component, such as a screw or a bracket, you create a separate aluminum material and assign it its own Vertex Map. Every material that is applied to individual components must be assigned separately to the respective objects. This way you keep control over each part, and you can design the chipping individually.

Summary ??? Cinema 4D Vertex Map: Realistically Simulating Chipped Paint
You have learned how to create chipped paint on a metal object using a Vertex Map. The Vertex Map controls the transition between black paint and white aluminum in the layer mask folder. An FBM noise in Lever mode provides the necessary irregularity, while strength, opacity, and clips take care of the fine-tuning. With adjusted reflection values and an inverted alpha channel, the result looks convincing. The same approach can be applied to any components and scenes.
FAQ
Why should I use a Layer shader?The Layer shader is a container in which you can combine several shaders and blend them together, so that you can control paint and aluminum in a single material channel.
Why is the folder set to Layer Mask?The Layer Mask mode makes the Vertex Map act as a mask that determines which area of black and white becomes visible.
Why is Lever mode important?In Normal mode, the effect of the Vertex Map largely disappears. Lever mode creates a strong contrast so that the Vertex Map remains visible.
What should I do if the object is still too shiny despite all the steps?Check whether the alpha channel of the aluminum is inverted, and reduce the reflectivity of Fresnel, Specular, and Diffuse.

