

A smooth, new headlight often looks sterile. With a few targeted paint chips, it looks as if it has decades under its belt. In this tutorial, you will learn how to use a Vertex Map to define where the dark paint has chipped off and where the bare metal shows through. I'll show you the technique using the basic principle, and you decide the extent yourself.
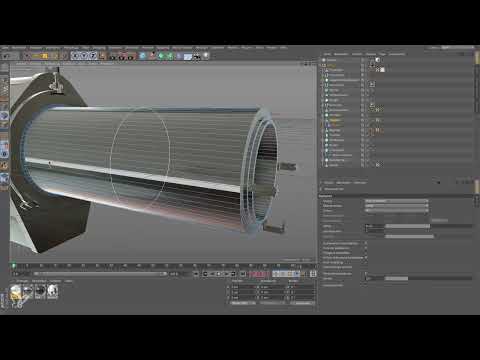
The video is only loaded from YouTube when you play it – data (including your IP address) is then transmitted to YouTube/Google. More in the privacy policy
Introduction
The trick with the paint damage doesn't work with textures from the internet, but directly on the geometry. You paint on the points (vertices) of your object and Cinema 4D remembers where you painted. For this, however, you first need enough polygons, because fine chips can only be cleanly delineated where there are enough points. At the same time, you shouldn't overdo the number, otherwise the scene quickly becomes unwieldy. The balance between level of detail and file size is therefore the first sticking point.
Key Takeaways
- The Vertex Map is a kind of mask that is placed on the points of the object. Everything you paint there is later used as information for the material.
- For even chips, you need polygons that are as square as possible. Long, narrow polygons make painting difficult.
- Using the Loop/Path Cut in the "Create Mesh" mode, you can make even cuts, for example 42 of them, to subdivide the object.
- The Vertex Color tag with the "Alpha" mode stores your painting without assigning a real color to the object yet.
- With a pen and pressure sensitivity, you can control the opacity and thus paint fine transitions.
- The painting is initially only a placeholder. Only when you assign a material to the object do you see the final result.
Step-by-Step Guide
Step 1: Define the Idea and the Spots
Before you start, think about where a headlight actually wears out over the years. Typical spots are edges, transitions, and areas that are frequently touched or exposed to weather and sun. Don't paint randomly, but orient yourself on these real wear spots. This looks more believable later than a uniform pattern.

Step 2: Create Enough Geometry
For painting, you need polygons. Simply subdividing the object by many levels would not be a good solution, though, because the file would quickly become several gigabytes in size. Instead, look for a middle ground. Look at your object and identify which areas are already well resolved and which consist only of long, narrow polygons. That is exactly where you need to improve.
Step 3: Select the Object and Open the Loop/Path Cut
Click on your object in the Object Manager so that it is active. Then go to "Create Mesh" in the menu and select the "Loop/Path Cut" tool there. Make sure you are working in the plane mode. The Plane Cut makes cuts along a plane through the object and thus creates new edges and points.

Step 4: Make Even Cuts
In the Plane Cut, you see the option "Cut Locally". Cinema 4D may have remembered the last setting, so check that. With even cuts, the program divides the distance between the first and the last polygon into equally sized sections. With just one cut, two halves are created; with several, correspondingly more parts.

Step 5: Increase the Number of Cuts
Leave the option for even cuts activated and increase the number of cuts. In the example, a value of around 42 already gets you quite close to square polygons. You don't have to make the polygons slavishly exactly square. What matters is that they are not extremely elongated. Then you can paint evenly later.
Step 6: Check the Result
Look at whether the grid looks even in the relevant places. If you still have very long polygons in some places, you can cut additionally or increase the number of cuts further. Afterwards, select a different tool again so that the cut lines are no longer displayed. That way, you only see the object itself when painting and won't be distracted.

Step 7: Adding the Vertex Color Tag
To be able to paint on the object, you need the appropriate tag. Make sure the object is actively selected in the Object Manager. Then open the tags and select the "Vertex Color Tag". This tag is a comparatively new feature in Cinema 4D. It stores your painting directly on the object, that is, on the points.

Step 8: Setting the Paint Mode to Alpha
In the Vertex Color Tag you will find the setting for the paint mode. In this case, you do not want to paint real color onto the object, but create an alpha channel. This channel later only determines where something becomes visible. Therefore, in the "Vertex Color" mode, select the "Alpha" option. Now you can start painting.

Step 9: Setting the Right Paint Strength
On your first attempt at painting, nothing may happen. This is due to the strength setting. If you paint with 100% white, you initially see no effect in the viewport. Therefore, lower the value to 0% and paint again. Now the painting appears visibly on the object. It is important to know this setting, otherwise you might quickly think the tag is not working.
Step 10: Working with Pen and Pressure
If you use a graphics tablet or a pen, you can have the pressure transferred directly to the opacity. This way, the force with which you press down determines how intense the color appears. Light pressure results in a light, gray transition, strong pressure in a dark, almost black spot. This way you can paint chips with soft edges and hard cores. Also reduce the brush radius when you want to add fine details.
Step 11: Interpreting the Structure Correctly
In the viewport, the painting initially looks quite strange, with irregular patterns and gradients. This is normal and you don't need to worry. The structure is just a preview of the points. Only once you have assigned the material will you see how the paint really looks. Then you can decide whether you want to refine it.

Step 12: Increasing the Resolution if Needed
If the resolution seems too coarse in some places, you can apply the Loop/Path Cut again and increase the number of cuts, for example to 84. This makes the painting finer and the result more accurate. The file naturally becomes heavier, so it is worth only cutting further where it is really necessary.

Step 13: The Preparation at a Glance
In the end, you have completed several important things. You have evenly subdivided the object with a Loop/Path Cut, created a Vertex Color Tag, and already painted a draft of the chips on the object. With this, you have determined where the chipped paint should later appear. The actual fine work follows as soon as you assign the material.

Summary – Used Look in Cinema 4D: Painting Chipped Paint with the Vertex Map
You have seen how to use a Vertex Map to define the places where the paint chips off. What matters is having enough polygons that are as square as possible, which you create with the Loop/Path Cut. With the Vertex Color Tag in Alpha mode and a suitable paint strength, you can paint in a targeted way. The pen helps you with soft transitions. The painting is initially only a placeholder, so you should only judge the result after assigning the material. This is how the smooth headlight becomes an object with history.
FAQ
Why do I see nothing when painting with 100% white?The strength is set too high; lower it to 0%, then the painting becomes visible.
Why do I need many polygons?Only with enough points can chips be delineated precisely and evenly. Too few polygons lead to coarse transitions.
Why should the polygons be as square as possible?Elongated polygons are difficult to paint evenly. Square polygons are easier to control.
Do I have to make the polygons exactly square?No, it's not about perfect squares. All that matters is that the polygons are not extremely elongated.
What does the Alpha mode in the Vertex Color Tag do?It creates an alpha channel that later only determines where something becomes visible, without assigning a real color to the object.
Why does the painting look so strange in the viewport?The structure is only a preview of the points. The final look only shows once the material is assigned.
Can I increase the resolution afterwards?Yes, you can apply the Loop/Path Cut again and increase the number of cuts, for example to 84. However, the file becomes heavier as a result.

