

You will hardly need any command in Cinema 4D as often as Extrude. With it, you form protrusions, building parts and structures from flat polygons. Together with the Extrude Inner function and the Live Selection, you can build a surprising amount with it without having to master complex tools.
The video is only loaded from YouTube when you play it – data (including your IP address) is then transmitted to YouTube/Google. More in the privacy policy
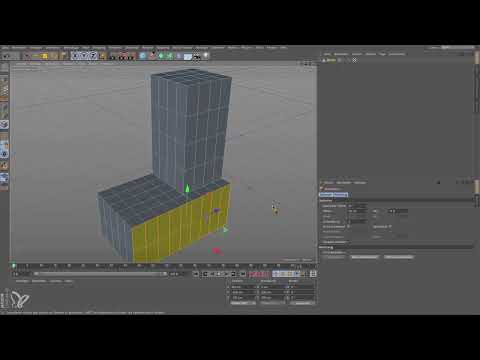
In this tutorial, I will guide you from a simple cube to a small high-rise. Along the way, you will learn how to select polygons correctly, what the difference is between moving a polygon group and true extruding, and how Extrude Inner works. The finale is the variance, with which you create irregular shapes.
Key Takeaways
Key Takeaways
- Extruding creates new faces and leaves the surrounding polygons in place. Moving with the arrow, on the other hand, drags the polygons along with their neighbors.
- The shortcut D starts Extrude, I starts Extrude Inner.
- An object must first be converted into a polygon object (key C) before you can use the command.
- With Extrude Inner, the direction does not matter. The face is reduced inward, and you can adjust further parameters afterwards.
- With the variance, you bring irregularity into extrusions without having to edit each polygon individually.
Step 1: Prepare the Starting Object
Start with a standard cube with an edge length of 200 cm. Enlarge it to 600 cm so that it looks like a building. Then you subdivide it into six segments, each 100 cm high. In the X and Z directions, four segments are enough. This subdivision gives you a clean grid structure later that you can use for orientation.

Step 2: Call the Command and Switch to Polygon Mode
You will find the Extrude command under Create Mesh. At first it is light gray and not selectable. The reason is the parametric primitive object: Cinema 4D can only execute Extrude on editable polygons. So press the C key to convert the object, and then switch to Polygon mode. The command would also be useful in Edge mode, but for getting started I will first show you how to work with polygons.

Step 3: Select the Polygons with the Live Selection
Before you can extrude, you have to determine which faces should be affected. Take the Live Selection tool for this and mark the eight polygons on the lower side of the building. The selection is the basis for everything that follows, so it is worth working cleanly here.

Step 4: Extrude with the Shortcut D
Now call the command via the menu and memorize the shortcut D right away. In the menu, there is an abbreviation in front of it that Cinema 4D uses for shortcuts. If you press the M key, an overview appears in which you can look up the letters of individual tools. For example, O stands for Slide, P for Stitch and Sew, and Q for Melt. For extruding, the D is all you need.
With the shortcut D, you are directly in the command. Then drag the selection in the viewport to the right or in another free direction. Make sure you do not drag on the axis arrow, otherwise you will move the polygons instead of extruding.

Step 5: Set the Offset
In the Attribute Manager, you will find the Offset. In the example, it happens to be set to 100 cm. Since the distances between the segments are exactly 50 cm, however, you set the value to 50. This creates a uniform extension that fits the grid exactly.

If you want to stack several such extensions on top of each other, click Apply New Transform in the Attribute Manager. Repeat the process until you have the desired number. In the example, five extensions are enough.
Step 6: Extruding and Moving Compared
At this point, it's worth taking a closer look at the difference. When you move a polygon group with the arrow, the movement takes the neighboring polygons along with it. In some cases, that can be exactly what you want, for example when an entire part of a building is supposed to move.

When extruding with D, the polygons that border the selection stay in place. Only the selection itself is pulled out. The edges of the surroundings are preserved, and a real explosion, that is, a clean protrusion, is created. This difference is central. Moving reshapes existing geometry, while extruding creates new geometry.

If you select all the polygons at the bottom with the 9 key and then drag with the arrow, the entire object moves. With D, on the other hand, an explosion outward is actually created, which you can cleanly limit to 50 cm.

Step 7: Extrude Inner
Besides normal extrusion, there is inner extrusion. Many beginners confuse it with extruding outward, but with the Extrude Inner function the direction is irrelevant. The command shrinks the selection so that a new frame is created within the surface. You can push it both inward and outward, and the result remains an inner extrusion.

Select the surface and call up the command under Create Mesh. The shortcut is I. Now drag the selection inward to shrink it. If you disable Preserve Groups, each polygon is shrunk individually, which leads to many small individual surfaces.

A big advantage: you can adjust the settings afterward. If you realize that you would rather have a single large inner surface instead of many small ones, you enable Preserve Groups again and correct the value.

Step 8: Combining Extrude Inner and Then Extrude
You can combine both commands to build a roof edge. First extrude the surface inward and then slightly bevel it. Then select an inner extrusion again with I and shrink it further. Afterward, you apply an extrusion upward with D and get a kind of roof.

If you need several small antennas instead, simply reselect the surfaces. This also works during an active selection. With I, Preserve Groups disabled, and a smaller scale, structures are created that are ideal for technical details.

Step 9: Creating Irregularity with Variance
Variance is the last tool in this tutorial. It is normally set to zero, so all extrusions turn out the same size. If you increase the value, each extrusion becomes slightly different. This applies to Extrude Inner as well as to normal extrusion.

Above 100 percent, variance becomes particularly interesting. Then there is a possibility that a polygon will be extruded not outward but inward. For most cases, you don't need this range. For organic or industrial structures, however, it can be a real enrichment.
Conclusion
With the two commands Extrude and Extrude Inner, supplemented by the Live Selection, you can build buildings, machines, and abstract shapes in a short time. It is no coincidence that the result in the example resembles a small factory. Try out the commands on your own objects, work with different offsets, and observe how the selection changes. Soon you will know the shortcuts D and I in your sleep.

Summary ??? Learning Extrusion in Cinema 4D: Extrude Inner and Variance in a Practical Tutorial
Extruding creates new geometry, while moving shifts existing polygons together with their neighbors. Extrude Inner shrinks the selection and can be adjusted afterward via Preserve Groups and Variance. With these tools and the Live Selection, you can create almost any basic shape.
FAQ
Why is the Extrude command grayed out on my cube?The object is still a parametric primitive object. Convert it into a polygon object with the C key, then the command is available.
What is the difference between Extrude and Move?When moving, the neighboring polygons are pulled along. When extruding, they stay in place, and a clean protrusion is created.
Which shortcut starts Extrude?The shortcut is D. You start the Extrude Inner command with I.
Is the direction important when using Extrude Inner?No. The inner extrusion shrinks the selection, regardless of which direction you drag in.
What does Preserve Groups do?If it is active, the polygons stay together as one surface. If you disable it, each polygon is shrunk individually.
What does Variance do?Variance ensures that extrusions turn out different sizes. Normally, it is set to zero.
Can I change the Extrude Inner settings afterward?Yes. You can also adjust the parameters later in the Attribute Manager, for example Preserve Groups.

