

Have you gotten to know Array, the Rotate tool, Bevel, and Lathe in the last few lessons and are wondering whether it has all really sunk in? Then this interim workshop is exactly right for you. You will build a Western windmill from it, using only simple basic objects and modeling tools.
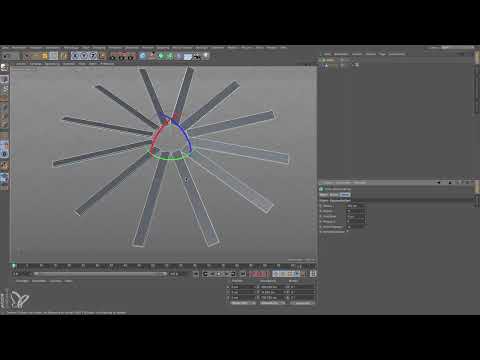
The video is only loaded from YouTube when you play it – data (including your IP address) is then transmitted to YouTube/Google. More in the privacy policy
A windmill with blades, housing, spinner, and lattice tower could certainly be designed in more detail. For a clearly recognizable scene, however, these techniques are entirely sufficient. In the end, you will have a scene that you can easily expand.
Key Takeaways
An Array object multiplies a basic object, and you can change its parameters at any time without rebuilding the result. Parametric objects cannot be rotated directly. You must first convert them into a polygon object with the C key and then align the axis in Axis mode. If you group multiple objects in a Null object, you can move and rotate them together. The Bevel generator ensures clean edges, and a Lathe object creates the spinner from a simple spline.
Step-by-Step Guide
Starting Point: The Cube as a Wind Blade
Start with a simple cube. The wind blades will be made from this cube before you add the housing and tower later. The order is important because every part fits seamlessly into the overall scene in the end.

Next, place the cube in an Atom Array, which arranges the blades in a circle around a center point. The Array will later handle all of the duplication.

Shaping and Multiplying the Blades
A real wind blade is significantly flatter than a cube. Therefore, set the thickness to about 5 centimeters. Then make the blades narrower and slightly longer so that they look like slats.

Then click on the Array again and increase the number of copies. In this example, it is eleven copies, so twelve blades in total. Thanks to the Array object, you only have to make each change once, and all the blades adopt it automatically.

Rotating the Blades: Why the Cube Doesn't Respond at First
Flat blades do not move in the wind if they are parallel to the axis of rotation. You have to turn them slightly so that the wind exerts a force on them. However, if you simply apply the Rotate tool, nothing happens at first. This is due to two characteristics of Cinema 4D that you should know.
Parametric basic objects cannot be rotated directly. You have to convert them into a polygon object with the C key. After that, you can edit the object itself.

Rotating the Axis Instead of the Object
The second trick concerns the axis. You do not rotate the object, but change its axis. To do this, switch to Axis mode in the mode bar. Afterwards, you can rotate the blade in any direction you want.
In the example, the instructor rotates the blade by 20 degrees. This angle is entirely sufficient for this windmill, but you can adjust it as you like.

Switch Axis mode off again right afterwards. As long as it is active, you only move the axis of each further object, and that quickly leads to confusion. So use it exclusively for the respective rotation.
Afterwards, open the Array once more and reduce the radius a little. The blades then sit slightly closer to the center point, and the wheel looks more harmonious overall. A big advantage of this approach is that you can reopen the Array at any time. The adjustment is therefore non-destructive.

Create a spinner from a spline
The spinner is the conical part in front of the blades. It distributes the oncoming wind evenly across the blades. To create it, draw a spline in the front or right view. Place the points so that a smooth curve is created that ends exactly on the Y axis. End the drawing with the Escape key.

To turn the line into a three-dimensional object, you use a Lathe generator. To do this, hold down the Alt key and click on the spline. Then place the Lathe function over it. The spinner now sits exactly on the axis. At first it may look a bit unusual, but that will change with the following steps.

Adjust the array radius and housing
So that the spinner also sits correctly in the array, open the array again and set the radius to about 200 centimeters. This way, all parts fit together properly.

So that the wind turbine stands upright later, you need to align all parts together. To do this, select them with a selection frame and then group them in a null object. The null object works like a group in Photoshop: you can move, rotate, or scale all the objects it contains together.

Now grab the Rotate tool and set the null object in steps of 10 degrees. This keeps the wind turbine stable and it finally stands upright on the ground.

Model the housing from a cube
For the housing, you create a new cube. It is initially too tall and too wide, so you adjust its dimensions. Also give it a subdivision in the Z direction so that you can edit edges later.

Convert the cube into a polygon object and switch to edge mode. Select the rear edge and pull it upward. This creates a technical-looking shape reminiscent of a machine housing. Then deselect it by clicking in the gray area.

Smooth edges with the Bevel generator
So that the housing looks softer, you add a Bevel generator and drag it into the cube. An offset of two to three centimeters and a subdivision of about five segments give good results. An annoying intermediate edge can be removed with the "Use Angle" option.

Substructure and tower
The tower consists of a cone, which you push back under the housing. Adjust its height until it starts exactly at the ground. At the bottom it may be a bit wider so that it looks stable.

A lattice tower needs angular cross-sections. Therefore, set the number of segments of the cone to four so that a square is created. You can then place the tower in an Atom Array, similar to the blades, which creates the lattice.


Then increase the radius of the cylinder in the array so that the lattice looks stronger.

Cross-connections for a stable lattice
Currently the tower looks unstable because it lacks cross-connections. To fix this, convert the cone into a polygon object and use the Mesh commands to create diagonals. After that, the lattice looks significantly more stable.

Fine-tuning the wind blade cube
Finally, you are still not entirely happy with the cube that forms the blades. To fix this, select the top edge. Make sure to use the Scale tool and not to move the axis system. To do this, switch to World mode before widening the edge. This keeps the proportions consistent.

When you end the selection, click the Array again, and the ghost image in the middle disappears, your wind turbine is finished.

Summary ??? Wind turbine in Cinema 4D: From cube to finished scene
You have learned how to create twelve wind blades with a cube and an Array and rotate them sensibly using the Axis mode. You have also created a spinner using Lathe, refined a housing with Bevel, and built a lattice tower from a cone. The Null object helped you align all the parts together. With this workshop, you can test your knowledge from the previous lessons directly in a small project.
FAQ
Why does nothing happen when I rotate a cube with the Rotate tool?Parametric primitive objects cannot be rotated directly; you must first convert them into a polygon object with the C key.
Do I have to turn off the Axis mode again after rotating?Yes, because as long as it is active, you only move the axis of each additional object, which is usually not what you want.
Can I still change the number of blades later?Yes, the Array object is non-destructive, so you can adjust the number of copies at any time.
Why do I group the wind turbine parts in a Null object?This way you can rotate, move, or scale all the parts together, similar to a group in Photoshop.
How do I create the spinner from a line?Draw a spline in the Front or Right view, place a Lathe generator over it, and make sure the curve lies on the Y axis.
Why should I switch to World mode when scaling?In World mode, the proportions and orientation stay easy to follow, while the axis system does not jump unexpectedly.

