

A bracket without material thickness quickly looks like a piece of paper. Only real thickness and an outward-facing curvature give it stability and credibility. That is exactly what this tutorial is about. You work on a headlight model in Cinema 4D and reinforce the bracket so that it looks like a real component. For this, you use loop selections, the Plane Cut, and several extrusion steps. The curvature is created in five small steps, each differing by 15°.
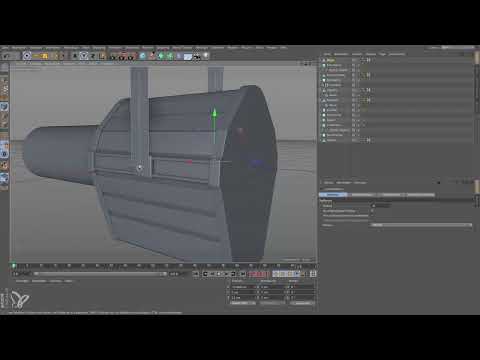
The video is only loaded from YouTube when you play it – data (including your IP address) is then transmitted to YouTube/Google. More in the privacy policy
Key Takeaways
Key Takeaways
- Convert the extrusion into a polygon object before modeling and create a backup object.
- With the Plane Cut and the even cuts (from version R19), you divide the bracket exactly into two halves.
- The loop selection on the outer edges is the foundation for the curvature.
- The curvature is created with the Extrude tool at an angle of 15° per step, 90° in total.
- An additional extrusion in Polygon mode gives the bracket the desired material thickness.
Step-by-Step Guide
Check the starting situation and prepare the object
First, take a close look at the bracket. It lacks any thickness, and that is immediately noticeable. Compared to objects like the back panel or the curves of the bayonet, however, it needs more than just a little volume. It requires a distinct outward curvature on the front and rear edges. This rounding provides strong stiffening, so that the handle becomes significantly more stable despite its low weight.
Before you get started, convert the extrusion into a classic polygon object. If something doesn't work out later, a backup object is worthwhile. Copy the original object, paste it in, and hide the duplicate. You can keep the original, because it's easy to get lost in complex modeling. It's best to rename the converted object directly to "Bügel" so that it is clear later what it is.

Divide the bracket into two halves with the Plane Cut
For the later modeling, you need an additional point at the lower part of the bracket, on both sides. To do this, the bracket has to be cut through. A cut across the entire object is not necessary, however. A local cut around the bracket is sufficient.
You can find the appropriate tool in the "Create Mesh" menu. It is called Plane Cut. Make sure the plane mode is set to "Free". Only then are there problems, because the tool then offers things you don't need at all. The plane in which you want to cut lies in the XY plane, and that is exactly where you place the cut.
The trick for a clean cut lies in the even cuts, which have been available since version R19. As soon as you click them, only a single option remains between two polygons or polygon edges. Simply click in the view, and the bracket is cleanly divided into two halves.

Correct the shape of the handle with points
Now you can adjust the rough shape of the bracket. Switch to Points mode and select the point on one side. On the other side, hold down the Shift key and mark the corresponding point. Then pull the lower point downward until a right angle roughly forms. A few millimeters more is perfectly fine. Leave the point where the bracket looks right visually. With that, you have defined the basic shape of the handle.

Set the loop selection on the outer edges
For the curvature, you need the outer edges of the bracket. To do this, switch to Edges mode and activate the Loop Selection. With the Live Selection, this would be tedious. Move the mouse over the edge, and Cinema 4D immediately shows you which selection will result.
If this doesn't work for you, it is often due to the Edge Loop option. Activate it, and the correct loop around the outside will be selected. Simply click on the edge. The selection is now prepared. Hold down the Ctrl key and deselect the two unwanted edges that do not belong to the outer edge. The same applies to the edges on the opposite side.

Creating the curvature with the Extrude tool
Now comes the actual rounding. For this, you use the Extrude tool from the "Create" menu. Take a close look at the settings. By default, there is an offset of -0.15 cm. The minus sign goes in the wrong direction, so you switch to a positive value. You initially set the angle to 0° and then find the right value using the preview.
To see better what you have beforehand, zoom in close to the object. Then click "Apply". At first, the bracket is only extended on both sides. That is too much, and no real curvature is created. So reduce the value until the extension becomes significantly smaller. Set the offset to about 0.1 cm. Then you already have a very slight curvature.
You now achieve the actual curvature in five steps of 15° each. Start with -15° and then re-transform the operation each time. In doing so, you increase the angle step by step to -30°, -45°, -60°, -75° and finally -90°. The stiffening upward becomes clearly visible. It ensures that the bracket gets exactly the shape you need.

Adding material thickness with polygon extrusion
The curvature alone is not enough yet. The bracket is still too thin at the edges because there are no polygons for the material thickness. Deselect everything and switch to Polygon editing mode. Then select the Extrude tool again.
Extrude the surface by about 0.15 cm. Make sure that the "Create Caps" option is activated so that the extrusion stays closed. After that, the bracket has a clean material thickness at the desired spot. This bracket is now about 1.5 mm thick and looks much more realistic.

Finishing up and preparing the attachment
Finally, click anywhere in the image to deselect. Then you can see the highlights, which are caught cleanly on the new surface. The bracket is already in the right place, but it is not yet fastened. A screw is still missing for the final connection to the headlight. You can tackle this step in the next work session.

Summary – Modeling a bracket in Cinema 4D: curvature and material thickness step by step
You have developed the bracket from a thin surface into a stable component. First, you converted the object into a polygon object and secured it with a replacement object. Then, with the Plane Cut and the even cuts, you created an exact division. With Loop Selection and the Extrude tool, you built up the curvature in five steps of 15° each. Finally, a polygon extrusion gave you the necessary material thickness.
FAQ
Why should I convert the bracket into a polygon object before modeling?A polygon object can be edited more flexibly. The extrusion is retained, and you can change points, edges and surfaces directly.
What is the replacement object for?It serves as a backup. If a modeling step goes wrong, you can show the hidden duplicate again instead of starting from scratch.
Which version of Cinema 4D do I need for the even cuts?The option is available from version R19.
Why does the offset have to be positive with the Extrude tool?A negative value shifts the extrusion in the wrong direction. With a positive value, the desired outward curvature is created.
What are the five steps of 15° each for?The gradual increase to a total of 90° ensures an even, natural-looking rounding without the geometry becoming messy.
Why is the material thickness only added at the end?The curvature is created first via the outer edges. The extrusion in Polygon mode then adds the thickness so that the bracket does not look too thin at the edges.

