

Imagine building a cooking pot in Cinema 4D that ends up actually looking like a household object, using only primitive objects from the menu. That is exactly what this workshop shows you. You don't need any modeling knowledge about polygons or splines. The tools from the first chapter are enough: tube, cylinder and torus, plus the parameters for segments, fillets and slices as well as the object coordinates.
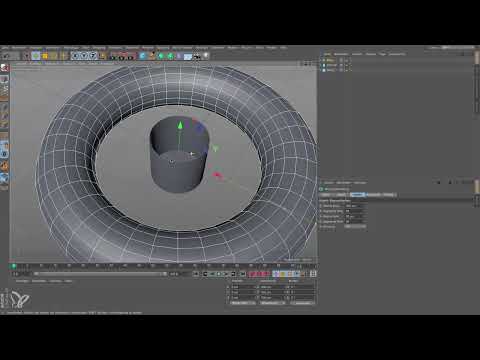
The video is only loaded from YouTube when you play it – data (including your IP address) is then transmitted to YouTube/Google. More in the privacy policy
The pot is created in several small steps. First you create the body as a tube, then you close the bottom with a cylinder, round off the sharp edges and finally assemble the handles from a cut-out torus. Pay attention to the numerical values at every step, because in this workshop precise adjustment is what matters most.
Key Takeaways
Parametric primitive objects can be adjusted at any time afterwards. So you don't have to set perfect dimensions from the start. If you change a value later, the entire object adapts.
Segments determine smoothness. With 36 segments a round object quickly looks angular, while 72 segments give a much rounder impression.
The Alt key enables fine steps. With the Alt key held down, you change values in smaller increments, for example in millimeters instead of whole centimeters.
Fillets break sharp edges. Even a few fillet segments with a small radius produce shiny edges that look realistic.
Slices turn a torus into a handle. With angles such as 0 to 180 degrees or 180 to 360 degrees, you cut out exactly the part you need.
Coordinates help with exact placement. With a value in the Z coordinate, you place objects mirrored on the opposite side.
Step-by-Step Guide
Step 1: Understanding the Basic Idea and Scale
Before you get started, you should know that you can scale primitive objects at any time. Working to scale is still a good principle, especially if you later work with several objects in a scene. For this workshop, however, we deliberately set that rule aside and concentrate on the shape.

Step 2: Creating the Tube as the Body
Select the tube in the object menu. It forms the basic shape of your pot, so you should choose it in such a way that the shape remains easily recognizable. Drag the outer radius until you reach roughly the desired size.
Step 3: Setting the Wall Thickness
The tube initially has a wall thickness of four centimeters. That is far too thick for a pot. Therefore reduce the wall thickness to one centimeter, because that is easy to work with and the pot looks more realistic.

Step 4: Increasing the Segments
In the raw state you can clearly see individual corners at the bottom edge. This is due to the 36 segments of the circumference. Double the value to 72. This makes the tube noticeably rounder, and you can also see through it better when looking inside.

Step 5: Closing the Bottom with a Cylinder
To close the pot at the bottom, you need a cylinder. It already has a radius of 50 centimeters, while the outer radius of the tube is 51 centimeters. Therefore set the radius to the inner value of 50 centimeters so that the bottom fits exactly into the pot.
Here too, you increase the circumference from 36 to 72 segments so that the bottom becomes just as round as the body. You can increase the height of 200 centimeters by about one centimeter. Then you move the cylinder downward so that it forms the pot's bottom.

Step 6: Fine-Tuning the Bottom in Millimeter Steps
The bottom should be a little larger than the opening so that it stands out. A whole centimeter would be too much for that, though. Therefore hold down the Alt key when changing the diameter. This way you change the value not by one centimeter, but only by one millimeter per click. This results in a subtle enlargement that is visually convincing.

Step 7: Round off the sharp edge at the rim
The upper edge of the tube still looks very sharp. Select the tube and open the fillet settings. There are initially eight fillet segments. That is too fine for this application; five segments are completely sufficient.
Also change the fillet radius to 0.2 millimeters. To do this, hold down the Alt key again so you can work in millimeter steps. The fillet then affects both the inside and the outside. If you then click into the empty area, you can see a fine highlight edge that is created precisely by this fillet.

Step 8: Prepare the handle with a torus
A pot without a handle still looks incomplete. For this you need a torus. However, the default torus is much too large, so you should first shrink it significantly. The result can be fine-tuned later.

Step 9: Shrink the torus
Set the radius of the torus from 200 to 20 centimeters. Since the torus now looks too thick in proportion, also reduce the radius of the tube that makes up the torus by a factor of 10. After that, the torus already looks much more reasonable.

Step 10: Halve the torus with a slice
A handle should only sit on one side of the pot, not as a full circle. To do this, open the Slice tab on the torus. For a torus, this tool is much more useful than for a cube. Set the slice from 0 to 180 degrees. Then pull the torus outward along the Z axis until it is no longer visible on the inside and sits cleanly against the pot on the outside.

Step 11: Fit the torus to the pot
The torus still looks a bit large. Open the object again and reduce the radius to about 13 centimeters. Also adjust the radius of the tube until the proportions are right. If the torus is then too small for the pot, pull it outward a little again. Then move it upward so that the handle sits well on the side.

Step 12: Copy the torus
You don't have to create the second handle from scratch. Select the torus and copy it with Command and C on a Mac or Ctrl and C on Windows. Then paste it with Command and V or Ctrl and V, respectively. The copy lies exactly on top of the original, so it is not visible at first. Select the copy so that you can move it.

Step 13: Mirror the copy using the Z coordinate
Open the coordinates and read the Z coordinate of the copy. In the example, it is 48.963 centimeters. Put a minus sign in front of it and confirm with the Enter key. The copy thus moves exactly to the opposite side of the pot.

Step 14: Trim the second handle
The copy still shows the same slice from 0 to 180 degrees as the original. To make it sit correctly on the other side, set the slice to 180 to 360 degrees. Confirm the input. Now both handles are exactly the same distance from the Y axis, and the pot looks complete.

Step 15: Check the result
View the finished pot from different perspectives. Pay attention to the transition of the fillets, the symmetry of the handles, and the base, which protrudes slightly beyond the edge. A model like this is not a masterpiece, but it impressively shows how much can be built with just a few parametric primitive objects.

Summary ??? Building a Cooking Pot in Cinema 4D: Parametric Primitive Objects Step by Step
You have seen that a recognizable cooking pot can be created from a tube, two cylinders, and a ring. The most important adjustments are the segments for smooth curves, the wall thickness and radii for the proportions, the Alt key for fine steps, and the slice for the handles. With the Z coordinate, you mirror the handles exactly to the opposite side. Feel free to try out the steps with your own dimensions, because that is exactly the appeal of parametric objects.
FAQ
Question: Do I have to work to scale when building the cooking pot?Answer: Not necessarily, because you can scale any primitive object at any time. For larger scenes, however, working to scale still makes sense.
Question: Why should I increase the segments to 72?Answer: With 72 segments, a round object looks smooth, whereas with 36 segments clearly visible corners appear.
Question: What do I need the Alt key for when changing values?Answer: While holding the Alt key, you change values in millimeter steps instead of whole centimeters, which is important for fine adjustments such as the bottom overhang.
Question: How do I create a handle from a ring?Answer: In the ring object, you use the Slice tab and set the desired angle range, for example 0 to 180 degrees, so that only a semicircle remains.
Question: How do I place the second handle exactly opposite the first?Answer: Copy the ring, set the Z coordinate of the copy to the mirrored value with a minus sign, and set the slice to 180 to 360 degrees.
Question: Why does my rounding look too sharp after applying it?Answer: Choose fewer rounding segments, for example five, and a small radius of about 0.2 millimeters, so that the edge is cleanly broken without looking overly fine.

