

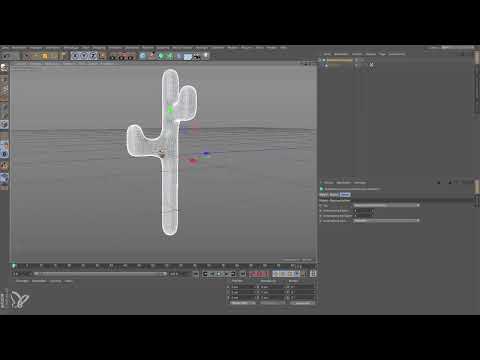
So far, all the models you have created in Cinema 4D probably look rather angular. This is exactly what you will change in this tutorial. You will learn how to build a basic shape with simple extrusions and turn it into a soft, organic shape with the Subdivision Surface object, SDS for short. A cactus that is created from a cube serves as the example. The guide is aimed at beginners who already know the basics of polygon modeling or are just getting to know them.
The video is only loaded from YouTube when you play it – data (including your IP address) is then transmitted to YouTube/Google. More in the privacy policy
Key Takeaways
The SDS rounds all child objects. Corner points are converted into curve points, just like the corner points of a spline, which makes the entire shape evenly soft.
The Live Selection is safer than the Selection tool. With it, you reliably move polygons in the right direction without accidentally misaligning them.
The spacing of the edges determines the hardness of the rounding. If edges are close together, the edge stays hard. The further apart they are, the softer the rounding becomes.
Editor and renderer subdivision are separate settings. In the editor, a low level is usually enough to relieve your graphics card. For the final rendering, you increase the renderer subdivision.
The child object remains editable. You can keep moving, extruding, or adding polygons even after rounding.
Step 1: Preparing the Starting Cube
First, create a cube and give it a size of about 20 cm. In the next step, you set the subdivision in the Y direction. Ten subdivisions are enough so that you have enough polygons for the extrusions later. The result is a column made of ten segments, with one face at the top and one at the bottom.

Step 2: Extruding Polygons with the Live Selection
Convert the cube into a polygon object. Then switch to Polygon mode and select a single polygon with the Live Selection. Next, pull it outward with the Extrude tool. Repeat the whole process once with another small piece. This creates the first protrusions, which will later shape the cactus.

Step 3: Why the Live Selection Is Safer
You could also select and extrude polygons directly with the normal Selection tool. This is faster, but it carries a risk: you can easily move polygons in the wrong direction without noticing it right away. Therefore, it is better to use the Live Selection, even if it takes a few more clicks. You then trigger the extrusion with the keyboard shortcut D.

Step 4: Adding More Extrusions Upward
If you also want to give the upper part of the cactus arms, click again with the Live Selection on the desired face. Then extrude it upward. With every further extrusion, the shape grows, and you get a basic structure that still looks very angular.
Step 5: Understanding the SDS as a Rounding Object
The SDS is its own object, to which you subordinate the polygon objects. You can think of it as all the corner points of your model being converted into curve points. The shape becomes round as a result, similar to a path in space that is smoothed. You surely already know a spline: a corner point creates a sharp corner, a curve point a soft rounding. The SDS transfers this principle to complete bodies.

Step 6: Setting Up the SDS
For your model to be rounded, you must make the polygon object a child of the SDS. To do this, hold down the Alt key in the Object Manager and then click the green SDS icon. The polygon object now ends up below the SDS. The cactus immediately looks soft and organic. This exact effect is the goal when you model, for example, plants, figures, or objects that should not look angular.

Step 7: Keeping Typical Applications in Mind
Think of technical devices, especially cameras. Older models were often angular, whereas modern designs are frequently very round. Manufacturers like Canon use similar mathematical models to design their housings. The SDS helps you recreate such shapes digitally.

Step 8: Select the Subdivision Type
In the SDS object, you will find various types to choose from. For most projects, leave the setting at Catmull-Clark. This model also supports N-gons, meaning polygons with more than four corners, and is therefore suitable for most modeling tasks. You only need other types in special cases, for example when the arrangement of the polygons needs to be adjusted for texturing.

Step 9: Set Editor and Renderer Subdivision
The SDS has two subdivision values: one for the editor and one for the renderer. In the editor, the value should stay low, because each additional level multiplies the number of points your graphics card has to calculate. Even at level 0, a threefold subdivision is displayed. For a scene with many cacti, that quickly becomes too much. An editor subdivision of 2 is usually sufficient. If the object is far back in the scene, 1 or even 0 is enough. The renderer subdivision, on the other hand, you increase for the final image so that the curves look fine and smooth.

Step 10: Retain Editability
A big advantage of the SDS is that you can continue to edit the child object. To do so, click on the cube or cactus again and select, for example, the previously selected polygon. You can move it, and the shape stays soft and rubbery. Additional branches on the underside can also be added. The SDS therefore always keeps evaluating your object while you work on it.

Step 11: Turn Off the SDS When Needed
If the rounding bothers you while working, simply turn off the SDS. Then you are working with the familiar angular cube again. Extrude as usual, then turn the SDS back on and compare the result. This way you can quickly see how the shape changes.

Step 12: Use Edge Spacing Deliberately
The rounding is closely tied to the spacing of the edges. If two edges are close together, the rounding between them is only slight, and the edge stays hard. If you increase the spacing, the rounding becomes softer. You can use this knowledge deliberately when modeling. For example, if you create an inner extrusion on the cactus, scale it down, and move it outward or inward, you will see that the edge initially stays hard and only becomes softer with greater spacing.


Summary ??? Cinema 4D SDS: From Angular Cube to Round Cactus
You have seen how to build a basic shape with a cube divided into ten segments and extend it with extrusions. The Live Selection protects you from mistakes when moving polygons. With the SDS as a parent object, your model becomes soft and organic without you losing editability. When setting the subdivisions, make sure to choose a low value in the editor and a higher one for rendering. The spacing between the edges ultimately determines the hardness of the rounding. With this knowledge, in the next step you can model more complex shapes and use the SDS deliberately for your projects.
FAQ
What exactly does the SDS do in Cinema 4D?The SDS rounds all child polygon objects by converting their corner points into curve points. This makes the shape look soft and organic.
How do I make an object a child of the SDS?In the Object Manager, hold down the Alt key and then click the green SDS icon. Your polygon object is then automatically grouped underneath it.
Why should I use the Live Selection instead of the Selection tool?With the Live Selection, there is less risk of accidentally moving polygons in the wrong direction. The Selection tool is faster, but remains more prone to errors.
What is the difference between editor and renderer subdivision?The editor subdivision determines the display in the workspace and should stay low to spare the graphics card. The renderer subdivision defines the quality of the final image and can be set higher.
Can I still edit an object after rounding it?Yes, the child object remains editable. You can move or extrude polygons even after adding the SDS.
What happens if I turn off the SDS?The model is displayed as angular again, and you work with the original geometry. This is helpful if you want to make precise extrusions.
Which subdivision type should I choose?For most projects, Catmull-Clark is the right choice, since this type also supports N-gons. You mainly need other types for special texturing requirements.
What does the hardness of a rounded edge depend on?It depends on the spacing of the neighboring edges. If the edges are close together, the edge stays hard. The greater the spacing, the softer the rounding becomes.

