

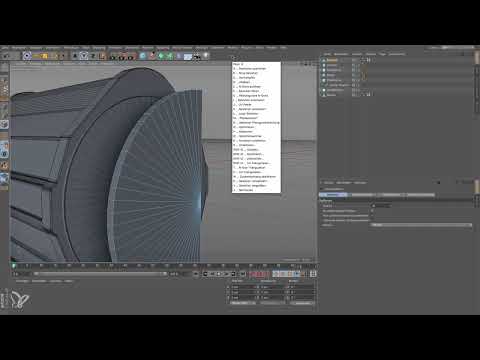
An inconspicuous cylinder has a clear task here: it creates a fine shadow gap at the connection between the lens and the camera. This is exactly what you work on in this tutorial. You build a lens bayonet from a half cylinder, mirror it into a complete component, place it precisely on the main body and round off all edges evenly with the Bevel Deformer.
The video is only loaded from YouTube when you play it – data (including your IP address) is then transmitted to YouTube/Google. More in the privacy policy
Key Takeaways
- Axially symmetrical objects save work, because you only model one half and add the other half using a symmetry object.
- You remove unneeded faces such as cap and inner faces early on so that the model stays clear and manageable.
- Loop or path cuts separate the polygons that you will move later and prevent unsightly gaps.
- The Bevel Deformer only rounds off cleanly if you keep the offset small and limit the angle to 40°.
- The Phong angle controls how soft edges appear in the shading.
Step-by-Step Guide
1. Create a copy of the cylinder as a basis
Start by copying the cylinder with the rounding. Copy it with Ctrl+C and paste it with Ctrl+V so that the size matches exactly. Move the copy forward a bit so that you can edit it easily. Then reduce the height to about 0.8 cm, because the bayonet is significantly flatter than the main body.

2. Remove unneeded cap faces
You do not need the roundings on the cap faces for the bayonet, since the Bevel Deformer will take care of the final rounding later. Therefore, select the cap faces in Polygon mode and delete them. The object already looks much tidier afterwards.

3. Create a half cylinder using axial symmetry
The bayonet is axially symmetrical to the Y axis. So you only need to build one half. The cylinder initially has 72 segments. Halve this number to 36 and then set the range from 90° to 270° in the slice. This creates a clean semicircle shape with 72 segments again on the half, and you avoid the asymmetrical underside and top side. You convert the finished half cylinder into a normal polygon object and name it "Bayonet" so that you can find it again unambiguously later.

4. Delete and optimize interior polygons
In the half cylinder there are triangular interior polygons. They are not visible, but they get in the way later when mirroring. Switch to Polygon editing mode, select these faces and delete them. Afterwards you should optimize the object. To do so, open the menu Mesh > Optimize or use the radial menu: hold down the U key, and then choose the Optimize command with O. This function closes gaps that occur as soon as you pull individual polygons outward.

5. Use the bayonet mount as a reference
Before you model the protrusion, it is worth taking a look at the Picture Manager. There, among the photographs, you will find a reference image with the detail of the bayonet mount. Use this image as a guide for the height, width and position of the lug, because this way the result will look believable later.

6. Set cuts for the protrusions
So that you can move individual polygons without distorting the rest of the model, you need clean dividing lines. Open Mesh > Create > Loop or Path Cut and make a first cut that separates a piece about 1 cm wide. Make a second cut about 0.5 cm below it. Half the distance later ensures that the transitions remain consistent.

7. Pull the protrusion forward
Activate the Live Selection and select the polygon band between the two cuts. Then pull it forward so that the protrusion is created. Make sure to also select the two adjacent polygons. This creates a smooth transition, and the middle edge stays in its position. Repeat the process on the lower side of the bayonet, ideally with a similar shape as at the top. This is not an extrusion, but a pure move, in which the neighboring polygons go along with it.

8. Mirror the entire bayonet with a symmetry object
Half a bayonet is not enough for the construction. Therefore, create a symmetry object and place the bayonet beneath it. The ZY mirror plane is already set correctly. You can see the result immediately in the viewport. To get a complete object, convert the symmetry object into a polygon object or null object. You can then pull the bayonet out, and delete the empty null object.

9. Use the Bevel Deformer
The bayonet still looks rather angular. Place a Bevel Deformer beneath the object so that it encloses the model. The first time you use it, the result often looks broken. This is due to the default value of 1 cm for the offset. First set the value to 0 and then carefully to 0.1 cm. Then increase the subdivision until the number of segments on the rounded edge matches the cylinder.

10. Limit the rounding by angle
To prevent the Bevel Deformer from processing every edge, activate the "Use Angle" option and set the angle to 40°. Now only edges whose angle between the polygons is above 40° are rounded. Flat transitions at 0° remain untouched. If individual edges look too hard, the Phong angle helps. A value of 20° visibly smooths the edges, whereas at 0° they look hard. In the video, the Phong angle ends up staying at 40°, because otherwise the edges would undesirably stand out as individual segments in normal shading.

11. Check the placement on the cylinder and the shadow gap
Finally, place the bayonet on the cylinder. To do this, switch to the main view and move the component step by step to the edge of the cylinder. Make sure it sits exactly at the spot where the shadow gap is later supposed to appear. Rotate the view and check the result. If the gap becomes visible, your construction has been successful.

Summary – From Cylinder to Lens Bayonet: Modeling in Cinema 4D
You have built a lens bayonet step by step: You created a half cylinder using axial symmetry, removed unnecessary faces, formed protrusions via cuts, and completed the result with a symmetry object. The Bevel Deformer with a limited angle and an adjusted Phong angle ensures clean rounding. The final test on the cylinder shows whether the desired shadow gap is created.
FAQ
Why are the cap faces deleted?The rounded parts on the cap faces are not needed for the bayonet, because the rounding of the edges is later handled by the Bevel Deformer.
Why do you work with only one half of the object?The bayonet is axially symmetrical. Working with one half saves effort, and the symmetry object generates the second half automatically.
What does optimizing the object do?When moving individual polygons, gaps can appear. The Optimize command closes these gaps and cleans up the geometry.
Why should the offset of the Bevel Deformer be small?An offset of 1 cm quickly destroys the model. With a value of 0.1 cm, the shape is preserved and the rounding looks even.
What is the purpose of the 40° angle in the Bevel Deformer?The angle ensures that only edges with a bend of more than 40° are rounded. Flat transitions therefore remain unchanged.
What does the Phong angle do?The Phong angle determines how soft edges appear in shading. Small values look harder, larger values smooth the transitions.

