

You are working on a model and notice that a cube or a plane needs to be subdivided more finely. As long as the base object stays parametric, that's not a problem: you simply change the segments. But as soon as you convert the object into a polygon object in order to edit points, edges and polygons directly, you run into limits. This is exactly where the Knife tool helps. It subdivides polygon objects in a targeted, precise way and without detours. It is also useful in SDS modeling when you want to make rounded areas sharper.
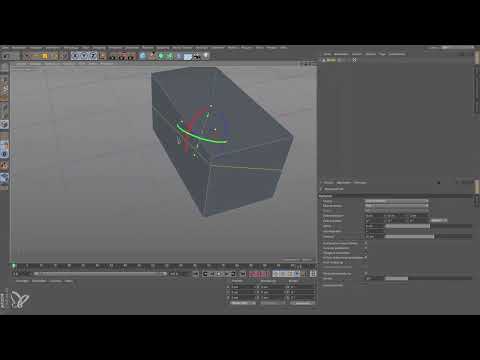
The video is only loaded from YouTube when you play it – data (including your IP address) is then transmitted to YouTube/Google. More in the privacy policy
Key Takeaways
The Knife tool subdivides polygon objects in a targeted and precise way. It includes three types of cuts: Line Cut, Plane Cut and Loop Cut. As long as the cuts are still marked in orange, they can be adjusted. You confirm them with the Escape key.
Step-by-Step Guide
Converting a Parametric Base Object into a Polygon Object
When you can no longer control the cube via its segments, you convert it into a polygon object. The result is a normal polygon object that you can subdivide as you like. Keep in mind that the conversion cannot be undone without losing the history. Therefore, plan the timing carefully.

Finding the Knife Tool
You can find the Knife tool in the menu under "Create Mesh". It used to be a single tool, up to version R18. Today it is split into three tools: Line Cut, Plane Cut and Loop Cut. This split has the advantage that each tool takes on its own task, even though the functions have become very extensive.

Using Line Cut in Edge Mode
Switch to Edge mode and select Line Cut in the "Create Mesh" menu. If you want to cut a polygon diagonally, simply click on an edge and drag the line across the polygon. Cinema 4D offers you the edge or the polygon as a target. Thanks to snapping, the cut point automatically snaps to the edge. But you can also cut into the polygon without the cut having to touch an edge.

Starting and Aligning Cuts Flexibly
Line Cut is more flexible than you might think. You don't have to start at the edge. You can start in the middle of the polygon, run to an edge, continue to the point and cut beyond the edge. The nice thing about it: the resulting points remain freely movable. If a point is supposed to lie not on the edge but within the polygon, you simply move it. In this way, you keep full control over the course of the cut.

Confirming Cuts and Using the Escape Key
As long as you haven't confirmed the Line Cut, the cuts are only indicated. So you can change them again at any time. If you press the Escape key, the cut is actually executed and the tool is released. This step is the decisive difference between a preview and an actual subdivision. If you don't like a change, you can still intervene beforehand.
Using Plane Cut in Free Mode
The Plane Cut cuts through all planes of the object. In Plane mode, the default setting is "Free". If you click twice, you define a cutting plane that severs the object completely. As soon as you move the mouse, a rotation tool appears with which you rotate not the object, but the cut. You can increase the number of cuts live and even change the spacing. This was not possible in earlier versions.
Aligning Plane Cut to the Local Axes
In most cases you don't want to cut freely, but along the axes. Therefore, switch the Plane mode to "Local". Then you can cut along the XY, YZ or XZ plane. Previously you had to laboriously calculate the spacing. Today there is the option "Even Cuts". If you want to divide a cube exactly into four equal parts, you activate this option and confirm with Escape. You get three cuts that are distributed exactly evenly.

Using the plane cut directly on the polygon object
An important advantage: you don't have to leave the base object parametric for long. You can convert it right away and then subdivide it as you like with the plane cut. This saves you intermediate steps while still maintaining precision.

Placing the loop cut precisely
The loop cut is probably the tool you will need most often. It cuts exactly where you place it. If you move the mouse over an edge, Cinema 4D offers you a suitable cut. If you choose the top edge, a cut is created along the Y plane. On the side, a cut is created in the XZ plane. You can move the cut placed in this way using a slider, as long as it is orange.

Entering distances exactly
If you want to set a cut to a specific value, for example ten centimeters from the floor, you use the input field. Pay attention to the units of measurement. If you misjudge the value when reading the slider, you correct the value directly in the field. Confirm the entry and then press Escape. The cut is then placed at exactly this position.

Placing multiple cuts and removing them again
You can add further cuts to the loop cut. Cinema 4D then distributes them quantized, that is, at even intervals. If you want to remove a cut again, you simply drag it out of the object, for example upwards. This way you can deliberately keep or discard cuts.

Leaving the Knife tool
You exit the Knife tool with the Escape key. Alternatively, you simply select another tool. Both ways take you safely out of the tool.

Summary – Knife tool in Cinema 4D: Making precise cuts
The Knife tool in Cinema 4D offers you three cut types: line cut, plane cut, and loop cut. You first convert your object into a polygon object and then cut deliberately. Cuts remain editable until you confirm them with Escape. You will encounter the loop cut most often, but the other two tools are also worthwhile. Practice all three on a simple cube, and you will quickly find your way.
FAQ
Why can't I subdivide a cube via the segments after converting it?After conversion into a polygon object, there are no longer any parametric segments. Instead, you subdivide the object directly with the Knife tool.
What is the difference between the plane cut and the loop cut?The plane cut cuts through all layers of the object, for example along an axis. The loop cut places a cut exactly where you start at an edge.
What is the Escape key used for with the Knife tool?With Escape you confirm the cuts and release the tool. Before that, the cuts can still be changed.
How do I create four equally sized parts with the plane cut?In plane mode, activate the option for even cuts. Then you confirm with Escape, and the object is divided into exactly four parts.
Can I move or remove a cut afterwards?Yes, as long as the cut is marked orange, you can move it with the slider. You remove a cut by dragging it out of the object.

