

As soon as your scene takes place outdoors rather than in a studio, the entire lighting setup changes. Whether it's mountains, a landscape, or a floating planet: the sky determines mood, brightness, and shadows. Cinema 4D offers two lighting objects for this, which differ significantly in structure and requirements. In this tutorial, you'll get to know both, set up the physical sky with the Sky Manager, and find out when a sky object with an HDRI is the better choice. The steps follow the course of the video, which is 675 seconds long in total.
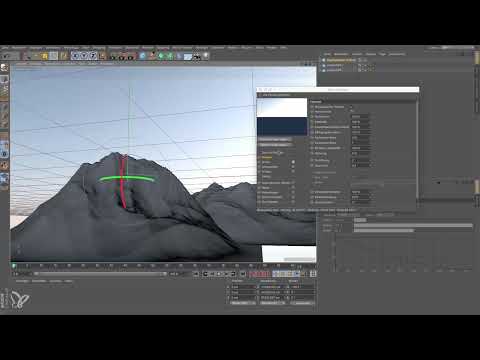
The video is only loaded from YouTube when you play it – data (including your IP address) is then transmitted to YouTube/Google. More in the privacy policy
Key Takeaways
- For outdoor scenes, Cinema 4D provides the physical sky and the sky object.
- The physical sky delivers a sky dome, sun, clouds, and other effects without any additional files.
- You open the Sky Manager by double-clicking the sky. There you control date, time, location, and brightness.
- The sky object requires an HDRI in order to illuminate realistically. Without a texture, the sky stays gray.
- Don't confuse the two skies. They generate light in different ways.
Step-by-Step Guide
Step 1: Preparing the Outdoor Scene
Interiors are usually created with area lights or physical lights. For an outdoor scene, however, you need an environment that is lit by the sky. As an example, we use a mountain range that you create with a parametric primitive. Increase the segments to about 300 so that the deformation shows fine detail. Then you stack the object in depth, move individual parts, and adjust the width until the impression of a real landscape emerges.

Step 2: Distinguishing the Two Skies
Once a landscape is in place, you need a sky. Cinema 4D offers two fundamentally different objects for this. You can find the physical sky in the Create menu under "Physical Sky". The sky object is located under "Create" and "Environment" and is simply called "Sky". Don't confuse them, because they work differently. The physical sky calculates the light itself, while the sky object waits for a texture.

Step 3: Setting Up the Physical Sky in the Sky Manager
The physical sky already comes with blue, horizon brightening, and sun. Open it by double-clicking the icon to launch the Sky Manager. Under "Time and Location" you can change the date and time. The change takes effect immediately in the viewport, so you can directly observe the position of the sun.

Step 4: Controlling Brightness, Intensity, and Sun
In the Sky section of the Sky Manager, you adjust the radiation intensity. It determines how much light the sky gives off to the scene. The visible intensity, on the other hand, only changes the brightness of the sky in the image without generating more light. You should keep an eye on both values separately. With the rotate tool you can rotate the sky, and the sun moves across the dome as you do so. If you want an overcast day, simply remove the sun from the scene. The blue sky then remains, but often looks somewhat artificial without the sun.

Step 5: Using Presets, Location, and Animation
The Sky Manager contains presets that quickly give you a subdued or more dramatic mood. Select one and watch how the sun adjusts on its own. For realistic lighting conditions, specify a location under "Time and Location", for example Chicago in Illinois. Cinema 4D then calculates the position of the sun for the selected date and time. For animations, you can also define time spans, for example for a flight from one city to another. At the end, don't save the file if you only want to experiment.

Step 6: Getting to Know the Sky Object and Its Limits
The sky object works differently. It is an object that lies virtually infinitely far away, similar to a rainbow that you can never reach. If you load it without a texture, it stays gray. It expects an image file that serves as the environment. Without this texture, the sky object therefore cannot provide realistic lighting.

Step 7: Build a Test Scene with a Ground and a Planet
To check the effect, you need objects in the image. Add a ground and a sphere. Pull the sphere upward, add a ring, and adjust the radius and tube thickness until you have a planet floating above the ground. Without a material, however, the scene looks rather dull, which is why you will add a material and an HDRI in the next step.

Step 8: Load an HDRI from the Content Browser
An HDRI is a high dynamic range image that stores the lighting conditions of a real environment. In the Content Browser, open the presets that were installed with your Cinema 4D version. Choose the Light Setups category and then the HDRI files. Availability depends on your version. With the Studio version, significantly more presets are available to you. Double-click an environment, such as a marketplace, and check how it looks in your scene.

Step 9: Assign a Material and Assign the HDRI to the Sky
For the planet, you choose a material, for example brushed chrome. Drag it out of the Content Browser with a double-click and assign it to the ring or the sphere. Then you assign the HDRI to the sky object by dragging the material onto the sky. In the viewport, you can immediately see how the image settles into the sky and changes the reflections of the metal. A render is not necessary for this preview.

If you are working with an older version, the reflectivity may not be displayed. Activate it under "Options" so that the reflection works. In versions R18 and R19, this option is already available. In older versions, the effect only appears when rendering.

Summary – Lighting Outdoor Scenes in Cinema 4D: Physical Sky and Sky Object at a Glance
For outdoor scenes, you have two options in Cinema 4D. The Physical Sky comes with a sky dome, sun, clouds, rainbow, fog, and stars. You control it via the Sky Manager and need no external files. The Sky Object, on the other hand, only delivers realistic light if you assign an HDRI to it. Decide depending on the project: the Physical Sky is suited to quick, customizable results, the Sky Object to scenes with a photorealistic environment.

FAQ
Do I have to load an HDRI for the Physical Sky?No, the Physical Sky does not need an HDRI because it calculates its own light.
Why does the Sky Object stay gray?The Sky Object expects a texture. Without an HDRI or image, it stays gray.
Can I remove the sun in the Physical Sky?Yes, you can remove the sun via the object list, which results in an overcast sky with a blue dome.
How do I change the position of the sun?Open the Sky Manager, select "Time and Location", and adjust the date, time, or location.
Why can't I see the reflectivity?In older versions, you have to activate reflectivity under "Options". From R18 onward, it is already available.

