

The camera body consists of two halves, a front and a back. To turn them into a solid, three-dimensional body, you first have to merge the halves into one closed spline. Then you use the Extrude tool to define the housing thickness. In this tutorial, I will guide you through the entire process: from connecting the splines and closing the gaps to cap surfaces and fine roundings on the edges.
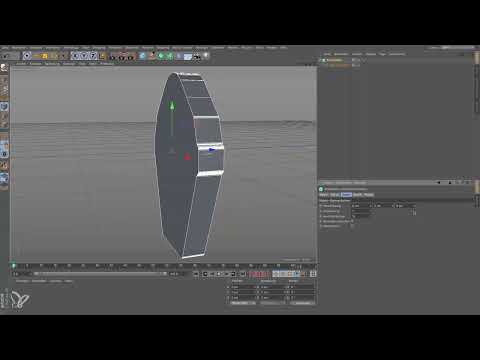
The video is only loaded from YouTube when you play it – data (including your IP address) is then transmitted to YouTube/Google. More in the privacy policy
Key Takeaways
- The Extrude tool needs a single, closed spline. Two separate halves must be connected beforehand.
- You remove superfluous points to keep the mesh clean. Straight sections do not need intermediate points.
- You set the housing thickness directly in the Extrude object. The default value of 20 cm has to be adjusted to around 1.8 cm.
- Cap surfaces are necessary so that the housing does not look hollow. Roundings on the edges provide a realistic look.
- The start level determines the subdivision of the rounding. With five segments and a radius of about 0.15 cm, you get a clean edge.
Step-by-Step Guide
Step 1: Connect the two splines into one object
For the back panel, you work with the original spline and the mirrored spline. First, you have to turn them into a single object. In the Object Manager, select both splines and then choose the command "Connect Objects & Delete". Afterwards, only one spline object remains in your scene. The gaps between the two halves are still open at this point, so you close them in the next step.

Step 2: Close the gaps at the end points
Now switch to Points mode and look at the spline up close. You will notice that in some places many points lie close together. This is not a problem, because it produces particularly fine roundings. You connect the two points at the gaps by selecting them with the Live Selection. You may notice that these are curve points. That is also fine, because you can still connect them. You find the command for this in the menu under Spline Functions as "Connect Segments". Click the desired option, and the gap is closed.

You can apply the same procedure on the other side as well. However, the connection at the spot where you start is often easier. If you click the spline there and then choose "Close Spline", it is closed completely.

Step 3: Close the spline and remove unnecessary points
After the spline is closed, there may be two additional points at the starting spot that were needed for the beginning of the spline. You can now select and delete these points. Make sure, however, that you only remove points on straight sections. You should keep the intermediate points in the curves, because they define the shape of the roundings. On the front and on the straight edges, on the other hand, you may tidy up. In the end, the spline should look clean, without unnecessary nodes.

Step 4: Insert the spline into the Extrude object
Now it's time for the actual extruding. For this you need the "Extrude" tool, which you call up via the Create menu. Place the finished spline as a child object in the Extrude object by dragging and dropping it beneath it in the Object Manager. The spline must be directly under the Extrude object. If the tool contains several objects, you can click on them one after another in the list to check the settings.

Step 5: Set the housing thickness
By default, the tool extrudes 20 cm. For the camera body, that is far too much. Therefore, open the object properties of the Extrude object and switch to the "Object" tab. There you find the value for the movement in the direction of the extrusion. Set it to 2 cm and then measure precisely. The actual thickness of the front and back parts is about 18 mm. So you enter 1.8 cm here. The remaining coordinates, such as the position, stay at zero so that nothing shifts.

Step 6: Activate Caps
Without caps, the object looks from the outside as if you could see through it. Therefore, activate the "Caps" option in the Extrude object. This closes both the front and the back. In addition, the caps are now given their own edge, which you will round in the next step.

Step 7: Round the Edges and Adjust the Start Level
To soften the sharp edges, you activate the "Rounding" option in the caps area. First, you set a radius of 1 cm. This value is deliberately chosen to be large so that you can clearly see the effect. When you look at the rounding, it doesn't yet look entirely even, because the back is not yet subdivided finely enough. This can be solved with the start level. Set the start level to 5. This creates a truly fine and clean rounding, and the mesh remains even.

Step 8: Refine the Radius for a Technical Rounding
A radius of 1 cm is usually too round for a camera body. Therefore, set the value to about 0.15 cm. The edge then no longer looks too soft, but still remains visibly rounded. This creates a technical rounding, as found on real housings. Look at the edges from different angles to check the result.

Step 9: Design the Front the Same Way
The front requires the same settings. Here, too, you need caps and rounding. Set the number of segments to five so that both sides are subdivided equally. You enter the radius by hand as 0.15 cm. After that, the front and back look identical.

Step 10: Check the Result
Finally, view the object from several perspectives. In some places, the white subdivision lines disappear. This is not an error: the program combines a polygon there that is internally subdivided into many smaller polygons. This is unproblematic for further editing. With that, the back wall is essentially finished, and you can continue with the further details of the camera body.

Summary – Cinema 4D Extrude: Creating a Camera Body from a Spline
You have learned how to join two spline halves into a closed object and remove the superfluous points. Afterwards, you brought the spline in the Extrude tool to the realistic housing thickness of 1.8 cm. With caps, a start level of 5, and a radius of about 0.15 cm, you get clean, technical-looking edges. The front can be created with the same settings, so that both sides look identical.
FAQ
Why do I have to join the two splines before extruding?The Extrude tool requires a single spline. Two separate halves would lead to two separate bodies that do not fit together properly.
What thickness should the housing have?For the camera body described, the thickness of the front and back parts is about 18 mm. You therefore enter 1.8 cm in the Extrude object.
Why are caps important?Without caps, the object is open at the ends, and you can see through it. With caps, the housing looks closed and solid.
What does the start level do for the rounding?The start level determines how finely the rounding is subdivided. With a start level of 5, an even and very clean rounding is created.
Why shouldn't the radius of the rounding be too large?A large radius looks soft and unrealistic. A value around 0.15 cm creates a technical rounding that suits a camera housing.

