

A subject without suitable lighting quickly looks flat and lifeless. This tutorial shows you how to set up an area light in Cinema 4D so that it behaves like real light. For this you need two settings: an area shadow and a falloff. You will also get to know the physical light, which already comes with both. The two light types are quite similar, and you will learn what to pay attention to depending on which version you are working with.
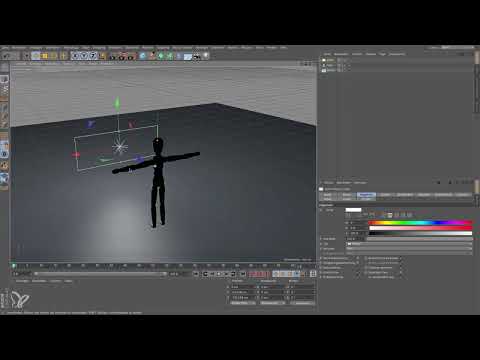
The video is only loaded from YouTube when you play it – data (including your IP address) is then transmitted to YouTube/Google. More in the privacy policy
Key Takeaways
- An area light needs an area shadow and an inverse square falloff in order to look physically correct.
- The floor in the scene is infinitely large. For a clean presentation, you can limit it.
- With the falloff cage, you determine how far the light reaches. The 100 percent line shows you the point where full brightness is reached.
- The physical light (from version R19) has shadow and falloff built in from the start. By default, it only emits in the Z direction and has an intensity of 500 percent.
- The falloff angle can be reduced from 180 degrees to about 120 degrees so that the light falls more naturally.
Step-by-Step Guide
Preparing the Scene
Begin with a new scene and add a floor from the scene objects. At first glance, it seems to end at a certain boundary. In fact, however, it is an infinitely large object that extends to the horizon. This only becomes visible when rendering. So that the white lines of the floor do not merge into a white surface at the horizon, you limit the floor slightly. This way you avoid unsightly artifacts in the image.

Next, you add the figure with a height of 180 cm. It simply stands on the floor and serves as a scale for the lighting later on. Without light, however, it appears to be in a gray void and doesn't look good yet.

Understanding Physical Correctness
For several years now, Cinema 4D has been oriented more strongly toward physical correctness. Both materials and light sources are preconfigured so that they behave in a physically correct way. The lights include the point light, the spot light, the area light, the infinite light, the sun light, and the physical light. The area light is among the relatives of the spot light and is the basis for the first part of this tutorial.

Placing and Shrinking the Area Light
Create an area light and initially position it in the center of the coordinate system. You will see that the figure is now lit from below, which looks rather unnatural. Move the light up and lift it out of the floor. The figure is then lit much better. Then you shrink the light a little so that it looks more like a kind of strip light. You can leave it like this for now.

When rendering, however, you notice a problem: the light emits in both directions and illuminates the figure, even though it doesn't cast a shadow yet. But it shouldn't emit in both directions.

Setting the Emission Direction
Open the details of the light. At the very bottom, you will find a small checkbox labeled "Z direction only". The blue element of the coordinate system stands for the Z direction. Activate this option so that the light only emits in the desired direction. Then render again. Now the light only illuminates the figure, but still doesn't cast a shadow.

Activating the Area Shadow
You will find the shadow in the "General" tab of the light. There you can choose between soft and hard shadow. Both look appealing, but are not physically correct. Therefore, choose the area shadow. It is calculated quickly in small scenes. For your final rendering, you should always use it so that you don't accidentally work with a different shadow type. Then render again. The calculation takes a little longer, but now the figure casts the shadow it should actually cast.


Setting the Falloff
One important detail is still missing. Move the light source a bit farther away from the figure and light the scene from higher up. Render the image again. You will notice that the light seems to reach infinitely far. It does get darker in the back, but not to the extent that would be physically correct. A light source should lose intensity with the square of the distance.

To do this, open the details of the light source again. Very close to the "Z direction only" option, you will find the Falloff. Change it from "None" to "Inverse Square". This setting is physically correct.

Defining the Range with the Falloff Cage
Now you define how far the light should shine. For this, there is a cage made of three circles that marks the 100 percent line. At these points, the light source reaches exactly 100 percent brightness. Drag the cage a bit larger so that the man in the scene lies completely within the area where the light reaches its full strength. Render the image and check the result. The figure is now correctly lit, and the scene becomes noticeably darker toward the back. Your light source is now working in a physically correct way.


Comparing the Physical Light Source
Now delete the area light and create a physical light source. It has been available since version R19 and has everything built in from the start: an inverse square falloff and an area shadow. Position it a bit wider, farther away, and slightly higher. You will notice that you don't need to set anything additional. In the details, the "Z direction only" option is already enabled, the falloff is inverse square, and the area shadow is set on the "General" tab.


Another difference is already visible in the preview: The physical light source is white at the front and transparent at the back. So it emits light in the Z direction. If you want to use both directions, remove the checkmark next to "Z direction only". With the physical light source, however, this option is set by default.

On the "General" tab, you can give the light source a slight color if needed. Choose a color and reduce the saturation slightly, and the light will get a subtle tint. Of course, this also works with other colors.

When rendering, you will see that the light source has a falloff, the scene gets darker toward the back, and the light source looks convincing overall. The physical light source is easier to handle because you have to set less.

Adjusting the Intensity
One small difference remains: The area light has a default intensity of 100 percent, while the physical light source has 500 percent. If you are working with the physical light source and the image becomes too bright, reduce the intensity. You can do this at any time, and in the viewport you immediately see the effect of the change.

Optimizing the Falloff Angle
When rendering, you will also notice that the physical light source emits light upward and downward at an angle of 180 degrees. For diffuse light, this is fine in principle. Physically, however, it would be more plausible if less light arrived in exactly this area. To do this, open the falloff angle setting in the Details tab. Set the value to about 120 degrees. After that, the light falls more the way you would expect it to in reality.

Summary ??? Area Light in Cinema 4D: Setting Up Shadows and Falloff Correctly
With an area light, you create realistic lighting as soon as you activate the area shadow, limit the emission to the Z direction, and set the inverse square falloff. With the falloff cage, you determine how far the light reaches, and with a falloff angle of about 120 degrees, the lighting looks even more natural. The physical light source already offers the same functions by default and is therefore particularly well suited for a quick start. With it, pay particular attention to the intensity of 500 percent.
FAQ
Question: Why should I use the area shadow instead of the soft or hard shadow?Answer: The area shadow is physically correct, while the soft and hard shadows look good but do not correspond to real-world conditions. It is also calculated quickly in small scenes.
Question: What does the "Z direction only" option mean?Answer: It limits the light source's emission to the positive Z direction, that is, the direction shown in white in the preview. Without this option, the light source emits in both directions.
Question: Why is the floor in my scene white at the horizon?Answer: The floor is infinitely large, and the fine lines become denser in the distance and merge into a white surface. A limited floor prevents this effect.
Question: Which version of Cinema 4D do I need for the physical light source?Answer: The physical light source is available from version R19. In older versions, you have to work with the area light and make the settings manually.
Question: Why does my character look too bright when I use the physical light source?Answer: The physical light source has an intensity of 500 percent by default. Reduce the intensity until the image looks balanced.

