

When you're working on a staircase or another component in Cinema 4D, hard edges quickly look artificial. With a small rounding, you create the so-called technical edge, which catches light cleanly and makes your model look more realistic. With parametric primitive objects this is easy, but with polygon objects you need other tools. In this tutorial you'll learn about two of them: the Bevel command for individual edges and the Bevel Deformer for the entire object.
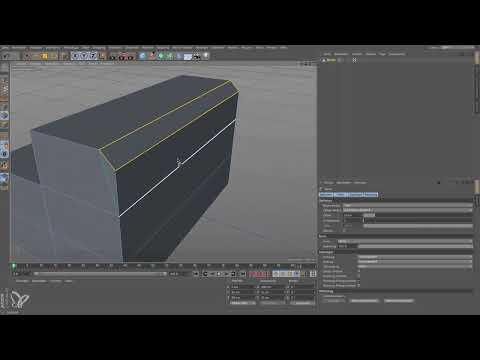
The video is only loaded from YouTube when you play it – data (including your IP address) is then transmitted to YouTube/Google. More in the privacy policy
Key Takeaways
Parametric primitive objects can be rounded directly, polygon objects cannot. For those you need the Bevel command or the Bevel Deformer.
The Bevel command works on specifically selected edges and allows more complex transitions between polygons.
The Bevel Deformer is made a child of a polygon object and can be switched on and off at any time as well as adjusted afterwards.
With the angle threshold you determine from which bend angle an edge is beveled at all. Flat edges thus remain untouched.
Starting Point: Building a Staircase from a Cube
Before you can round anything, you need a model. To do this, create a cube and set it to an edge length of 40 cm. Also give it three subdivisions in the Z direction. These segments later ensure that you can place the steps exactly where you need them.

Converting the Cube into a Polygon Object
So that you can select and extrude individual faces, you first have to convert the cube into an editable polygon object. Then switch to Polygon editing mode. Make sure you are working in this mode before you start the next steps, otherwise the selection tools won't work as desired.
Creating Steps with Extrusion
With the Live Selection tool, select the two faces from which the first step should be created. Then press the D key to activate the Extrude tool. Pull the selection upward and set a height of 40 cm. While dragging, pay attention to the numerical display so that the value is exactly right.

The step is now visible. For the next step, you deselect the faces that have already been extruded. To do this, hold down the Ctrl key and click on the step you no longer want to edit. Then you select the next faces and simply click "Reapply Transform" in the extrusion. This way the value stays at exactly 40 cm without you having to enter it again.

Finally, click once in the gray area outside the object to release the selection. The staircase is now basically finished, but still looks very hard and angular.

Rounding a Single Edge with the Bevel Command
The Bevel command is particularly suitable when you want to edit one or a few edges in a targeted way. To do this, switch to Edge mode and select the edge you want to round. All actions then affect only this edge, which gives you control over the result.

Now call up the Bevel tool. You'll find it in the command menu under the polygon tools. After calling it up, an offset of 10 cm and a subdivision of 0 appear by default. Since the settings may have been changed beforehand, click "Reapply Transform" if necessary. This has the same effect as clicking "Apply".

At first, the result doesn't look like a clean rounding yet, more like a chamfer. You can still recognize the effect well, though. Reduce the offset to 4 cm and set the subdivision to 5. This creates a soft, even rounding that you can enlarge, reduce, or refine as you like.


Customizing the Profile of the Rounding
In the Bevel tool you will also find the setting for the shape. By default it is set to "Round". If you switch to "Profile" and then to "User", you can define the rounding profile yourself. Every point of the profile can be moved, and the changes affect the edge immediately. For very fine results you often need more subdivisions. This tool is especially useful when you need an edge that is not just rounded, but, for example, chamfered or slightly curved.

Using the Bevel Deformer for the Entire Object
Sometimes you want to round not just one edge, but the entire object. For this you don't have to select every edge individually. A much more convenient way is the Bevel Deformer, which has been available since version R17. You will find it in the Deformer menu. Drag it onto the cube in the Object Manager so that it becomes a child of the polygon object. The entire staircase is then beveled.

The settings correspond to those of the Bevel command. You can set the offset, adjust the subdivision, and use the depth to influence how the edge runs. Normally you leave the depth at 100%. For the exercise you can again choose five subdivisions.

The great advantage of this deformer lies in its flexibility. You can deactivate and reactivate it as needed to compare the result with the unrounded model. Offset and subdivision can be changed at any time afterwards.

Excluding Flat Edges from Beveling
With the Bevel Deformer, however, a problem can occur: even edges that are already flat, such as the connection between two faces on one plane, are rounded as well. This is unnecessary and distorts the result. The solution is the angle threshold. Activate it and set it to 40°. The edges between faces that form an angle of 0° are then no longer beveled.

The edges at the top edge of the steps and the step edges have an angle of 90° and are therefore still rounded. Since 40° is far below that, the deformer captures exactly the edges you need.

How to Recognize the Results Correctly
A good rounding is not an end in itself. It should soften the edge so that it catches highlights when rendering, without unnaturally bloating the model. Usually you bevel all objects that are not already completely round once they are fully modeled. Make sure the offset does not become too large, and use only as many subdivisions as necessary for the desired smoothness.

Summary – Cinema 4D Bevel: Rounding Edges with the Bevel Command and Bevel Deformer
Polygon objects in Cinema 4D cannot be rounded using the same settings as parametric primitive objects. With the Bevel command you work on individual edges in a targeted way and can freely design the profile and shape. With the Bevel Deformer you round entire objects, toggle the effect at any time, and use the angle threshold to control which edges are captured. Start your models with a test rounding of a few centimeters, and increase offset and subdivision step by step until the result matches your ideas.
FAQ
Can I round a cube directly with the Bevel command?No, the Bevel command requires a polygon object. First convert the cube into an editable object and switch to edge or polygon mode.
What is the difference between the Bevel command and the Bevel Deformer?The Bevel command edits the selected edges directly in the model. The Bevel Deformer acts on the entire child object and can be switched on and off at any time.
What is the subdivision used for when beveling?The subdivision determines how many segments the rounding has. The more subdivisions, the smoother the edge becomes, but the number of polygons also increases.
Why are flat edges beveled too?If the angle threshold is deactivated, all edges are captured, including those between two faces on one plane. Activate the angle threshold and set it to, for example, 40° so that only truly angled edges are rounded.
What does "Re-transform" mean?With this function you apply the current values for the next action, for example an extrusion with the same height. The result corresponds to clicking "Apply".

