

Imagine you have set up a studio scene with a 180 cm tall figure, and the light should not only hit the figure, but also fall as a visible beam through a smoky room. This is exactly where you quickly hit limits with area lights and physical lights, because neither of them has visibility. The target spot closes this gap. It automatically aligns itself to a null object, so you can effortlessly direct it at specific objects. In this tutorial, you will learn how to create and align the target spot, shape it with visibility and turbulence, and specifically exclude individual objects from the light.
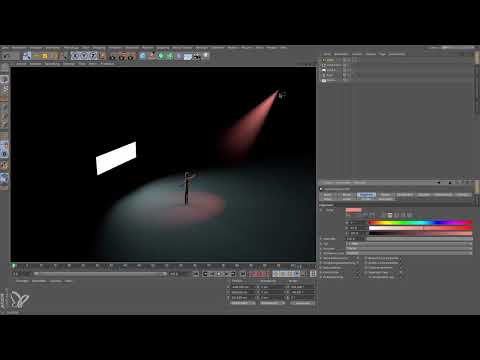
The video is only loaded from YouTube when you play it – data (including your IP address) is then transmitted to YouTube/Google. More in the privacy policy
Key Takeaways
- Area lights and physical lights do not support visibility. The target spot is suitable for this.
- The target spot is automatically connected to a null object (light target) via an Align-to expression. If you move the null object, the light direction follows.
- Visibility simulates smoke or fog. You set it in the light settings under General.
- A wave-shaped turbulence in the visibility settings breaks up the uniform brightness and looks much more realistic.
- In the Project area, you can use Exclude or Include to define which objects the light hits.
Step-by-Step Guide
Step 1: Choose the right light source
Start with a clean initial situation. Delete the area light you worked with before, and use the physical light instead. If you are using an older version of Cinema 4D, you may not find it directly. In that case, you can rebuild it from an area light, even though that is cumbersome. By the way, regarding point lights: a point-shaped light does not exist physically. A small area light therefore behaves more correctly and gives you more creative freedom overall.
In the menu, next to the physical light, you will see three other variants with similar icons: the spot light, the IES light, and the target spot light. The IES light is only worthwhile if you want to import real manufacturer data of luminaires. It is therefore not suitable for this tutorial. The target spot light is the spot with better control, because it works like the normal spot but is easier to align.

Step 2: Create the target spot and align it automatically
Create the target spot and watch how it points directly at the figure. You may wonder how the light source knows where the figure is. The answer is simple: it doesn't know by itself. The blue circle symbol, which stands for Target, is responsible. Behind it is a so-called Align-to expression, which assigns a null object to the spot. In this example, this null object is called Light Target 1 and you can find it in the Object Manager.
As long as you don't change anything on the light target, the spot remains aimed at its target. This is the big advantage of this method.


Step 3: Adjust position and viewing direction
If you move the light target, you change the direction in which the spot points. This works in all directions, so you can freely decide where the light falls. Usually, the light target stays where it is while you move the light source itself. The spot then continues to point at the figure.
For a more dramatic effect, you can move the light source farther away, narrow the light cone, and angle the spot slightly from above. This way, the lighting really looks like a stage spotlight.

Step 4: Set shadow, color, and falloff
In the General section, you can assign an area shadow to the spot as usual. A render will later show you whether the edges should look softer so that the lighting appears physically correct. In addition, a spot may well be colored. A custom color helps you distinguish multiple lights more easily in the scene setup.
For physically correct behavior, you also activate the inverse square falloff. You already know this option from the area light.

Step 5: Activate visibility
Now comes the feature that gives the target spot its special appeal. Visibility is also located in the General section. You can set it to visible, which quickly leads to a result. Alternatively, the volumetric option is available to you. It delivers finer results, but requires significantly more rendering time because shadow maps are additionally calculated into the light cone. For getting started, the simple variant is completely sufficient.
When rendering, however, you notice that the light source itself becomes visible. This is not physically correct, because you have defined neither the density nor the humidity of the room. Strictly speaking, one would have to describe the atmosphere precisely before calculating it. This step is nevertheless useful for an initial mood.


Step 6: Fine-tuning the visibility
Open the visibility settings to refine the effect. There you can adjust the outer distance, that is, determine how far the light cone extends into the space. In the example, the brightness was too strong, so it was reduced considerably. After rendering, the scene already looks significantly more realistic. Make sure you don't set the brightness too high. A value of around 50 percent is a good starting point.
Step 7: Breaking up homogeneity with turbulence
However, the result still looks too uniform. You can fix this impression by assigning a wave-shaped turbulence to the visibility. To do so, go to the appropriate place in the visibility settings and add a corresponding option. A smoke-like structure immediately appears in the air, bringing the light cone to life. You can change the size of the turbulence in the settings. Larger values make the marbling blur and create the impression that the room has been filling with smoke for a while.


Step 8: Deliberately excluding or including objects from the light
Sometimes the light shouldn't fall everywhere. In the example, a disruptive circle of light appears on the floor that doesn't fit the scene. In that case, you can click on the light source and select the Exclude mode in the Project section. Then simply drag the floor into the field. After rendering, no light is visible there anymore, while the visible light cone is retained.
The opposite works the same way. If you switch from Exclude mode to Include, only the selected object is illuminated. This is useful if, in a studio scene, you want to give a dark object more light specifically, without the entire surroundings becoming bright.


Summary – Cinema 4D Target Spot: Creating a light cone in fog with visibility
The target spot is the right tool if you want to create a visible light cone in Cinema 4D. Its automatic alignment to a null object makes control pleasantly simple. With visibility, its fine-tuning via distance and brightness, and a wave-shaped turbulence, you achieve a believable smoky atmosphere. Through the Exclude and Include function, you also retain full control over which objects are in the light.
FAQ
Why can't I assign visibility to an area light source?Visibility is intended for the target spot. Area light sources and physical light sources do not support this function, which is why you should fall back on the target spot for the light cone in fog.
How does the target spot align itself automatically?It is connected to a null object, the so-called light target, via an Align expression. If you move the light target, the spot automatically points in the new direction.
What is the difference between visible and volumetric?The visible setting is faster and is sufficient for a first impression. Volumetric delivers more accurate results, but requires significantly more calculation time.
Why does the light cone look too uniform?Without structure, the smoke looks homogeneous. A wave-shaped turbulence in the visibility settings brings movement and marbling into the light cone.
How do I prevent an object from receiving light?Select the light source, open the Project section, set the mode to Exclude, and drag the object into it. The object will then no longer be illuminated.
How do I illuminate only a specific object?In the Project section, use the Include mode and add only the desired object. Only this object will then receive light.

