

You may know the situation: you place a cube, a sphere and a plane, render, and the underside of the cube looks pitch black, even though the sun is clearly shining on it. This is exactly where this tutorial comes in. It shows you why materials and render settings are closely linked in Cinema 4D, and how you can achieve much more realistic results with physically correct materials, often even with less effort than with the old methods.
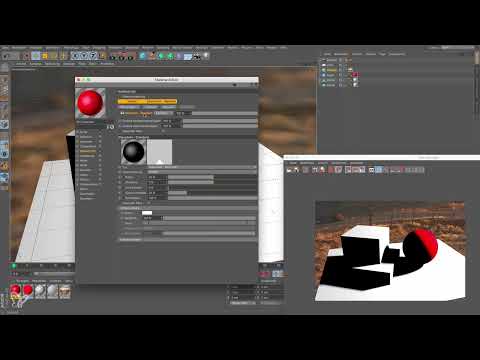
The video is only loaded from YouTube when you play it – data (including your IP address) is then transmitted to YouTube/Google. More in the privacy policy
Key Takeaways
- In Cinema 4D, the material and the renderer together determine the result. You can't sensibly adjust the render settings without looking at the materials.
- Classic materials do not calculate physically correct light reflections. That's why you have to artificially improve them with Global Illumination and Ambient Occlusion.
- Physical materials work with measurable quantities such as roughness, reflection strength and Fresnel behavior. They come with indirect lighting and realistic reflections built in.
- With physical materials and the physical renderer, you can usually do without Global Illumination and Ambient Occlusion. This saves setup work and render time.
- Small output sizes and low quality levels are suitable for test renders. For the final quality, you increase the resolution and the sampling quality in a targeted way.
Step-by-Step Guide
Step 1: Understanding the Starting Scene
Before you tweak the settings, it's worth taking a look at the scene. It consists of a plane, a cube, a sphere and a sky object. The sky object is an image that surrounds the environment and provides light. Since an image alone does not produce real sunlight, you add a small spherical light source as the sun. This gives you a starting point that does justice to the later comparison.

Step 2: Switching the Render Preset to "Physical"
Open the render settings via the gear icon in the render view. By default, the "Standard" preset is selected there. Switch it to "Physical". Then open the "Physical" tab and you'll see that there are only a few options there. You already know depth of field. You can ignore motion blur as long as you don't want to render an animation.
Step 3: Understanding the Sampler and Quality
The sampler determines how Cinema 4D calculates the image quality. The "Adaptive" option makes the most sense for most scenes because it calculates areas with a lot of detail more intensively. The "Progressive" option keeps rendering until you stop the process. The "Fixed Count" option works with a fixed value: the higher you choose the subdivision, the longer the rendering takes, but the better the result becomes. For a start, the "Preview Low" preset is enough. The image will then look grainy, which is perfectly fine for tests.

Step 4: Setting the Output Size for Test Renders
A rendering in the viewport is impractical. It looks unfinished and is not suitable for comparing. Therefore, open the output settings and set the width and height. For test runs, 400 x 600 pixels is enough so that the result is available quickly. Activate the "Lock Ratio" option so that when you change one side, the other adjusts automatically. For the later fine rendering, you can increase the value to about 6000 x 4000 pixels.

Step 5: Leaving the Remaining Output Settings Unchanged
You can leave most options in the output unchanged. Only the size of the image is important. When saving, you can set the target folder directly or render first and save the image later. You don't need to set up Multipass and antialiasing separately for these basics, because in physical rendering the sampling quality also determines the edge smoothing.

Step 6: Turning Off Sub-Polygon Displacement if Needed
Sub-Polygon Displacement calculates materials with real geometry deformation and requires a lot of render time for this. If you only want to assess the overall scene and not every detail, you can temporarily deactivate this option. But don't forget to turn it back on for the final rendering.

Step 7: Render in the Picture Viewer
Instead of rendering in the viewport, you use the Picture Viewer. You open it via the corresponding menu or via the icon in the toolbar. There you can view the image at the desired size and switch back and forth directly between different renderings. This makes the comparison much clearer.

Step 8: Look at the classic materials
Now it gets exciting. In this scene, you have created each material twice: once as a classic material and once as a physical one. With the classic red material, only the color is set, and the reflectivity uses the default specular value. The white also looks rather gray in this form. Render the scene with these materials to see the starting point. You will notice that the shadow sides of the cube remain completely black.

Step 9: Activate Global Illumination
In the past, this problem was solved with Global Illumination. This effect calculates how light hits from one surface onto another, is reflected there, and indirectly illuminates the surroundings. Activate the effect in the render settings and first choose one of the presets. Then render again. The sphere and the shadow areas now look illuminated, which reinforces the impression of realistic light.

Step 10: Switch from the preview to a custom setting
The preview preset is intended for tests and produces artifacts. For a clean result, you switch to "Custom" in the render settings. There, for the Global Illumination entry, you choose the Irradiance Cache, that is, the model that calculates the indirect illumination. First set the record density to "Low". For a final quality, you later increase it to "Medium" or "High".

Step 11: Add Ambient Occlusion for contact shadows
Another classic effect is Ambient Occlusion. It creates darker areas where objects touch or stand close together, so-called contact shadows. Activate the effect and compare the result with and without Ambient Occlusion as well as with and without Global Illumination. With a higher record density, the disturbing blotches that are often seen as artifacts in renderings also disappear.

Step 12: Create physical materials
Now comes the decisive step. Create a new physical material. For the white material, you set the specular strength to zero in the reflectivity, since this value is not physically justified. For the red material, you enter the color in the Diffuse channel and also set the specular strength to zero. The behavior of the surface is then controlled by roughness and reflection, which are based on measurable values.

Step 13: Assign the physical materials
For the new materials to take effect, you have to assign them to the objects. Drag the physical material onto the cube, the sphere, and the plane. You can then delete the classic materials or simply leave them, as they will be overwritten. Make sure that the new materials are active on all objects before you start rendering.

Step 14: Look at the result without GI and AO
Now deactivate Global Illumination and Ambient Occlusion and render the scene. The image takes a bit longer and still looks grainy, which you can improve with a higher quality level. Pay attention to the details: The sphere shows a reflection of the sky, which was not visible at all with classic materials. The edges of the cube also receive highlights, since the cube is slightly rounded by the Bevel deformer. This rounding also produces a usable contact shadow.

Step 15: Carry out the comparison with GI and AO activated
Now switch Global Illumination and Ambient Occlusion back on and render again. Compare the result directly with the previous rendering. You will hardly see any difference. This is because physical materials already behave correctly: They reflect the light of the environment themselves. The additional effects therefore bring little, but cost computing time.

Step 16: Choose the Physical Renderer
In the last step, you decide on the renderer. In the render settings, select the "Physical" entry and set the desired quality there. If you would like to try the new Pro Render instead, you can use that as well. However, it is covered elsewhere in the tutorial.

Summary ??? Mastering Cinema 4D Render Settings: From Standard to Physical Rendering
You have seen that classic materials quickly look unrealistic without Global Illumination and Ambient Occlusion. Physical materials with measurable values for roughness, reflection, and Fresnel, on the other hand, bring realistic lighting conditions with them right away. In the current version of Cinema 4D, you should therefore use physical materials and the physical renderer whenever possible. Set the quality low for tests and only increase it for the final rendering. This saves time and still gives you a convincing result.

