

Imagine you are building a miniature scene and want exactly the bird's-eye view you had in mind. With the default camera you often get further than you think. But if you want to control focal length, sensor size or even depth of field, you need your own camera object. This guide shows you step by step how to create it, set it up and use the Physical Renderer to produce real blur.
The video is only loaded from YouTube when you play it – data (including your IP address) is then transmitted to YouTube/Google. More in the privacy policy
Key Takeaways
- A custom camera object can be positioned precisely and operated with a freely adjustable focal length.
- The focal length determines how strong the perspective looks: wide angle emphasizes foregrounds, telephoto lenses compress the scene.
- With the Protection tag you lock a camera position so that it cannot be moved accidentally.
- You should generally leave the sensor size unchanged, because it affects the field of view.
- Depth of field only works together with the physical camera and the Physical Renderer. The aperture controls how strong the blur is.
Step 1: Creating the camera object
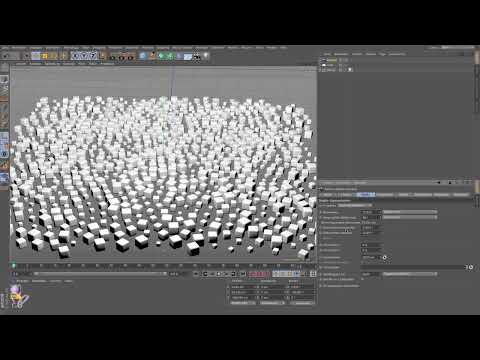
Open the project file with the small cube scene. The view already shows a camera, namely the default camera of the viewport. You can move and rotate it, but you cannot change its focal length. You create your own camera object via the camera icon in the toolbar.

Step 2: Understanding the view pyramid
Leave the camera view and look at the scene from the outside. There you see the camera object as a small icon. The view pyramid shows you what the camera captures. With it you can estimate which areas end up in the image and where you still need to correct the camera.

Step 3: Looking through the camera
You do not change the focal length via the view in the viewport, but directly on the camera object. To do this, activate the camera so that you look through its lens. After that, you can still move toward your scene with the 2 key and adjust the settings at the same time.

Step 4: Comparing wide angle and telephoto
First set a focal length of 12 mm. This is a typical wide angle: objects in the foreground look huge, and they quickly become smaller toward the back. Then switch to a long focal length of about 70 mm. Now the foreground and background look almost the same size, because the telephoto focal length compresses the perspective. Which effect you like better is purely a matter of taste. Many designers find the wide angle more exciting because it brings more dynamism into the image.

Step 5: Locking the camera with the Protection tag
Once the position and focal length are right, you should secure the camera. To do this, click the camera object in the Object Manager and in the Tags menu choose Cinema 4D Tags, then Protection. From this moment on, the camera can no longer be moved, not even with the 1, 2 or 3 keys. You can still switch it off and look through it at any time. However, it can no longer be changed. You can remove the Protection tag later if you want to continue working.

Step 6: Using a second camera
You can add another camera at any time. Create it just like the first one, switch it on and compare the image sections. In the example, the second camera is removed again afterwards because it is not needed. For comparison images, however, a second camera object is still practical, since you can save different viewing angles of the same scene.

Step 7: Putting the sensor size into perspective
In the camera object you will find the sensor size in addition to the focal length. If you change the sensor size, the focal length remains unchanged, but the field of view changes. The image therefore looks different even though you have not touched the focal length. The good news: in most cases you do not need to change the sensor size at all. It is best to leave it at the default value and work exclusively with the focal length. Then the field of view changes automatically the way you expect.

Step 8: Getting to Know the Focus Distance
The focus distance is the most interesting parameter when you want to work with sharpness. It lengthens or shortens the camera's viewing pyramid. However, when you adjust the focus distance, nothing changes in the rendered image at first. The effect only becomes visible when the scene is actually calculated and depth of field is active. So this behavior is not a bug, but part of how this setting works.

Step 9: Activating the Physical Camera
For real blur you need the physical camera. To do this, click on the corresponding section in the camera object so that the options of a photo camera are displayed. There you can also set the shutter speed. However, this setting only makes sense for animations because it controls motion blur. For still images, it's best to stick with the normal photo camera and focus on the aperture.

Step 10: Setting the Aperture
The aperture is the value that determines how strong the blur is. A low f-number such as 1.4 corresponds roughly to a 50 mm lens with a very large opening and produces a pronounced blur. Set it to 1.4 first so that the effect is clearly visible.
Step 11: Activating the Physical Renderer and Depth of Field
For depth of field to be calculated at all, you need to do two things in the render settings. Select the Physical Renderer as the renderer. Then add the Depth of Field effect in the render settings. Only when both are active does the focus distance really make sense.

Step 12: Setting the Focus Distance and Testing the Blur
Now move the focus distance all the way to the front so that it points to the foremost layer of your scene. Then activate the camera and render the image. The subject appears sharp in the foreground, and the cubes in the background become strongly blurred. With an aperture of 1.4, the effect looks very drastic. Then change the aperture to about 5.6 or 8. The blur remains noticeable, but is clearly weaker. A value of 2.0 lies somewhere in between and is well suited if you want to keep the effect more subtle.

Step 13: Shifting the Focus to the Back
You can move the focus point at any time. Set the focus distance to a cube in the rear area of the scene. The side view helps you recognize the position precisely. After rendering, the blur is now in the foreground, while the background is rendered sharp.

Possible Applications
Depth of field is especially useful when you want to render miniature-style visuals. The effect then resembles model photography because the sharpness lies only on a narrow area. The physical camera is equally helpful when you want to match your own 3D scenes to a photo. Many photos do not have the same sharpness everywhere, and you can recreate exactly this look with the focus distance.

Summary ??? Setting Up a Cinema 4D Camera Object: Focal Length and Depth of Field
With your own camera object, you gain significantly more control over your scene. You create the camera, choose a suitable focal length, and lock it with the protection tag once it is in the right place. You usually leave the sensor size unchanged. For depth of field you need the physical camera, the Physical Renderer, and the Depth of Field effect. With the aperture and the focus distance, you then control where the sharpness lies and how strong the blur is. Take your time to try out the settings, because every scene reacts a little differently.
FAQ
Question: When do I need my own camera object instead of the default camera?Answer: As soon as you want to change the focal length, sensor size, or depth of field, you need your own camera object.
Question: What does the protection tag on the camera do?Answer: The protection tag prevents you from accidentally moving or changing the camera, but you can still switch it on and off.
Question: Why does nothing change in the image at first when I adjust the focus distance?Answer: The focus distance only takes effect during rendering, and only if the Physical Renderer and the Depth of Field effect are active.
Question: Which aperture should I choose for strong blur?Answer: Low f-numbers such as 1.4 produce very strong blur, while higher values such as 5.6 or 8 lead to a much weaker blur.
Question: Should I change the sensor size to adjust the image?Answer: As a rule, no. The sensor size changes the field of view, which is why it is usually better to work with the focal length.

