

An object in Cinema 4D does not necessarily have to carry just one color or one material. Especially with labels, patterns, or two-tone products, you need several materials on the same geometry. Imagine a cup whose handle should be orange while the rest stays blue. That is exactly what I'll show you in this tutorial. You'll learn how to create polygon selections, save them, and assign them to the appropriate materials. You'll also see why the order of the materials is crucial and how to avoid a typical mistake where a material suddenly disappears.
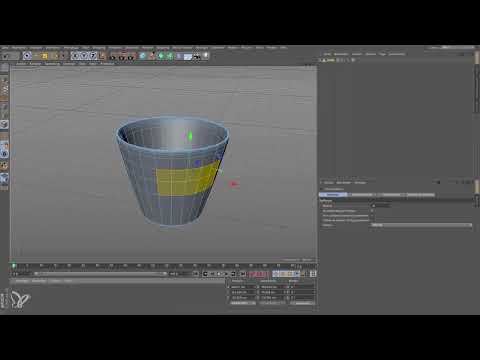
The video is only loaded from YouTube when you play it – data (including your IP address) is then transmitted to YouTube/Google. More in the privacy policy
Key Takeaways
- An object can carry several materials. To do this, you divide it into polygon areas that you select separately.
- A polygon selection is saved as a selection tag. You can rename this tag and reuse it at any time later.
- Cinema 4D evaluates materials in the Material Manager from right to left. A material located all the way on the right covers all the others.
- The material tag binds the material to the saved selection tag via the "Selection" field. Without this connection, the assignment has no effect.
Step-by-Step Guide
Step 1: Prepare the Basic Shape
Start with a simple geometry. In the example, a cup is created from a spline that you turn into a volume with an Extrude tool. The shape doesn't have to be perfect, because this is about the material technique and not about modeling. Just make sure you have a closed, editable geometry.

Step 2: Convert the Object into Editable Polygons
So that you can select areas of the object specifically, you first have to convert it into an editable polygon object. To do this, press the C key. Afterwards, the object is available to you as a polygon mesh, and you can subdivide the surface further.

Step 3: Subdivide the Surface with Cuts
Next, you define the boundaries for your color areas. In the Mesh menu, you select the Loop Cut tool. Use it to make two cuts around the area that will later hold the label or the second color. With the Escape key, you exit the tool again. The cuts ensure that the later selection ends exactly at the desired edges.

Step 4: Create the Polygon Selection
Now switch to Polygon editing mode so that you select faces instead of points or edges. With the Live Selection tool, you mark the area that should later receive a different material. You can feel free to be generous with the selection. The only important thing is that the marking is clearly delimited and that you don't catch anything unintended.

Step 5: Create the Required Materials
For the cup, you need at least two materials. To do this, double-click an empty area in the Material Manager to create a new material. The first material gets a blue hue, the second an orange one. You don't need to adjust the reflectivity in this step. It's about the assignment, not about the look.

Step 6: Drag the Material onto the Selection
Drag the orange material via drag & drop directly onto the previously marked polygon selection in the viewport. Release the mouse button. Cinema 4D then automatically creates a material tag that assigns the orange material to the marked area. Afterwards, activate the renderer to check the result.

Step 7: Color the Rest of the Object Blue
Now the remaining part of the cup should become blue. To do this, you drag the blue material onto the entire object, that is, onto the cup itself or onto the object in the Object Manager. The result seems logical at first: the area with the selection stays orange, the rest turns blue. But if you render again now, the orange suddenly disappears.

Step 8: Correct the order of the materials
This error has a clear cause. Cinema 4D reads the material assignments from right to left. If the blue material is on the far right, it covers the entire object, and the program sees no reason to take the orange material into account. The solution is simple: Drag the blue material tag to the left in the Object Manager so that the orange tag is evaluated first. After that, the color distribution appears correct again. You can also swap the order if you set the selection first and then the material. The key is that the specific assignment is to the right of the general one.

Step 9: Understand and name the selection tag
Each polygon selection is saved as its own tag. In the Object Manager you will find it under a name like Polygon Selection.1. You should change this name so that you keep track of things later. In the example, the tag is called Label after being renamed. This way you can distinguish multiple selections and address each one specifically.
Step 10: Establish the connection between material and selection
Open the material tag of the orange material. There you will find the Selection field. First delete the existing entry there so that you are working from a clean starting point. If you now render again, the entire cup appears orange, because the material takes effect without a selection. This is exactly the indication that the connection is missing. Therefore, drag the selection tag Label from the Object Manager into the Selection field of the material tag. As soon as the link is in place, the cup shows the desired two-tone look again.

Step 11: Check the result
Render the image again and check whether all areas are colored correctly. Only when blue and orange appear cleanly separated have you completed the task correctly. If an error occurs, first check the order of the tags and then the link in the Selection field. In the vast majority of cases, the problem lies exactly there.

Summary – Assigning multiple materials to one object in Cinema 4D
You can easily apply multiple materials to a single object in Cinema 4D. The key lies in three things: the clean subdivision of the geometry with cuts, the saved polygon selection as its own tag, and the correct order of the materials. Pay particular attention to the right-to-left evaluation and to the link via the Selection field in the material tag. If you keep these points in mind, labels, color areas, and patterns can be implemented reliably.
FAQ
Do I absolutely have to convert the object into a polygon object before the assignment?Yes, for polygon selections you have to convert the object into an editable polygon object, for example with the C key.
Why does my material disappear after I assign the second material?Cinema 4D evaluates the materials from right to left. If a general material is further to the right, it covers the specific selection. Therefore, drag the tag with the selection to the left.
What is the Selection field in the material tag for?In the Selection field, you link the material to a saved selection tag. Without this link, the material affects the entire object.
Can I still change the selection later?Yes, you can edit the selection tag at any time or label it better by renaming it. The assignment is retained via the Selection field.

