

You need an object that doesn't exist yet, and you have neither a cube nor a cylinder as a starting point? Then the Polygon Pen is exactly the right tool. In Cinema 4D, you use it to create points, edges, and polygons entirely without a template, directly in the viewport. In this tutorial, I'll guide you step by step from the first quad, through adding more faces, to round arcs and a practical application example.
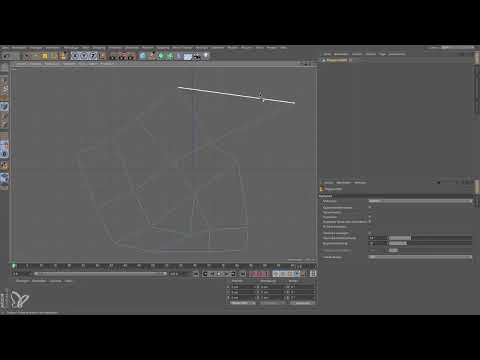
The video is only loaded from YouTube when you play it – data (including your IP address) is then transmitted to YouTube/Google. More in the privacy policy
Key Takeaways
- The Polygon Pen doesn't require a starting object and creates geometry directly in the viewport.
- Work in an isometric or top view so that your faces don't get lost in space.
- A double-click finishes a shape. Faces with more than four points are displayed as nGons.
- The tool automatically detects whether you are grabbing a point or an edge, and moves or connects accordingly.
- With Ctrl (Control), you extend existing shapes; with Ctrl and Shift, you create round arcs on edges.
- The decisive factor is the drawing mode, that is, whether you want to create points, edges, or polygons. The selection mode plays a minor role.
Step-by-Step Guide
Step 1: Finding the Polygon Pen
Open the Create Mesh menu. You will notice that the Polygon Pen is the only tool there that is usable in a meaningful way without an existing polygon object. That is exactly its strength, because you create the geometry entirely yourself.

Step 2: Choosing the Right View
If you use the tool in the default view, your face lies perpendicular to the camera and its position in space remains unclear. Delete the attempt and switch to an isometric view or to the top view. There you can place the points unambiguously in the plane.

Step 3: Setting the Drawing Mode
The mode at the top left, that is, Points, Edges, or Polygons, is not as important as the drawing mode. The drawing mode determines what the Polygon Pen actually creates. To start, first choose the Points mode, since with it you can set as many points as you like.

Step 4: Placing the First Quad
Click four points one after another to create a quad. After the fourth click, you already have a complete quadrilateral face that you can edit further.

Step 5: Finishing the Shape
You can add more points to enlarge the shape. As soon as you are satisfied, a double-click is enough to finish the shape. Only then does it remain stable.

Step 6: Understanding Green Lines and nGons
The green lines inside your face show that the face consists of more than four points. Such a face is called an nGon. It is only displayed as a polygon in the viewport if it is subdivided. An nGon is therefore simply a polygon with more than four corners.

Step 7: Adding More Shapes
Select the Polygon Pen from the list again. Now place a new face on the existing shape. The tool snaps to existing points as you do so. In this way, you can add more nGons step by step and build up the shape piece by piece.

Step 8: Moving Points and Edges
The Polygon Pen detects whether you are grabbing a point or an edge. If you drag one point onto another, the shape changes accordingly. If you grab an entire edge, you can move it as a whole. Pay attention to the direction in which you move the cursor.
Step 9: Remove Unwanted Points
If a point is unnecessary, hold down the Ctrl key (Control) and click on it. It disappears and the surrounding surfaces are adjusted. The same works with entire edges.
Step 10: Working in Edge Mode
You can also work in edge mode. Pull an edge out of the object and place a second one next to it. Then connect the points by clicking on them. This way of working is somewhat more laborious than in point mode, but it is useful for certain constructions.
Step 11: Continue Working with Point Mode
For everyday use, I recommend point mode. You place as many points as you like and only close the shape with a double-click. This way you keep control over the structure, and the result remains cleanly organized.
Step 12: Extend Objects
Hold down the Ctrl key and drag on an existing edge. This way you can pull new surfaces out of the model. With this technique, you extend your object step by step without having to start over.

Step 13: Close Gaps
With the Polygon Pen, you can also complete objects. Draw connections between existing points. The tool snaps in automatically so that open areas are closed cleanly. This approach is hardly feasible with many other tools.

Step 14: Working with Grid Sizes in Polygon Mode
In polygon mode, you create surfaces directly in the viewport. At the top you see a setting for the grid size, for example 20 cm. If you set it to 50 cm, the steps become larger. When connecting, the difference in size adjusts automatically. This method is particularly convenient, but does not work in every mode.
Step 15: Create Round Arcs with Ctrl and Shift
Hold down Ctrl and Shift and move the mouse over an existing edge. A preview appears even without clicking. With a click, you turn it into an arc or a circle. Repeat the process on further edges to create more complex curves. With dense constructions, it can get a bit messy. In that case, you correct the points afterwards.

Step 16: Implement a Practical Example
Imagine you place an image of a car fender in the background. With the Polygon Pen, you trace the outlines. Then you adjust points and edges until the rough collection of polygons turns into a clean fender. This process takes a while, but it can be implemented well. The tool is also suitable for character modeling.

Step 17: Solidify the Workflow
Always work in an isometric view. Moving points or edges and extending with Ctrl work in every mode. The drawing mode therefore determines what you create, and the selection of points, edges, or polygons only controls the focus. Practice these steps several times, and you will quickly understand the tool.

Summary ??? Polygon Pen in Cinema 4D: Drawing, Connecting, and Extending Shapes
The Polygon Pen is a versatile tool with which you can build models without a template. You start in a suitable view, place points, and close shapes with a double-click. With Ctrl you modify and extend existing geometry, and with Ctrl and Shift you create arcs. Choose the drawing mode deliberately, because it determines the result. With a bit of practice, complex constructions can be created this way as well.
FAQ
Do I already need a polygon object in the scene?No, the Polygon Pen creates the geometry directly and does not require a starting object.
Why is my surface not positioned correctly in space?The surface often looks unclear in the front view because it lies perpendicular to the camera. Switch to an isometric view or the top view.
What is an nGon?An nGon is a polygon with more than four corners. The green lines in the surface show that such an nGon is present.
How do I remove a point again?Hold down the Ctrl key (Control) and click on the point. It disappears, and the shape is adjusted.
How do I create round arcs?Hold down Ctrl and Shift, move over an existing edge, and click. This creates arcs and circles based on the existing edges.

