

A good render result doesn't come about only when you click "Render", but already in the camera and renderer settings. The two are more closely connected than it seems at first glance. The physical camera controls aperture, depth of field and focus, while the physical renderer calculates light, shadows and quality. Only when both are matched to each other does the image look believable.
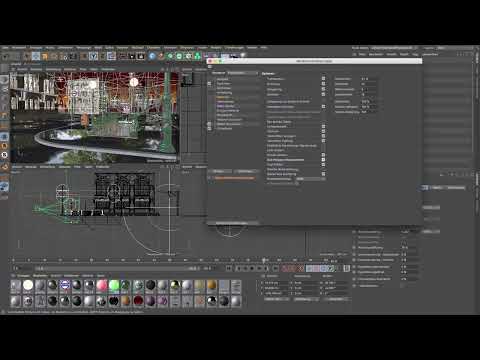
The video is only loaded from YouTube when you play it – data (including your IP address) is then transmitted to YouTube/Google. More in the privacy policy
In this tutorial, I will guide you step by step through all the relevant settings: from switching to the physical renderer, through aperture and focusing, to render quality and brightness. By the end, you will know why each option has to be set and how to avoid a typical trap with glass objects.
Key Takeaways
- The physical renderer is the foundation for the physical camera. Without it, the aperture and focus settings are not available.
- Depth of field must be enabled, otherwise the aperture has no effect at all.
- The aperture determines how blurry the background becomes. An aperture of 2 creates a miniature effect, while an aperture of 22 keeps the background almost sharp.
- The focus can be set using the slider or, more conveniently, using the focus object.
- With the "Adaptive" setting, you specify the quality in advance and let the renderer calculate until it is reached.
- Ambient Occlusion produces contact shadows, while gamma controls the brightness.
- Glass objects can become opaque when Ambient Occlusion is active. In the material's Render tag, you solve the problem by removing the visibility for Ambient Occlusion.
Step-by-Step Guide
Step 1: Activate the Physical Renderer
Open the render presets and look at the renderer selection at the top. By default, the standard renderer is set there, which you have used so far for test renders. It is faster, but it doesn't offer the options we need for a realistic camera. Therefore, switch to the "Physical" entry. This renderer is a little slower, but it provides the foundation for the physical camera, which we will set up shortly.

Step 2: Define Quality and Sampling
In the physical renderer section, you will find the "Adaptive" entry. This method is well suited because you specify in advance how high the quality should be, and the renderer calculates until that quality is reached. The sample quality is set to "Medium". That may sound like a mediocre result, but it is not. A higher setting increases the render time without delivering visibly better quality. For our use case, "Medium" is therefore completely sufficient.

Step 3: Enable Depth of Field
Now comes a checkbox that is easily overlooked: the "Depth of Field" option. Be sure to check whether it is enabled. Without this checkmark, working with an aperture makes no sense, because the blur isn't calculated at all. Once you have ticked the box, the most important renderer settings for the camera are done.

Step 4: Set Up the Physical Camera
Now switch to the camera and select the camera object. In the "Physical" tab, you will find the focal length. In our example, we use 30 mm. You should keep this value, because it determines the image framing and the perspective. The focal length is therefore a decision you should make at the beginning and not change afterwards, so that the visual impact remains consistent.

Step 5: Set the Focus Correctly
The focus distance is the distance at which you focus when taking a photo. Imagine you are photographing the scene with the trash can and the subway entrance. You would probably focus precisely on this foreground. It is best to check this in the top view, because there you can see where the camera is positioned and how far the focus reaches.
You have two options. The first: you drag the focus distance slider until the desired area is sharp. The second, significantly more convenient: you drag the object that should be sharp directly into the "Focus Object" field. In our example, it is the trash can. The camera then automatically snaps to this area, and you immediately know that the object is rendered sharp.

Step 6: Choose the right aperture
The aperture determines how blurry everything in front of and behind the focus becomes. In the Renderer section of the physical camera, an aperture of 8 is initially entered. With that, the background would be so blurred that the blur looks artificial. An aperture of 2, on the other hand, produces a strong miniature effect in which the scene looks almost like a toyland. That can be an appealing effect, but it doesn't suit our case.
Instead, I recommend an aperture of 22. The background then looks almost completely sharp, but is still minimally blurred. This is exactly how a real photograph would look. With a focal length of 30 mm, this is a realistic value, and with larger distances to the focus object, a strongly blurred background doesn't work anyway.

Step 7: Set the output size
Now go back to the renderer and open the output. For the test run, I chose a width of 1200 pixels, which results in an aspect ratio of 16:9. You can also use 1600 pixels right away, but then rendering takes longer. Since we are still in test mode, 1200 pixels is perfectly sufficient. You can set the save location now or determine it only after rendering.

Step 8: Check antialiasing and subpolygon displacement
There is a peculiarity with the options. When using the physical renderer, you cannot set antialiasing separately. The quality is controlled entirely by the physical renderer, including for textures and geometry. So you don't need to set anything further here.
Subpolygon displacement is a different story. At some point we had removed this checkmark in order to render faster. For the textures in the foreground, such as the asphalt, however, you need it so that the result looks realistic. Therefore, switch it back on.

Step 9: Activate Ambient Occlusion for contact shadows
Ambient Occlusion is responsible for contact shadows. It ensures that shadows appear where geometry lies close together, such as between a step and the asphalt or between a street lamp and the sidewalk. You should definitely activate this option.

Step 10: Set Global Illumination and Gamma
Global Illumination is set to "Low" in our example. That is sufficient, because the many light sources in the scene already provide enough samples. With the Radiance Cache, our GI method, you can also use the preview, but I would go with "Low" here as well. You generally don't need to change the other options.
An important point is the gamma. If your image has become too bright due to the many light sources and the fog, you can adjust it. The default value is 1.0. Values between 1.2 and 1.5 prove to be a good setting in this scene. At 0, on the other hand, the global illumination would no longer be visible at all, so you shouldn't go down that far.
Incidentally, you don't need to set glow effects separately. As soon as you use a glowing material, for example for the hotel's neon sign, the glow effect is added automatically.

Step 11: Work around the pitfall with glass objects
After the first test render, you may notice that the light sources in the street lamps are missing. This is due to the glass bodies. Ambient Occlusion treats them like opaque objects, so a contact shadow forms around them and they become non-transparent. As a result, the light sources inside the lamp remain invisible.
The solution is simple once you know it. In the Material Manager, open the affected glass material and look for the Render Tag there. You can leave all settings as they are. Only for the visibility for Ambient Occlusion do you need to remove the checkmark. After that, the glass stays transparent, and the light sources become visible again.


Step 12: Test render the result
After these adjustments, the render presets are complete. You can now first calculate the image as a test render. The street lamps will then show their light sources again, and the overall image looks coherent. If you're feeling brave, you can also render at a higher resolution right away. That takes correspondingly longer, but that's your decision.

Summary ??? Setting Up the Cinema 4D Camera and Renderer: Aperture, Focus and Render Quality
In Cinema 4D, the camera and renderer form a single system. The physical camera provides aperture, focal length and focus, and the physical renderer turns these values into an image. If you set the renderer to "Physical," activate depth of field and set the aperture to 22, you get a background that looks almost sharp. With the focus object, you set the focus area precisely. Adaptive sampling set to "Medium," active subpolygon displacement and ambient occlusion ensure quality and contact shadows. Gamma between 1.2 and 1.5 gets the brightness under control. And if glass objects disappear, the render tag in the material helps by removing the visibility for ambient occlusion there.
FAQ
Why are the camera and renderer so closely linked in Cinema 4D?The physical camera needs the physical renderer so that aperture, depth of field and focus can be calculated at all.
Which aperture is suitable for a realistic background?An aperture of 22 keeps the background almost sharp, but makes it appear slightly blurred, as in real photography.
How do I set the focus on a specific object?Drag the object into the "Focus Object" field in the physical camera tab. The camera then automatically snaps to this area.
Why are the light sources in the lamps not visible after rendering?Ambient occlusion treats the glass like an opaque object. In the render tag of the glass material, remove the visibility for ambient occlusion.
Which gamma value makes sense for bright scenes?Values between 1.2 and 1.5 work well if the image looks too bright due to many light sources or fog. The default value is 1.0.

