

An ornament made of polygons often looks in the model like paper glued onto a surface. With the combination of Volume Builder and Volume Mesher, you turn a flat shape into a continuously fused body in which all parts blend organically into one another. In this tutorial, you build such an ornament step by step, adjust voxel size, smoothing, and polygon count, and finally add it as decoration to a historic street lamp.
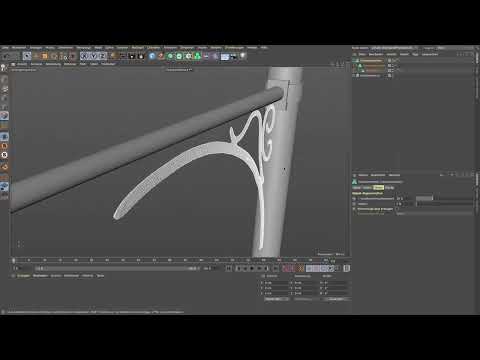
The video is only loaded from YouTube when you play it – data (including your IP address) is then transmitted to YouTube/Google. More in the privacy policy
Key Takeaways
- The Volume Builder first converts your flat ornament into a voxel object. Voxels are small volumetric building blocks that do not yet have a visible wireframe model.
- Only the Volume Mesher then calculates a true polygon object from it. Both tools belong together when you want to build a volumetric body.
- The voxel size determines level of detail and data volume. The smaller the voxels, the finer the result, but the more polygons are created.
- Inflate, Erode, and Smooth give the ornament thickness and shape. These values interact directly with the voxel size.
- A thin ornament can additionally be thickened with an extrusion with a cap. Without a cap, no closed volume is created.
- With the adaptive value, you reduce the polygon count in a targeted way without destroying the curves.
- A render instance allows you to use the finished ornament multiple times and align it precisely on the lantern.
Step-by-Step Guide
Step 1: Prepare and name the ornament
Start with your polygon ornament. Give the object a meaningful name, for example the word "Ornament". This is helpful because you will need this element in several places in the scene later and can quickly find it again in the object list.

Step 2: Place the ornament in the Volume Builder
Take the Volume Builder from the menu and drag your ornament under this object as a child. A voxel display appears immediately. The voxels are shown as surfaces with different gray values that are always aligned toward the camera. This preview still looks rough, but it already shows you the basic shape.

Step 3: Adjust the voxel size
The voxel size is initially set far too large in the Volume Builder. The term is composed of "volume" and "pixel", and that is exactly how it works: many small pixels together make up a volume. Reduce the value to about 0.7 cm. Then you can see much more clearly that the ornament looks like a real body.

Step 4: Use the Volume Mesher
The Volume Builder alone does not yet deliver a mesh. Therefore, additionally drag the Volume Mesher into the hierarchy above the voxel object. It calculates a polygon model from it that you can edit, render, and reuse. The result initially looks organic, but still appears very flat and paper-thin.

Step 5: Strengthen the volume with Inflate and Erode
To achieve more thickness, open the operations of the Volume Builder. To do this, hold down the button a little longer until the menu appears. There you will find the options Inflate and Erode. Initially set the offset relatively high, around 5 cm. This makes the ornament significantly thicker, but it quickly looks like an inflated sausage. This exaggeration is normal and shows you that you are on the right track.

Step 6: Fine-tune the offset
Reduce the offset gradually. With larger values, the parts merge too much, so the contour blurs and the ornament looks baked together. At about 0.5 to 0.4 cm you achieve a good balance. The shape remains recognizable, and the ornament still has enough volume.

Step 7: Apply smoothing
The ornament still looks a bit angular. Therefore, select the smoothing operation. At a strength of 100%, the ornament almost completely disappears, because the tool smooths the shape beyond recognition. Reduce the strength step by step. At about 20%, the shape becomes visible again, but it is still not noticeably smoother. This is a sign that you should reduce the size of the voxels beforehand.

Step 8: Reduce the voxel size
Return to the Volume Builder and reduce the voxel size further. Proceed carefully, preferably with the arrow keys, so that you can control the values finely. Note that this greatly increases the polygon count. With smaller voxels, however, the result becomes noticeably finer, and the smoothing now works noticeably better. Choose the size so that detail and computational effort suit your project.

Step 9: Coordinate smoothing and voxel distance
Now try the smoothing again with higher values. With the new voxel size, you can make the ornament softer. It is also worth taking a look at the voxel distance. It can be reduced a little further, but it should not be reduced too much, because otherwise the amount of data explodes. You will notice that voxel size, smoothing, inflating, and eroding are interrelated. A change to one value always affects the others.
Step 10: Check the threshold on the Volume Mesher
On the Volume Mesher you will find the volume range or the threshold. If you change it, the model also becomes slightly thicker or thinner. The wireframe display in the viewport can be a hindrance here, but you can simply leave it hidden while you experiment with the values.

Step 11: Thicken the ornament with extrusion
If the result is still too narrow, there is a second option. Hide the voxel object and the Volume Mesher and select your original ornament. Via the Mesh menu, you call up the Extrude tool. It is important that you activate the cap. Without it, no closed volume is created. Pull the extrusion in a direction that seems suitable to you. When you then show everything again, the ornament merges much more strongly with its surroundings.

Step 12: Add missing details
The result may still be missing a small decorative dot at the tip of the arm. You can add this detail afterwards. To do so, switch to Polygon editing mode, select the appropriate polygon, and use extrusion to attach the element at the top. After showing everything again, it turns out that this detail also blends organically into the shape.

Step 13: Reduce the polygon count with the adaptive value
With around 28,000 polygons, the ornament is too detailed for such a small object. On the Volume Mesher, you can therefore increase the adaptive value. This causes the program to remove polygons in places where the angle between them is small, while curves are preserved. Increase the value slowly and watch for when the result still looks good. At about 10 to 12%, the result in this example is still satisfactory. Afterwards, check the number of polygons in the Object Information. It drops significantly depending on the setting.

Step 14: Create a render instance and align it on the lantern
So that you do not have to compute the finished ornament multiple times at great expense, create a render instance. To do this, use the option for instances in the menu and select the render instance there, not a simple copy. Then move the instance to the desired spot on the lantern. Rotate it by 180 degrees so that it fits the opposite side. Pay attention to the axes when moving it. Along the Z axis, you can push the ornament closer to the post, then fine-tune along the X axis. Switch the instance on and off in between to check the effect. This way, your lantern gets decorations that come much closer to a historical model.

Summary ??? Voxel ornaments for a street lantern in Cinema 4D
You have converted a flat polygon ornament into a voxel object, turned it into a mesh with the Volume Mesher, and then balanced thickness, smoothing, and polygon count. Thickening via extrusion and the render instance help you complete the result and use it flexibly. What is decisive is the interplay of all parameters: voxel size, offset, smoothing, and adaptive value influence each other. Therefore, take your time with small changes and check each step in the viewport.
FAQ
Why does my ornament still look like paper after the Volume Builder?The Volume Builder only creates a voxel object. Real thickness and a polygon model only emerge with inflating, eroding, and the Volume Mesher.
What role does the voxel size play?Smaller voxels deliver finer details and better smoothing, but increase the polygon count considerably. Therefore, choose a value that balances quality and computational effort.
What happens if I do not activate the cap when extruding?Without a cap, no closed volume is created. The object then remains an open surface that cannot be thickened cleanly.
How do I reduce the polygon count without losing the shape?Increase the adaptive value on the Volume Mesher step by step. Check the result after each change and verify the polygon count in the Object Information.

