

Imagine a nighttime street where it has just stopped raining. You can bring exactly this mood into your Cinema 4D scene with rain puddles. The asphalt looks wetter, more surreal, and more atmospheric as a result. But before you distribute the puddles in 3D, you need a texture that will later control the alpha channel of a shader. You create this texture, the so-called puddle map, in Photoshop.
The video is only loaded from YouTube when you play it – data (including your IP address) is then transmitted to YouTube/Google. More in the privacy policy
In this tutorial, I guide you through the entire process: from the right file size and importing a special brush to post-processing with a tone curve and saving the finished file.
Key Takeaways
- A file with 4000 x 4000 pixels and 300 dpi is sufficient for most scenes.
- Choose 8 bit as the color depth and set the background to white.
- A round, soft standard brush creates damp edges that are atypical for dirt puddles. A special brush with irregular tips delivers a more realistic result.
- The angle jitter ensures irregular shapes. You should set it to at least 50%.
- A tone curve sharpens the transitions between black and white so that the puddles don't look like a wet film.
- You create the tone curve without a clipping mask, otherwise its effect will be lost.
Step 1: Securing the Camera in Cinema 4D
Before you start with the texture, you should lock down your test camera. Name it with the focal length, for example "Camera 30 mm". That way you can immediately tell later which perspective is meant, in case you need additional cameras with other focal lengths. Then you assign a protection tag to the camera via the tags. This way you won't lose the perspective, even if you continue working in the scene. Whether you change the viewing angle later doesn't matter here.

Step 2: Creating the Photoshop File
Photoshop is exactly the right program for this task. In testing, various texture sizes such as 2K, 4K, and 8K were compared. The result: a 4K texture is sufficient as long as the scene isn't rendered significantly wider than about 6500 to 7000 pixels. You therefore create a file with 4000 x 4000 pixels.

Set the resolution to 300 pixels per inch, i.e. 300 dpi. Choose 8 bit as the color depth and white as the background. Then you create the file. The white surface is the base on which you will paint your puddles in a moment.

Step 3: Creating a New Layer
The round, soft brush would theoretically be an option, but it creates sprawling, damp edges. Real dirt puddles look different, so you need a different brush. To be safe, first create a new layer. Then you can move, change, or delete your painting at any time without damaging the background.
Step 4: Getting and Importing the Brush
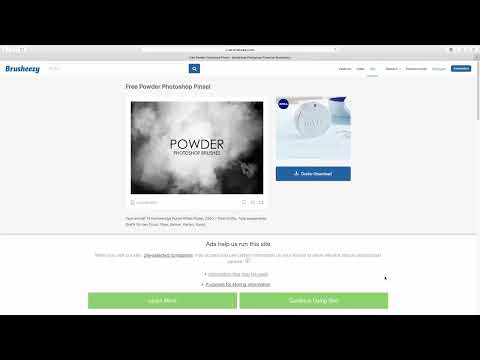
For this tutorial, the brush set "Free Powder Photoshop Brushes" was used. I can't provide the file to you directly here, but you can find it quickly. Simply search for "Powder Photoshop brushes" at brushEasy. You don't even have to open the website itself; a search in the browser will lead you to the right entry.
After you have downloaded the brushes, open the brush selection in Photoshop. Via the small button in this area, you choose "Import Brushes". The brushes will then be displayed at the end of the list.

Step 5: Setting the Brush Tip and Color
The brushes in the set are very similar, so the choice hardly matters. In the video, the very first brush is used. All brushes are relatively large, often between 3000 and 5000 pixels. That is usually too thick for the puddles, so you reduce it via the size setting. For painting, you set the color to black and the opacity to 100%.

Black later stands for the wet areas, while the white stays dry. With 100% opacity, you get clear edges, which you will then refine afterward.
Step 6: Adjusting the Angle Jitter
So that the puddles don't all look the same, you need to adjust the brush tip in the brush settings. To do this, open the settings and select the "Shape Dynamics" section. There you will find the Angle Jitter. It ensures that the tip is randomly rotated while painting. Set it to at least 50%. Whether you choose 50, 80 or 100% is barely noticeable in the result. The only important thing is that the value is above 50%.

Step 7: Painting the Puddles
Now it begins. With a click or a short stroke, place a first puddle on the white surface. You can use different sizes and shapes. This is not strictly necessary, but it improves the variety. A few simple blobs are also enough. However, a certain regularity should emerge so that the distribution looks believable.
Also pay attention to the later scene. If a puddle lies exactly where the subway entrance will later be, it will get lost in the image. Therefore, distribute the puddles so that they are also visible in the finished image.
Step 8: Sharpening the Edges with a Curves Adjustment
After painting, the gray, soft edges stand out. They look too wet and bring too much unrest to the street. A Curves adjustment helps here. It darkens the gray transitions and increases the separation between black and white.
Create the Curves adjustment layer above your layer and pull the curve down a little. This makes the edges visibly sharper. One important point applies here: Create the Curves adjustment without a clipping mask. With a clipping mask, nothing happens in this case. Adjust the strength of the curve until the puddles look right to you.

Step 9: Saving the File
When the shape of the puddles is finished, you save the document. Select "Save As" and save the file in PSD format. In the video, it is called "Pfützen PSD". Since the PSD format preserves the layers, you can open the file again at any time later and edit it further.
You will use this file in Cinema 4D to control the alpha channel of a shader. With it, you distribute the puddles on the asphalt without having to model every single shape by hand.

Summary – Creating a Puddle Map in Photoshop: Guide for Cinema 4D
You have now created a puddle map that serves as the basis for realistic rain puddles. You created a 4K file with 300 dpi and 8 bit, imported a special brush, and ensured irregular shapes with Angle Jitter. The Curves adjustment sharpened the edges, and the file is now ready as a PSD. In the next step, you will use this map in Cinema 4D.
FAQ
What resolution should my puddle map have?In the video, a file with 4000 x 4000 pixels and 300 dpi proved effective. It is sufficient as long as the scene is not rendered significantly wider than about 6500 to 7000 pixels.
Why shouldn't I use the normal soft brush?A round, blurry brush creates soft, moist edges. Real dirt puddles have clearer edges, so a special brush with irregular tips is better suited.
What is the Angle Jitter for?The Angle Jitter randomly rotates the brush tip with each stroke. This makes the puddles look more irregular and natural. A value above 50% is enough.
Why doesn't the Curves adjustment work with a clipping mask?In the video, the Curves adjustment had no effect at all with a clipping mask. Therefore, create it without a clipping mask.
What is the finished PSD file used for?The file is used in Cinema 4D to control the alpha channel of a shader. This allows the puddles to be distributed on the asphalt.

