

A railing only looks believable when its paint shows the right highlights in the light. Many materials fail at exactly this: they are colored, but the surface stays flat and lifeless. In this tutorial from the "Underground" series, you will learn how to build such a paint material in Cinema 4D completely yourself, without loading ready-made PBR presets. The key here is the reflectance channel, which not only controls the reflections but also determines the color. In addition, I will show you how a Bevel Deformer captures the light edges on the post edges. The video lasts just under ten minutes, and you can follow the individual steps easily if you apply them directly in your scene.
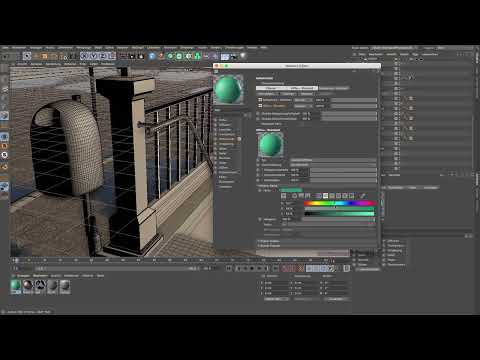
The video is only loaded from YouTube when you play it – data (including your IP address) is then transmitted to YouTube/Google. More in the privacy policy
Key Takeaways
- A physical material controls color and gloss via the reflectance channel, while the color channel is no longer needed in this setup.
- A Bevel Deformer with an angle threshold of 40° creates soft transitions at the right edges and thus highlights.
- Two speculars with different roughness and a Fresnel effect simulate the typical layering of paint.
- A fine noise in the relief provides an organic surface without making the material look busy.
- A higher sampling subdivision of 6 instead of 4 reduces noise but increases render time.
Step 1: Insert the Bevel Deformer into the post copies
The starting point is in the object hierarchy. There you will find the post copies in the Symmetry, and a Bevel Deformer is already inserted in one of them. If you remove it, you can bring it back at any time: drag it from the Deformer menu into the hierarchy and place it under the post. The deformer must be directly subordinate to the post object, otherwise it will not take effect. Only with this nesting does the flattening on the edges, which later catches light, come about.

Step 2: Set the angle threshold to 40°
In the Bevel Deformer, you use the angle threshold to control which edges get beveled at all. Set it to 40°. This way, only edges with an angle of 40° or more are processed, while flat transitions remain untouched. This value is a good starting point that you can adjust later if needed. Make sure you don't simply adopt the value without checking it against the geometry, because depending on the model the result changes significantly.

Step 3: Reduce the offset and increase the subdivision
The offset is initially set to 1 cm, and that is far too much for a railing. The surface then looks not like a rounding but like a chamfer. Reduce the value to about 0.3 cm, i.e. 3 mm. Then set the subdivision to 5. Only then is the edge smooth enough to simulate a real rounding. Compare the result in the viewport until the edge runs cleanly and no hard steps are visible anymore.

Step 4: Deliberately do not lower the angle further
In theory, you could decrease the angle threshold so that flatter edges are beveled as well. This creates additional highlights that make the appearance even more lively. For this railing, however, the effort is not worthwhile, because the upper parts are hardly in view from the viewing angle. This saves you polygons, and that is a sensible compromise. Afterwards, return to the value of 40° so that the setting stays consistent.

Step 5: Create a physical material
Now it's time for the material itself. Create a new material and make sure you don't use a standard material but a physical material. You probably already know the standard material from the puddles, but it works with a different channel structure. The physical material bundles all surface properties in the reflectance channel, and this is exactly what this tutorial builds on. Give the material a descriptive name so you can quickly find it again later in the scene.

Step 6: Set up the color in the reflectance channel
Everything happens in the reflectance channel: color, gloss, and roughness. The relief channel could also be used, but it is not intended for the base color. By default, the reflectance channel is already active, and you need to keep it that way. Create a default layer in it and set the color there. The advantage: you can edit the color directly at the place where the surface properties are defined as well. This simplifies the setup considerably.

Step 7: Defining the color of the paint
A bluish-green paint job, like the ones you know from subway stations, serves as the color reference. Choose a shade that looks slightly greener than pure blue, and set the brightness rather low. A dark, slightly saturated green suits a railing that has been standing outdoors for a long time. Don't let the saturation get too high, because otherwise the paint quickly looks artificial. With this setup, the color stays in the reflectivity channel, so you can match it with the gloss properties right away.

Step 8: Removing the default entries in the reflectivity channel
There are already two entries in the reflectivity channel: the default diffuse layer and the default specular layer. The diffuse layer already contains the color information and can stay. The specular layer, on the other hand, has its highlight strength and bump strength set to maximum values at 100 percent, and that leads to uncontrolled reflection. Therefore, delete it so that you can redesign the setup from scratch. After that, the material consists only of the color information and is completely matte.

Step 9: Adding a highlight with Fresnel
To make the paint shine, add a reflection via the Add button. You can choose between Beckmann and GGX; both deliver usable results in this case. The decisive factor is the Fresnel effect, which you activate additionally. It ensures that the reflection becomes stronger or weaker depending on the viewing angle, as is the case with real paint. You can leave the reflection strength at 100 percent, because the Fresnel effect already puts it into perspective.

Step 10: Adjusting the roughness and adding a second highlight
The roughness determines how much the highlight spreads out. Paint ages, so a perfectly smooth surface is unrealistic. Set the roughness for the first highlight rather high, so that a large, soft reflection is created. Then you add a second highlight with lower roughness. It lies on top of the first one and creates the small, sharper reflections on the smoother areas. Also equipped with Fresnel, this results in the typical layering of a paint.

Step 11: Reducing the reflectivity of the highlight
The upper, glossy highlight looks too strong at first attempt. Lower its reflectivity significantly, to about 60 percent in the example. Pay attention to the overall picture and not just the individual reflection. The paint should shine without the railing looking like freshly painted metal in the sun. You will usually find the right balance by switching back and forth several times between the view and the render preview.

Step 12: Using a noise bump for the organic surface
A surface looks more lively when it shows small irregularities. For this, you can use an FBM noise in the bump channel. An FBM noise is a suitable candidate, because it looks organic, and that is exactly what suits aged paint. However, the strength must be significantly lower than a default value; in the example, about 2 to 3 percent is enough. With higher values, the material quickly loses its smoothness, and the surface looks washed out.

Step 13: Checking the result without global illumination
Before you tackle further details, it is worth taking a look at the final perspective. Switch the camera back on and render without global illumination. This way you can quickly see whether the highlights and the color are fundamentally right. However, you will notice that the image is very grainy. This is not due to the material itself, but to the render settings. You will eliminate the graininess effect in the next step.

Step 14: Increasing the sampling subdivision
If you are working with the standard renderer, the graininess can be fixed via the sampling subdivision. Set it in the reflectivity channel, and only in the color channel, from 4 to 6. The material becomes noticeably smoother, while the render time increases noticeably. This drawback is usually acceptable, because you improve the result beyond just the noise. In later render passes with global illumination and effects, the appearance of the material will change once more, but the basic setup remains the same.


Summary – Creating a Cinema 4D Paint Material: Using the Reflectivity Channel for Color and Gloss
You now have a paint material for the railing that controls its color and its highlights entirely via the reflectivity channel. The Bevel Deformer with a 40° angle threshold, an offset of 3 mm, and a subdivision of 5 ensures rounded edges. Two highlights with Fresnel, different roughness, and reduced reflectivity form the surface. A subtle FBM noise in the relief makes the material look lively, and the increased sampling subdivision removes the noise. With this basic setup, you can later refine the paint further with global illumination and render effects.
FAQ
Question: Why is the reflectivity channel used instead of the color channel?Answer: In the physical material, the reflectivity channel controls color, gloss, and roughness together, which allows for a more consistent paint setup.
Question: What does the angle threshold do in the Bevel Deformer?Answer: It determines from which edge angle the bevel is calculated. A value of 40° only bevels steeper edges and leaves flat transitions untouched.
Question: Why shouldn't the offset be too large?Answer: A large offset creates a visible flattening instead of a rounding. A value around 3 mm looks more realistic on railing edges.
Question: Why is the image grainy without global illumination?Answer: If the sampling subdivision is too low, the highlights are only calculated roughly. Increasing it to 6 smooths the result.
Question: Do I have to use the Standard renderer?Answer: No. The sampling setting is mainly found in the Standard renderer, but other renderers work with their own quality options, which you will need to adjust accordingly.

