

The entrance area of your scene looks bright with the spherical lamps above, but flat. The light spreads diffusely in all directions, and the front area doesn't get the accents it deserves. In this tutorial, you combine two different types of lighting to create an atmospheric result: a glowing material for the lamps themselves and two omni lights placed close to the fixtures. You also activate visibility so that the light becomes visible as fog. In the end, you get a grungy, gloomy entrance situation that suits the underground scene.
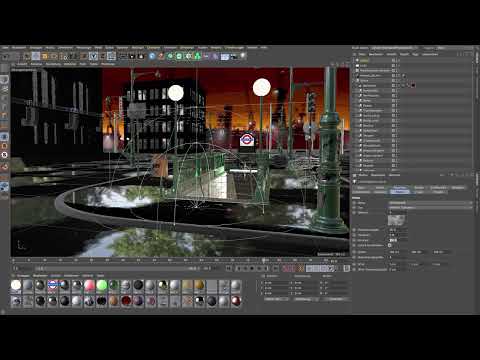
The video is only loaded from YouTube when you play it – data (including your IP address) is then transmitted to YouTube/Google. More in the privacy policy
Key Takeaways
Key Takeaways
- Glowing material makes the lamps visible, but it only actually emits light when Global Illumination (GI) is active.
- An omni light provides the actual share of the light. With inverse square falloff and a small radius of effect, the light stays in the foreground.
- Visibility creates the fog aura around the light source. With wavy turbulence, the fog looks alive instead of like white foam.
- The brightness of the visibility controls how strong the mood turns out. A value of 30% has proven effective here.
Step 1: Create a glowing material for the lamps
First, create a new material and choose a simple luminous material for it. In the Material Editor, you activate the "Luminance" channel and then drag and drop the material onto the two spherical lamps. Make sure to click the lights in the Object Manager so that the material is assigned precisely.

Step 2: Subtly adjust the color of the glowing material
A slight tint gives the light character. A yellow tone looks warm without being too heavy-handed. If you overdo the color, the lamps no longer look like light, but like ocher-colored little balls. Therefore, set only a very slight tint. At the same time, you may also color the two lamps differently, because light sources don't necessarily have to be the same color.
Step 3: Assign the material to the spheres
You'll find the spherical lamps in the "Underground" group. Drag the new material onto both spheres, either individually or together. This lays the foundation: the material makes the lamps visible and ensures they are perceived as glowing in the scene.

Step 4: Check the effect of Global Illumination
Glowing material only emits light if Global Illumination is active. Therefore, activate it in the render settings. The brighter you set the material, the stronger the emission. However, the actual light for the foreground should come from another source, namely from an omni light that moves close to the lights.

Step 5: Insert an omni light as a second light source
A standard omni light has no extent whatsoever and therefore cannot be entirely physically correct. Moreover, it doesn't fall off at all, so it shines just as brightly in the background position as in the front. But it is precisely this property that makes it ideal for targeted accents. So add two omni lights and initially create them unchanged. You'll adjust the settings in the following steps.

Step 6: Activate area shadows
For soft shadows, you choose the shadow type "Area Shadow". It is the classic among shadow types and looks more realistic than simple variants. However, expect longer render times. You leave the intensity at 100%, because you achieve the darkness through the falloff and not through the shadow.

Step 7: Set inverse square falloff
On the Details tab of the omni light, you choose inverse square falloff. It corresponds to the classic falloff that every other light source uses. The default value is 500 cm, but you need a significantly smaller radius of effect so that only the foreground is illuminated. You set the value in the Attribute Manager at the bottom right to about 65 cm. Then you move the light source close to the spheres so that you can assess the result directly.

Step 8: Activate Visibility for the Fog
So far, the light lacks visibility. On the "Visibility" page you activate it, because only then does the aura around the light source appear, which looks like fog. The visibility should not be too intense, so you set the radius to 100 cm. You leave the brightness at 100% for now and reduce it later, after you have examined the result.

Step 9: Adjust the Brightness of the Visibility
As a test, you first lower the brightness of the visibility to 55%. These values are only guidelines. What matters is how the fog looks in the overall image. With a contrast value in the visibility settings, you additionally achieve more depth. The higher the contrast, the more clearly the turbulence shows.

Step 10: Use Wavy Turbulence for Lively Fog
Without movement, the fog looks like white foam. To make it look as if wisps of cloud are drifting in it, you edit the visibility with the wavy turbulence. You have the option of increasing the contrast to make the effect of the turbulence even more visible. The lighting itself remains untouched, because this is exclusively about the visibility.

Step 11: Define the Color of the Omni Light
The omni light should look warm and rather yellow to orange, like a classic light bulb. Set the color accordingly. The result doesn't have to look exactly like a light bulb; a direction that fits the mood is enough.

Step 12: Assign the Omni Light to the Spheres
To bind the light source to the sphere, you use the assignment function via the "Apply" tool. To do this, click on the light source, then select the sphere in the "Tools" menu and drag it into the corresponding field. It is important that the light source is subsequently located inside the sphere. Simply drag the sphere in, and you're done.

Step 13: Copy and Move the Second Omni Light
For the other side you need a second omni light. To do this, switch to the top view and select the Move tool. Hold down the Control key while dragging so that a copy is created. If you drag without the Control key, you merely move the original. Drag the copy onto the opposite sphere. In a slow scene, it can help to deactivate individual groups so that your computer doesn't stall.

Step 14: Pull the Light Sources Forward
Both omni lights are still inside the spheres, where no one can see them. You pull both together a bit forward until they emerge from the sphere. Then you adjust the position slightly downward. Exactly at this spot, the bright front accent that you envisioned for the entrance area is created.

Step 15: Evaluate the Result in the Prerender
Switch to the central perspective and choose a section that shows the light sources down to the bottom edge of the image. In the prerender, the image looks a bit strange at first, but that's normal. Check whether the rear lamp is right and whether the foreground has not become too bright. The entrance area should remain a little grubby and gloomy.

Step 16: Fine-Tune the Visibility
If the fog looks too dense, you reduce the brightness of the visibility. At 65%, the effect was too strong, so you go down to 30%. This value creates the foggy atmosphere without flooding the entrance area. Note that the scene looks a bit darker overall, because more light sources will be added later with the street lamps.

Step 17: Final Check
Now you can see the entire result: The spheres glow warmly, the omni lights set targeted accents in the foreground, and around the lamps there is a fine, moving fog. That was exactly the goal of this section.

Summary ??? Cinema 4D Omni Lights for Atmospheric Entrance Lighting
You have learned how to create a luminous material for the spherical lamps, take Global Illumination into account, and use two omni lights with inverse square falloff and area shadows. With visibility enabled, wavy turbulence, and a well-balanced brightness, you get an entrance area that looks foggy, warm, and at the same time gloomy. The values from this tutorial are starting points. Adapt them to your scene and your taste.
FAQ
Why doesn't the luminous material glow without Global Illumination?Luminous material only emits light when Global Illumination is activated. Without it, the spheres remain visible but do not cast any light into the surroundings.
Why don't you use a falloff of 500 cm?The default value of 500 cm would illuminate the entire room. With 65 cm, the light stays limited to the foreground, and that is exactly what the accent is supposed to achieve.
What is the advantage of wavy turbulence?It makes the fog look as if it is moving, as if wisps of cloud were drifting within it. Without turbulence, the visibility looks more like white foam.

