

Puddles on asphalt and paving only look believable when they reflect and don't look like transparent water. In this tutorial, you recreate exactly this effect from the Cinema 4D project "Underground". You create a simple mirror material, adjust Fresnel, index of refraction, and roughness, and then apply a puddle map previously painted in Photoshop via the alpha channel. After that, you deform the surface with displacement so that potholes appear. In the end, you have puddles that lie on the sidewalk and street without visible repetitions.
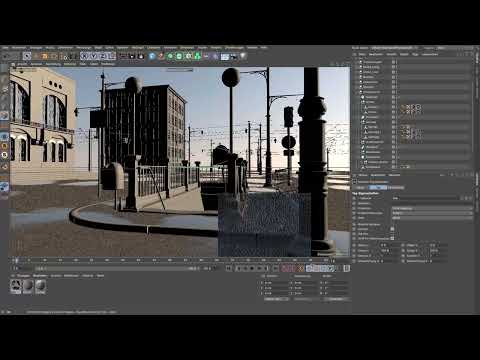
The video is only loaded from YouTube when you play it – data (including your IP address) is then transmitted to YouTube/Google. More in the privacy policy
Key Takeaways
Key Takeaways
- Water on a flat surface looks the way it does mainly because of reflection. A mirror material with a reflectance channel is therefore the right foundation, not color.
- The default specular channel should be removed in new scenes, as it conflicts with physically correct models.
- Using the Fresnel effect with the dielectric type and an index of refraction of about 1.35, the reflection gets a realistic edge gradient.
- The roughness stays low (about 1%) so that the surface remains smooth and doesn't look like frozen ice.
- The puddle map is used in the alpha channel and must be inverted so that the puddles are located where they were painted.
- Distributing several polygons with different orientations prevents visible repetitions.
- Sub-polygon displacement creates fine potholes, but requires sufficient subdivision and should be dosed carefully.
Step-by-Step Guide
Step 1: Create a New Standard Material
Begin in the Material Manager by double-clicking in the empty area to create a new standard material. Then open it with a double-click so that the material editor appears. You can disable the color completely, because water on asphalt should not look colored but should reflect the environment. Since you are looking at the puddles from a fairly flat angle, strong total reflection occurs. This is exactly why you build the effect via the reflectance channel.

Step 2: Remove the Default Specular Channel
In the reflectance channel, you will find the entry "Specular" by default. This channel comes from older versions of Cinema 4D so that old scenes continue to work. In a new scene, you should delete it so that only the physically correct models remain. To do this, click on the entry and remove it. Then you add the desired model anew.

Step 3: Select the Beckmann Reflection
For a smooth reflection with little roughness, the Beckmann distribution is well suited. It delivers a clean, clear reflection image and forms the basis for the puddles. Select it in the dropdown menu of the reflectance channel and check the preview in the viewport before continuing.

Step 4: Enable Fresnel with the Dielectric
So far, the material reflects equally strongly regardless of viewing angle. This is unrealistic, because at the edge of a water surface the reflection should be stronger than in the middle. You create this effect via the Fresnel filter. Select the dielectric for non-conductors there, which represents the properties of water well. The name sounds a little technical, but the setting is easy to understand: it controls how strongly the reflection depends on the viewing angle.

Step 5: Set the Index of Refraction of Water
In the Fresnel section, you can now set the index of refraction. For water, a value of about 1.35 is common. The default value is already close to that, so you only need to confirm it. Fine-tuning is hardly visible here, because dirty water has only a slightly different value. With that, the physical foundation of the water is largely complete.

Step 6: Dose Roughness and Specular Correctly
Roughness is set to 10% by default. This creates a matte gloss that is more reminiscent of frozen puddles or ice. Therefore, set the value to 1%. This value is barely visible, but ensures that the surface does not reflect perfectly. You can set the specular to zero, as you don't need it for water. This way, the water surface is essentially finished.

Step 7: Load the puddle map via the alpha channel
Now you assign the surface to the sidewalk and the street. To do this, load the puddle map you previously painted in Photoshop into the alpha channel. You can use the PSD file, since you can edit it later if needed. A JPG file also works, but it is less flexible. After loading, the viewport shows cut-out puddles. However, this output is inverted, so you have to invert the map. Only then will the puddles be located exactly where you want them.

Step 8: Assign the material to the sidewalk
Drag the finished material onto the front part of the sidewalk. The puddles appear immediately in the viewport. You can adjust the position and tiling in the material mapping to place the puddles elsewhere. Cube mapping is not strictly necessary in this example, since the tiling values and the position are sufficient.

Step 9: Position the puddles on the sidewalk
Move the puddles so that they look natural. Make sure they don't drift too far toward the horizon. If you push them too far back, they get cut off at the edge of the second sidewalk polygon, creating a hard, unnatural transition. Moving them toward the curb, on the other hand, is unproblematic and usually looks more believable.

Step 10: Map multiple polygons independently
The sidewalk consists of two squares that you can treat independently of each other. Apply the same map to the second polygon, but with a different rotation or offset. This creates different patterns, and repeating structures are hardly noticeable. A beer bottle in the asphalt or a dirty puddle can also be integrated into the image this way.
Step 11: Map the street
Proceed with the street in the same way as with the sidewalk. Load the puddle map onto the street polygons and adjust the rotation, size, and position. Here, too, the rule applies: each polygon should get its own arrangement. Reduce the size of the puddles if necessary so that the surface doesn't look like an underwater landscape.

Step 12: Render the result and check the Global Illumination
When rendering in the region preview, you notice that the reflection of the sky and surroundings is the most important thing. Without a suitable reflection, the puddle doesn't look convincing even with a good map. Global Illumination can further improve the lighting conditions, but in this example it is deliberately left disabled, since it slows down the image significantly and isn't strictly necessary. Make sure the light doesn't come only from the front, because otherwise the reflections look flat.

Step 13: Adjust the moisture areas in Photoshop
If the puddle shows too much edge in proportion, this is often due to the curve of the map. Open the PSD file in Photoshop via "Edit Image". Pull the curve down significantly so that the gray area representing the moisture becomes smaller and the actual puddle area becomes larger. Then save the file and reload the image in Cinema 4D so that the change takes effect.

Step 14: Check the changes in Cinema 4D
After reloading, you can see whether the puddle has become larger and the moisture area has shrunk. Render the region again and check the result. Only when the proportions are right do you move on to the next refinement.

Step 15: Bring the surface to life with a bump channel
The reflection is still a bit too smooth. To make the water surface look slightly in motion, you can add a bump channel. To do this, select, for example, Turbulence in the dropdown menu. Set the strength to about 1%, because a higher value quickly looks unrealistic. The surface then appears slightly rippled, which significantly enhances the impression of real water.

Step 16: Creating Potholes with Displacement
To place the puddles in potholes, activate the Displacement channel. Load the same texture of the puddle map there. The default strength is usually too high, so you then reduce it. It is important that you subdivide the object beforehand, because Displacement requires sufficient subdivision of the polygons.

Step 17: Activating Sub-Polygon Displacement
Turn on Sub-Polygon Displacement. It is best to use the same subdivision level as for the asphalt. At level 6, each polygon is subdivided very finely, and a very large number of polygons is quickly created. This is ideal for fine details, but noticeably increases render time. So be careful with the strength.

Step 18: Fine-Tuning the Displacement Strength
Reduce the strength to about 20% and set the value to around 2 cm. This looks more natural than the default setting and creates fine edges, as can be observed in real potholes. Don't overdo it, otherwise the holes quickly look like a field of craters.

Step 19: Checking the Final Result in the Foreground
View the result in a close-up. The fine edges around the puddle and the slight depressions show the effect very well. Such small details make the difference between a pasted-on texture and a believable surface. Remember that you can adjust the map, rotation, and position independently for each of the four polygons.

Summary ??? Puddles in Cinema 4D: Realistic Mirror Material with Alpha Map
With a simple mirror material, the Fresnel effect of the dielectric, and an inverted puddle map in the alpha channel, you create convincing puddles in Cinema 4D. The roughness stays low so that the surface looks smooth. By mapping several polygons independently, you avoid repetition. With displacement and a fine subdivision, believable potholes are also created. The results can be readjusted at any time via Photoshop and the material settings.
FAQ
Why should I delete the default specular channel?The specular channel comes from older Cinema 4D versions and does not fit physically correct models. In new scenes, you should therefore remove it.
Which refractive index is suitable for water?For water, a value of about 1.35 is close to realistic. The default value in Cinema 4D is already similar and is sufficient for most scenes.
Why is the puddle map inverted?The map contains cut-out areas for the puddles. By inverting it, the puddles lie exactly where they were painted.
Can I use the PSD file or a JPG file?Both work. However, the PSD file is more flexible because you can adjust the edges and curves later in Photoshop.
Why should the roughness be only 1%?At higher values, the surface looks matte, almost like frozen ice. A value of 1% preserves the reflection and still looks natural.
How do I avoid repeating patterns?Use a separate rotation, offset, or tiling of the map for each polygon. This creates different arrangements of the puddles.
Why shouldn't I push puddles too far toward the horizon?There they get cut off at the polygon edges, creating a hard transition that looks unnatural.
What is Sub-Polygon Displacement needed for?It creates fine deformations of the surface, such as potholes. However, the object needs sufficient subdivision for this.
Why is Global Illumination disabled in this example?Global Illumination significantly increases render time. It is helpful, but not strictly necessary for this example.

