

A sticker or a tag only looks convincing on an object when it sits in exactly the right place. For the post in this project, it should appear on the surface that is clearly visible. There are several ways to do this in Cinema 4D. This guide shows you the classic way using material channels and mapping, without you having to get to grips with Bodypaint. At the end, you will have a tag that is visible on only a single surface of the object and can be positioned exactly.
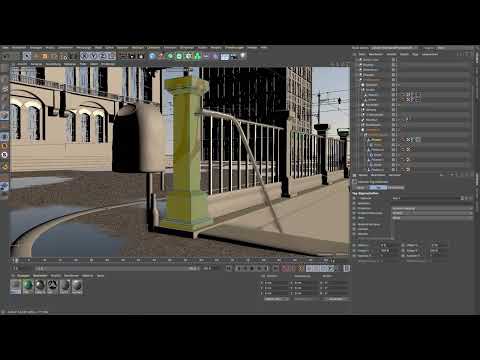
The video is only loaded from YouTube when you play it – data (including your IP address) is then transmitted to YouTube/Google. More in the privacy policy
Key Takeaways
The Cube mapping type allows you to set the size and position of a tag directly in the Attribute Manager. You should first bring the tag to the target location and only then scale it down, otherwise you will lose your orientation. With tiling turned off, the tag does not repeat, and with a frozen polygon selection you limit it to exactly the desired surface.
Starting Point and Choice of Method
You want to map a tag onto a green paint or onto a post that consists of several surfaces. Basically, there are two ways. The first goes through Bodypaint, which is designed specifically for texturing. There you unwrap the object via UV Edit and apply the tag piece by piece. This works well, but requires knowledge of Bodypaint. The second way works with the classic Cinema 4D methods. It takes a bit more time, but is more accessible for beginners. This guide follows the second way.

Creating a New Material
First you need a separate material for this surface. You could duplicate the existing paint material, remove the green color channel, and load in the tag. However, the result would have the same reflection as the paint. A sticker or a spray paint, though, reflects differently. Therefore, create a new material.

For stickers and tags, a normal material is completely sufficient. A physically correct material takes significantly longer to render, and the difference in reflection is hardly noticeable on such a small surface. A normal material is therefore the better choice if you want to save render time.

Loading the Tag into the Color Channel
Open the color channel of the new material and click on the image to load the file. Use the grunge map that has already been cut out for this. It already contains the transparency of the sticker. So you don't have to cut anything out anymore.

Make sure that the cutout via a layer mask is correct. A layer mask can also be applied. Check in the preview whether the tag appears white and the background transparent. If it is the other way around, invert the mask.

Finding the Object and Assigning the Material
The post sits inside a Symmetry object. It ensures that all posts look the same. You will find the object in the Object Manager when you search the hierarchy for the entry Pfosten. If you turn the Symmetry object on or off, you will see that it is responsible for the mirroring.

Drag and drop the material onto the post. This initially projects the tag onto the object. However, it is probably not yet visible, because the default UVW projection does not fit.

Switching the Mapping Type to Cube
Open the mapping settings of the material and select Cube as the projection. Now the tag lies as a cube over the entire object. You can clearly see it large in the view.

The typical mistake is to shrink this large tag immediately. Then you have to search for the right spot for a long time afterwards. It is better to find the position first and only then adjust the size.

Turn off tiling
By default, the tag repeats in space. This is not desired for a sticker. Therefore, deactivate the Tiling option. The tag is now mapped only once and no longer repeated. You keep this setting for the rest of the work.

Set the position with the offset
With the offset (Offset) you move the tag. First move the value in the vertical direction until the sticker ends up at the top of the post. Keep an eye on where it currently sits. If it drifts out of the object, you bring it back with a small correction using the offset.

Once the tag sits at the top, you can shrink it. To do this, change the size values in the Attribute Manager. The tag may move out of the picture in the process. That is normal. Then adjust the offset again until the tag appears in the right place again.

When the sticker fits at the top, you move it down step by step until it lies on the desired surface. You can also align it in the circumferential direction using the horizontal offset.
The size also changes when tiling is turned off. The tag is then simply displayed only once, but you can determine its size freely. Work your way step by step toward the right extent using size, width and height. A little narrower or flatter can make the difference.
When the tag sits perfectly, you have completed the mapping. The only problem is that the tag currently appears on all surfaces of the cube. This is the case with this object because it consists of several individual surfaces.

Limit the tag to a single surface
To prevent this, you switch to Edit Polygons mode. There, select the surface on which the tag should be visible. You can use the Live Selection tool for this. Use it to mark the desired surface.

Afterwards, you save the selection as a frozen selection. The selection can now be used as a mask. Drag it onto the material. The tag then disappears everywhere else on the object.

Then click anywhere in the image to deselect the selection. The tag now lies exactly on the surface you chose. At the edges it still looks a bit untidy. This is because it has not been edged yet. This finishing touch comes later.

Apply the procedure to other tags
The technique works not just for this one sticker. You can use it for all tags and grunge maps that you want to use in materials. To do so, repeat the steps: create a material, load an image, choose box mapping, turn off tiling, set the position, and limit the surface via a frozen selection.

Summary ??? Cinema 4D: Mapping a tag with box mapping on the post
You place a tag with box mapping exactly at the desired spot on an object. First you bring the tag to the right position, and only then do you adjust its size. With tiling turned off, the tag appears only once. A frozen polygon selection ensures that it becomes visible exclusively on the desired surface.
FAQ
Do I need Bodypaint to map a tag?No, you can use the classic Cinema 4D methods. Bodypaint is an alternative that requires prior knowledge.
Why should I use a normal material instead of a physically correct material?A normal material renders significantly faster. With a small sticker, the difference in reflection is hardly noticeable.
Why do I have to turn off tiling?With tiling turned on, the tag repeats across the entire surface. When turned off, it appears only once at the desired spot.
Can I also change the size of the tag when tiling is turned off?Yes, the size can be changed even then. The tag is then displayed only once.
What happens if the tag moves out of the object after shrinking?You correct the position via the offset. Pay attention to which direction the tag needs to be moved.
Why does the tag appear on several surfaces of a cube?The object consists of several individual surfaces, and each of them shows the material. With a frozen polygon selection, you limit the material to one surface.
How do I create a frozen selection?Switch to Edit Polygons mode, select the surface with Live Selection, and save it as a frozen selection. You then drag this onto the material.
What does the edge of the tag look like after mapping?The edges look untidy at first because the tag has not been edged yet. Edging is done in a later step.

