

Imagine you have downloaded a ready-made Substance and want to use it in your scene. In the Material Manager it looks usable at first glance, but on the object it quickly seems too coarse, too bright or too flat. This is exactly the problem the following tutorial addresses, using the example of a granite curbstone lying in a scene titled "Underground". You will learn how to load the Substance via the Asset Manager and which settings you need to adjust so that the material fits your geometry.
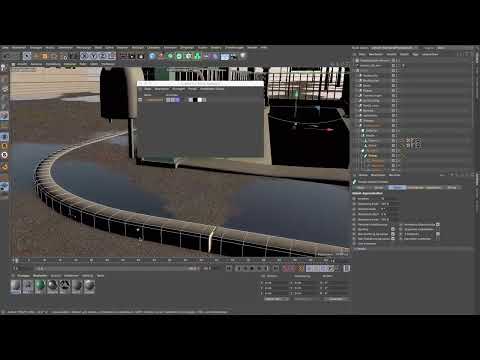
The video is only loaded from YouTube when you play it – data (including your IP address) is then transmitted to YouTube/Google. More in the privacy policy
Key Takeaways
- The clearest way to load Substances is via the Substance Engine's Asset Manager, not directly via the load command.
- The default resolution of 256 pixels is too low. Set it to 2048, which is sufficient for most scenes.
- The texture must match the mapping of your geometry. For the curbstone, you have to adjust the length instead of the circumference.
- The Displacement channel needs a finer subdivision of the geometry so that the deformation becomes visible, and a lower strength so that it doesn't get out of hand.
- The Bevel deformer is not strictly necessary, because you can easily round off the edges via the Displacement channel.
- The top faces of an object need their own material, otherwise they look unnaturally bright.
Step 1: Load the Substance via the Asset Manager
Before you can adjust anything, the Substance has to get into your scene. In Cinema 4D, open the Extensions menu and select the Substance Engine there. You could load the Substance directly here, but the Asset Manager is recommended because it lets you keep track at all times of which Substances are used in your scene. You also open the Asset Manager via the Substance Engine. Then, via File and Load Substance, navigate to the folder in which you saved the downloaded material.
The folder usually has the same name as the material. In it you will usually find two files. The relevant one is the file with the extension .sbsar, which is the Substance archive. Select it and open it. The material then appears in the Asset Manager, and at the same time it lands in Cinema 4D's Material Manager. There you can already see how many channels the Substance occupies. With this granite Substance there are quite a lot, which suggests a detailed material.

Step 2: Open and check the material in the Material Manager
Double-click the newly loaded material in the Material Manager to open its settings. At first glance it looks like a standard Cinema 4D material. That is deceptive, however: the Substance occupies not only the Reflectance channel to create a physically correct material, but also the Color channel. Click the Color channel and you will see the Substance shader and the associated asset. Through it you can address the material and change its appearance.

Step 3: Adjust the basic settings of the Substance
In the Substance shader you will find the parameters with which you can change the look of the material. These include the color choice, the contrast and the brightness. Another important slider concerns the Ambient Occlusion, that is, the distribution of shading in recesses and corners. It is worth experimenting a little here until the granite looks the way you imagine it. For a gray curbstone, moderate brightness values and a somewhat higher contrast are usually suitable so that the structure remains clearly recognizable.

Step 4: Increase the texture resolution
One thing you absolutely have to change is the resolution. The Substance arrives with 256 pixels by default, which is too little for small details seen from a great distance. Set the resolution to the highest sensible value, that is, 2048. Although Cinema 4D offers the option in the preferences to go up to 8K, that is unnecessary for most scenes and puts a heavy load on the computer. A 2K resolution is perfectly sufficient for most applications. In a test image with an edge length of just under 7,000 pixels, the result still looked razor-sharp.

Step 5: Check the Displacement channel
The Displacement channel deforms the surface based on the Substance data. By default it is preset to 100 percent and a maximum height of 10 centimeters. These values are generally too strong for a curbstone, so you should initially treat them as a starting point and adjust them later. To do that, you first have to prepare the geometry, which is explained in the next step.

Step 6: Prepare the curb geometry
The curb in your scene is built using a Sweep. For the displacement to work cleanly later, the object needs a very regular subdivision along its path. This subdivision is mandatory, otherwise the Substance will not show a uniform structure. Simply drag the material onto the Sweep, and you will immediately see how the granite structure is distributed evenly all the way around the object. The texture also follows the shape in the curve, but the mapping still needs to be adjusted for that.

Step 7: Adjust the UVW mapping to the length
With the curb, the texture is laid once around the profile and additionally along the length of the entire object. This means you have to assign the direction in the UVW mapping correctly. In this case, the length is the direction that should repeat, not the circumference. Therefore, increase the tile value in this direction. A value of 20 already improves the image significantly, but the stone still looks a bit too stretched lengthwise. With a value of around 42, a structure finally emerges that resembles real granite.
If you want to be more precise, you can measure the circumference and the length of the curb and calculate the ratio. This gives you exact values. For most scenes, however, simply looking at the result is enough.

Step 8: Set the displacement subdivision and strength
For the displacement to be visible at all, the geometry must be subdivided finely enough. To do this, activate the Subpolygon Displacement option in the Displacement channel. A subdivision level of 4 or 5 is sufficient in most cases. Test the setting with a render, because the first attempt often looks too strong. In this example, the surface deformed too much in all directions, so that the stone no longer looked like a curb.
The solution is to reduce the strength. A value of around 20 percent, i.e. one fifth of the default strength, is a rule of thumb you can use frequently. The result then looks much more realistic. Alternatively, you can also adjust the strength in the Normal channel to influence the effect of the texture.

Step 9: Round the edges via the Displacement channel
The upper and lower edges of the curb still look very sharp after the displacement. Here you can activate the Round Geometry option in the Displacement channel. It flattens the edges slightly so that the stone looks more natural. In many cases this is enough, and you do not need to adjust the Bevel deformer you originally used any further. The result is not a perfect circle, but a shape that follows the granite structure, and that is exactly how a curb should look.

Step 10: Activate Ambient Occlusion
So far the curb still looks flat, especially in the middle where the surfaces are too bright. Ambient Occlusion provides a remedy. You will find it in the Effects menu if it is not yet activated. It creates soft, deep shadows in recesses and at transitions, which makes the stone appear more three-dimensional. Make sure to choose the settings so that dark areas do not become unnaturally black.

Step 11: Apply the same material to the end faces
The end faces of the curb, i.e. the cap surfaces, are determined by the Cloner, which in the example is a cube. This cube needs the same material, otherwise the surfaces remain too bright. Apply the Substance to the cube, and the surface will adapt. The texture looks somewhat finer there because the cube is comparatively small. You can correct this with adjusted tile values, but for such a small detail the default setting is usually good enough.

Step 12: Check the result from a distance
Finally, you should render the result from some distance, because that is the only way to judge the effect. From this perspective it becomes visible whether the sidewalk is too dominant or the curb looks coherent. In the example, the asphalt between the stones was hardly noticeable, and the shadows in the gap fit well. If you do not like the gap between the two parts of the curb, you can make the cube wider or narrower at any time. The Substance is retained in the process, so you do not have to set it up again.

Summary ??? Applying Substance in Cinema 4D: Setting Up a Granite Curbstone Correctly
It is best to load a Substance in Cinema 4D via the Asset Manager so that you keep track of all the materials in your scene. After loading, you shouldn't simply accept the material as it is, but adapt it to your scene. This includes increasing the resolution to 2048, correcting the UVW mapping in the direction of the length, a finer subdivision with Subpolygon Displacement enabled, and a reduced Displacement strength. Rounding the edges via the Displacement channel and Ambient Occlusion also help. Don't forget to apply the material to the top surfaces as well. With these steps, a generic material becomes a believable granite curbstone.
FAQ
Do I always have to load the Substance via the Asset Manager?No, you can also load the Substance directly. However, the Asset Manager helps you keep track of all the Substances used in your scene.
Which resolution should I choose?For most scenes, a resolution of 2048 pixels is sufficient. The 8K setting is possible, but puts significantly more strain on the computer.
Why does my curbstone look too deformed after the Displacement?The default strength of 100 percent is usually too high for curbstones. A value of around 20 percent usually delivers a more realistic result.
When do I need Subpolygon Displacement?You need it so that the Displacement is visible on the geometry at all. A subdivision level of 4 or 5 is usually sufficient.
Do I have to use the Bevel Deformer?No, in this example the Round Geometry option in the Displacement channel was enough to flatten the edges.
Why are the top surfaces of my object too bright?The top surfaces are often determined by other geometry, for example a Cloner or a cube. You must assign the same material there as well.
Can I change the width of the curbstone afterwards?Yes, you can make the cube that forms the top surfaces wider or narrower at any time. The Substance is preserved in the process.

