

Imagine your scene is set up, the geometry is in place, and yet the road looks like a gray surface with no character. This is exactly where this tutorial comes in. You will learn how to create convincing asphalt with a simple trick and a photograph, before you even get into the elaborate materials.
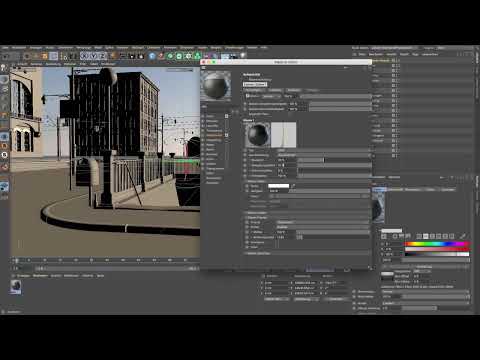
The video is only loaded from YouTube when you play it – data (including your IP address) is then transmitted to YouTube/Google. More in the privacy policy
Key Takeaways
Auxiliary lighting makes materials assessable. A physical sky with a low-hanging sun shows you early on how textures look under realistic light.
Frontal mapping projects the photograph from the camera's view. This keeps the photo's perspective consistent with your scene camera, as long as you don't move the camera significantly.
Specular highlight and reflectivity should be very low for asphalt. A reflection of 100% immediately looks unrealistic. Good results usually come from a few percent and a high roughness.
Brightness and gamma are not the same thing. If you increase the brightness, you lose contrast. Gamma, on the other hand, brightens the midtones without washing out the shadows.
Step 1: Set up auxiliary lighting with a physical sky
Before you can assess materials, you need light. Asphalt without lighting says little about how it will look. Therefore, create a physical sky via the Create menu. It is unspecific at first, but can easily be adapted to your vision. The auxiliary lighting is not the final light, but a tool for checking your textures in context.

Step 2: Set the time of day in the Sky Manager
Open the Sky Manager by double-clicking the sky. Under Time and Position, you can specify the lighting situation precisely. A time of around 5 p.m. produces a warm, yellowish coloring of the sun, which is already low above the horizon. This fits well with the later night and artificial light situation and does not need to be refined further at this stage.

Step 3: Adjust the light direction using the Rotate tool
You control the sun position via the rotation of the sky object. To do this, switch to Object mode and use the Rotate tool. Light coming in slightly from the right side models the surfaces nicely and gives the scene more depth. You don't need to be perfect here. What matters is that you achieve a believable mood.

Step 4: Create a new material and load the asphalt photo in the color channel
Create a new material via the Material menu and open it by double-clicking. The simpler way, and the one recommended for getting started, is through the color channel. You could also use the photo in the reflectivity channel, but for many projects simple materials are perfectly sufficient.
In the color channel, load the asphalt image from the project folder that you receive with this lesson. You will find the same image in the Asphalt folder, which is also provided.


Step 5: Configure reflectivity via GGX and Fresnel
Asphalt is very rough, so the reflectivity should be rather low. Remove the default specular, since it plays hardly any role for asphalt. Because the shallow viewing angle at the horizon still produces slight reflections, you add a GGX reflectivity. It is particularly well suited to rough surfaces.
Next, you define a Fresnel type, specifically a dielectric, because asphalt hardly conducts electricity. The default Fresnel with a refractive index of 1.35 is a classic. For asphalt, choose the Asphalt preset. It is at 1.6 and thus delivers a slightly stronger specular highlight than water or ice, which makes sense for polished material. For rough asphalt, however, this value has only a subtle effect.


Step 6: Fine-tune specular highlight, roughness, and reflection strength
Set the specular strength to 0%, because specular highlight is not a physically exact quantity, but a curve setting that is applied to every material. You should, however, increase the roughness significantly, for example to 30 to 35%. This creates the grain that makes up asphalt.
At 100%, the reflection strength quickly looks unnatural in the material preview. Instead, go to about 10% and then check the result in the rendering.


Step 7: Add relief via the color channel
So that the surface doesn't look flat, you can additionally load the asphalt image into the bump channel. The strength is initially at 20%. You should keep this value or only increase it carefully, because too strong a relief emphasizes the grain far too much, and the asphalt quickly looks artificial. Keep an eye on this control, as it can be readjusted at any time later.

Step 8: Project the material onto the geometry and correct the mapping
Apply the material as a test to the front part of the sidewalk. For this, you use the finished group with the street and sidewalk from your scene. The projection initially appears over the entire area, i.e. including the meadow and sky. This is not the desired result.
Therefore, switch the projection from UVW mapping to frontal mapping. This projects the photo from the camera's point of view, and the tiles stay at 1 in both directions. The photo was taken from exactly this perspective, so the projection fits well.


Step 9: Choose the camera position for consistent frontal mapping
Frontal mapping only works as long as the camera matches the original perspective of the photo. If you move the camera significantly, the texture does not distort along with it, but stays aligned frontally to the scene camera. Therefore, make sure your camera takes roughly the position of the original shot. In this example, the camera was set to a 30 mm focal length, while the normal focal length is 36 mm. Otherwise, nothing was changed.

Step 10: Test render and reduce reflections
Render a section without ambient occlusion using the standard renderer. You will notice that the texture itself is convincing, but the reflections are still too strong. The sky and the dark silhouette of a post are clearly reflected. Therefore, reduce the reflection strength once more, for example to 3%. This keeps a slight reflection in the horizon area without making the surface shine unnaturally.

Step 11: Correct brightness and contrast with the Layer shader
If the texture is too dark for you, use a Layer shader in the color channel. It does not change the mapping, but offers you controls for brightness, contrast, and gamma. Use the gamma for brightening and not the brightness. The brightness does lighten the image, but takes away its contrast. The gamma can be increased in small steps. A value of about 1.6 to 1.7 with slightly increased contrast often works well.
In the example, a gamma of 1.4 already led to a clear brightening. Since this value can quickly look too bright in a different lighting situation, you should check every change in the rendering.


Summary ??? Texturing asphalt in Cinema 4D with frontal mapping
You have seen that an asphalt surface can look convincing with a simple photograph, clean lighting, and careful material settings. First you set up auxiliary lighting via the physical sky, then you set up the material with GGX, Fresnel, and low reflection. Frontal mapping and a suitable camera position ensure the correct projection, while the Layer shader and gamma fine-tune the brightness. The surface is not finished yet, but it is a good foundation for further work with dirt and details.
FAQ
Why should I set up auxiliary lighting first?Without light, it is hard to judge how realistic a material looks. A physical sky provides an early image mood against which you can measure textures.
Do I absolutely have to use the color channel?No, you can also load the photo in the reflectance channel. For getting started, however, the color channel is the easier way and is sufficient for many projects.
Why is the specular strength for asphalt set to 0%?Specular highlight is not a physically correct quantity, but a curve that is applied to every material. With rough asphalt, additional shine is not necessary.
What roughness makes sense for asphalt?A value of about 30 to 35% creates the typical grain. Higher values increase scattering further and often look very matte.
Why do I reduce the reflection strength so much?At 100%, asphalt quickly looks like lacquer. Values around 3 to 10% provide a believable, slightly reflective surface.
What happens if I move the camera significantly?With frontal mapping, the texture stays aligned frontally to the scene camera. From other viewing angles, it therefore no longer looks correct in terms of perspective.
Why should I change the gamma instead of the brightness?The brightness lightens the image but reduces the contrast. The gamma raises the midtones and preserves the structure of the asphalt.

